Tag: muscle building

  • Dumbbell Training: The Complete Guide for Adults

    Dumbbell Training: The Complete Guide for Adults

    Dumbbell Training: The Complete Guide for Adults

    You don't need a packed gym, a dozen machines, or a personal trainer on speed dial — a pair of dumbbells and the right plan can transform the way your body looks, moves, and feels.

    Walk into any gym across America and you'll see the same pattern: the fancy cable machines sit empty half the time, while the dumbbell rack is almost always busy. There's a reason for that. Dumbbells are arguably the most versatile, accessible, and effective training tools ever created — and the science backs that up.

    Whether you're training at home with a single pair of adjustable dumbbells or working your way through a full rack at the gym, dumbbell training delivers real, measurable results for adults across every fitness level. From building lean muscle and improving joint stability to supporting bone density and metabolic health, the benefits go far beyond what most people expect.

    In this complete guide, you'll learn exactly how dumbbell training works, how to structure your workouts for your specific goals, which mistakes to avoid, and what realistic progress actually looks like. Whether you're just getting started or looking to sharpen your existing routine, this guide meets you where you are.

    Why Dumbbell Training Matters More Than You Think

    Most adults significantly underestimate how powerful a structured dumbbell routine can be. It's easy to assume that "real" training requires barbells, machines, or expensive equipment. That assumption leaves a lot of gains — and health benefits — on the table.

    The American College of Sports Medicine (ACSM) recommends that adults engage in resistance training at least two to three days per week, targeting all major muscle groups. Dumbbells can meet that recommendation completely, and in many cases, they offer advantages over fixed machines because they require your stabilizing muscles to work simultaneously with your primary movers.

    A study published in the Journal of Strength and Conditioning Research found that unilateral dumbbell exercises — movements performed one side at a time — activate significantly more core musculature than bilateral barbell exercises at comparable loads. That means you're not just working your arms or legs; you're training your entire kinetic chain with every rep.

    For adults aged 35 and older, this becomes especially relevant. The NIH reports that adults begin losing muscle mass at a rate of 3 to 5 percent per decade after age 30 — a condition called sarcopenia. Resistance training, including consistent dumbbell work, is one of the most evidence-supported interventions for slowing and even partially reversing that process.

    Beyond muscle, dumbbell training supports joint health, improves posture, increases bone density, and contributes to better insulin sensitivity. These aren't minor perks — they're pillars of long-term health and independence.

    How Dumbbell Training Actually Works

    Here's a myth worth busting upfront: lifting heavier always means better results. That's not how muscle adaptation works — and believing it leads to poor form, overuse injuries, and frustrating plateaus.

    Muscle growth (hypertrophy) and strength gains happen through a process called mechanical tension combined with metabolic stress. When you challenge a muscle with resistance — whether that's 10 pounds or 50 — micro-tears occur in the muscle fibers. During recovery, those fibers rebuild slightly thicker and stronger. Over time, consistent progressive overload leads to visible, functional changes in your physique and performance.

    What makes dumbbells uniquely effective is their demand for bilateral symmetry and joint stabilization. Unlike a barbell, where your dominant side can compensate for your weaker side, dumbbells force each limb to pull its own weight — literally. This reduces muscular imbalances over time and supports healthier movement patterns in everyday life.

    Research published in the European Journal of Applied Physiology confirmed that unilateral resistance training significantly improves neuromuscular coordination, which translates to better balance, injury prevention, and functional strength. This is particularly valuable for adults who want their gym work to carry over into real life — carrying groceries, playing with kids, or staying active into their 60s and beyond.

    The range of motion available with dumbbells also tends to be greater than with barbells. On a dumbbell chest press, for example, you can lower the weights further and achieve a deeper stretch at the bottom — a factor associated with greater muscle fiber recruitment according to research in the Journal of Strength and Conditioning Research.

    How to Get Started: Practical Steps by Level

    One of the best things about dumbbell training is its low barrier to entry. You don't need a gym membership or a full set of weights. Here's how to approach it based on where you are right now.

    Beginner (0-6 months of consistent training)

    • Start with two to three full-body sessions per week, separated by at least one rest day
    • Choose a weight where the last two reps of each set feel challenging but your form stays clean
    • Prioritize compound movements: goblet squat, dumbbell Romanian deadlift, bent-over row, overhead press, and chest-supported row
    • Aim for 3 sets of 10-12 reps per exercise
    • Rest 60-90 seconds between sets
    • Focus on learning the movement patterns before chasing heavier weights

    Intermediate (6 months to 2 years of consistent training)

    • Transition to a 4-day upper/lower or push/pull/legs split
    • Incorporate progressive overload: add reps or weight every 1-2 weeks
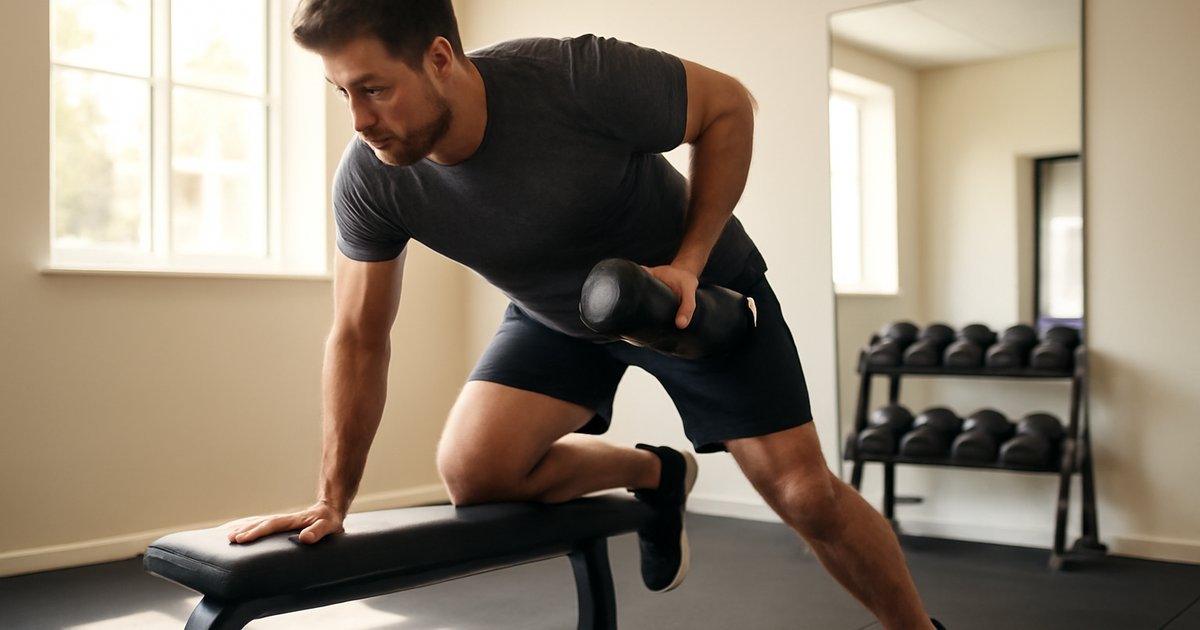
    • Include unilateral work: single-leg Romanian deadlifts, single-arm rows, alternating dumbbell lunges
    • Experiment with tempo manipulation — slow the eccentric (lowering) phase to 3-4 seconds for added stimulus. For more on this, see Tempo Training: The Secret to Smarter Muscle Growth
    • Aim for 4 sets of 8-12 reps on compound movements, with isolation work at 12-15 reps

    Advanced (2+ years of structured training)

    • Use periodization: cycle between strength-focused blocks (5-8 reps, heavier loads) and hypertrophy blocks (10-15 reps, moderate loads)
    • Incorporate supersets and drop sets for metabolic intensity
    • Pair dumbbell work with bodyweight movements or resistance bands for versatile programming. Check out Resistance Band Training: Build Strength Anywhere for complementary ideas
    • Track volume (sets × reps × weight) week over week to ensure continued progression

    Common Mistakes That Sabotage Results

    Even motivated, consistent lifters can unknowingly undermine their progress. Here are the mistakes that show up most often — and exactly how to course-correct.

    1. Using the same weight for every exercise and every session
    This is the most widespread error in dumbbell training. Your muscles adapt quickly to a fixed stimulus. If you've been using the same 15-pound dumbbells for three months, you're maintaining — not growing. The fix: apply progressive overload. Add 2.5 to 5 pounds once you can complete all your reps with clean form for two consecutive sessions.

    2. Skipping the eccentric phase
    Many people focus entirely on lifting the weight and just let gravity drop it back down. The lowering phase — called the eccentric — is where a significant portion of muscle-building stimulus occurs. Slow it down intentionally. Two to three seconds on the way down makes a meaningful difference in muscle recruitment and long-term results.

    3. Neglecting the full range of motion
    Shortening your range of motion to lift heavier weights is a trade-off that rarely pays off. Research from the Journal of Strength and Conditioning Research consistently supports that training through a full, pain-free range of motion produces greater hypertrophy and functional strength than partial reps at higher loads. Use a weight you can actually control.

    4. No structured plan — just "winging it"
    Randomly picking exercises each session feels productive in the moment but leads to imbalanced development and stalled progress over time. Even a simple plan — push movements on Monday, pull movements on Wednesday, legs and core on Friday — creates enough structure to drive consistent adaptation.

    5. Undervaluing recovery
    Muscles don't grow during training — they grow during rest. Harvard Health Publishing emphasizes that training the same muscle group without adequate recovery (typically 48 hours minimum) leads to diminishing returns and increased injury risk. Build rest days into your schedule, not as an afterthought, but as a core part of the program.

    What to Eat to Support Your Dumbbell Training

    Training is the stimulus — nutrition is what makes the results stick. Without the right fuel, even the best dumbbell program will underdeliver.

    Protein is non-negotiable. The Academy of Nutrition and Dietetics recommends that adults engaged in regular resistance training consume 1.2 to 2.0 grams of protein per kilogram of body weight per day. For a 170-pound adult, that works out to roughly 95 to 155 grams of protein daily. Prioritize lean sources: chicken breast, eggs, Greek yogurt, cottage cheese, canned salmon, lentils, and tofu.

    Carbohydrates fuel your sessions. Despite the cultural backlash against carbs, they remain the body's preferred energy source for moderate-to-high-intensity exercise. The USDA Dietary Guidelines support including complex carbohydrates — oats, brown rice, sweet potatoes, quinoa, and whole grain bread — as key components of an active adult's diet. Aim to consume a carbohydrate-containing meal or snack 1-2 hours before training.

    Don't skip healthy fats. Dietary fats support hormone production, including testosterone and growth hormone — both of which play a direct role in muscle repair and adaptation. Include avocados, olive oil, nuts, seeds, and fatty fish like salmon regularly. The American Heart Association recommends that fats make up 20 to 35 percent of total daily calories, with an emphasis on unsaturated sources.

    Hydration matters more than most people realize. Even mild dehydration — as little as 1-2 percent of body weight — has been shown to reduce strength output and exercise performance, according to research cited by the ACSM. Aim for at least half your body weight in ounces of water per day, and add an additional 16-24 ounces for every hour of active training.

    Post-workout nutrition: A meal or shake containing 20-40 grams of protein and a moderate amount of carbohydrates within 1-2 hours of training supports muscle protein synthesis and glycogen replenishment. This window matters more for beginners and is slightly more flexible for experienced trainees, but consistency here pays dividends.

    How Long Until You See Results — and What to Track

    This is where honest expectations matter most. The fitness industry is full of unrealistic promises, and believing them sets you up for unnecessary frustration.

    Here's a realistic timeline based on research and clinical consensus:

    • Weeks 1-3: Neural adaptation dominates. You'll likely feel stronger and more coordinated without major visible muscle changes. This is completely normal and expected.
    • Weeks 4-8: Visible muscle tone begins to emerge, particularly with consistent training and adequate protein intake. Energy levels and posture often improve noticeably during this phase.
    • Months 3-6: Significant strength gains, measurable changes in body composition, and improved performance across exercises. This is when most people start getting consistent positive feedback.
    • 6+ months: Cumulative adaptations become pronounced. Lean muscle mass increases, resting metabolism improves, and functional movement quality advances substantially.

    Results vary significantly based on training consistency, sleep quality, nutrition, age, hormonal health, and starting fitness level. If you're not seeing the progress you expect after 8-10 weeks of consistent effort, it's worth reassessing your nutrition, sleep, or training volume before assuming the program isn't working.

    What to track: Body measurements (chest, waist, hips, arms), the weights you're lifting week over week, how many reps you can complete with a given weight, progress photos every 4 weeks, and how you feel — energy, sleep quality, and mood are all meaningful indicators of progress.

    If you experience persistent joint pain, unusual fatigue, or plateau for more than 4-6 weeks despite consistent effort, consult a certified personal trainer or sports medicine physician for individualized guidance.

    Frequently Asked Questions

    Can I build serious muscle with just dumbbells?
    Absolutely. Many accomplished physiques have been built with dumbbells alone. The key is progressive overload — consistently increasing the demand on your muscles over time. If you have access to a range of dumbbell weights (or adjustable dumbbells), you can create the stimulus needed for significant hypertrophy. The limiting factor is usually not the equipment — it's the programming and consistency.

    How heavy should my dumbbells be?
    This depends entirely on the exercise and your current strength level. A general rule: choose a weight where the last 2-3 reps of each set feel genuinely challenging but you could technically complete 1-2 more with good form (this is called leaving reps in reserve). For most adults starting out, a range of 5-pound to 30-pound dumbbells covers the majority of exercises well.

    Is dumbbell training enough for weight loss?
    It's a meaningful part of the equation, but it works best alongside a nutritional strategy and adequate daily movement. Resistance training preserves lean muscle during a calorie deficit, which supports a healthier body composition over time. For complementary cardio ideas, explore Stair Climbing Workout: The Underrated Cardio That Delivers.

    How often should I train with dumbbells?
    For most adults, 3 to 4 sessions per week is the sweet spot — enough frequency to drive adaptation without accumulating excessive fatigue. Beginners often do well with 3 full-body sessions per week. More experienced trainees may prefer 4 days using an upper/lower or push/pull split.

    Do I need to warm up before dumbbell training?
    Yes — always. A 5-10 minute warm-up that includes light cardio and dynamic movements (leg swings, arm circles, hip hinges) prepares your joints, increases blood flow to working muscles, and reduces injury risk. The ACSM recommends warming up before every resistance training session, regardless of experience level.

    Your Starting Point Is Valid — Now Build From It

    Dumbbell training doesn't ask you to be anywhere other than where you are. It meets beginners with simplicity and rewards experienced lifters with depth. It works in a 10×10 home gym and in a commercial fitness facility. It supports fat loss, muscle building, bone health, joint stability, and functional longevity — all from a tool that fits in the corner of a room.

    The research is clear, the barrier to entry is low, and the upside is significant. Start with two to three sessions this week. Pick five foundational movements, choose an honest weight, and focus on how each rep feels rather than how much you're lifting. Small, consistent steps across weeks and months create the results that extreme approaches almost never do.

    Your best training doesn't happen in a perfect gym on a perfect day. It happens when you show up, grab those dumbbells, and put in the work — one rep at a time.


    This article is for informational and educational purposes only. The content is not intended to replace professional medical, nutritional, or fitness advice. Always consult a qualified healthcare provider, registered dietitian, or certified fitness professional before starting a new health program or making significant changes to your lifestyle.

    Content reviewed by our wellness editorial team, with references to peer-reviewed research and guidelines from leading health organizations.

  • Isometric Training: Build Strength Without Moving a Muscle

    Isometric Training: Build Strength Without Moving a Muscle

    You’re holding a wall sit, shaking at the 45-second mark, wondering how something so still can be so brutally effective — welcome to isometric training.

    Why Isometric Training Matters More Than You Think

    Most people associate a good workout with movement — squats, presses, lunges, rows. The more dynamic, the better, right? Not necessarily. Isometric training, which involves contracting your muscles without changing their length or moving your joints, has been quietly backed by decades of research as one of the most effective — and underutilized — tools for building strength, improving joint stability, and even managing pain.

    If you’ve ever held a plank, pressed your palms together during a chest squeeze, or braced hard at the bottom of a squat, you’ve already done isometric work. You just didn’t realize how powerful it was.

    According to the American College of Sports Medicine (ACSM), isometric exercise can produce significant strength gains — particularly at the specific joint angle being trained — and plays a meaningful role in rehabilitation, injury prevention, and neuromuscular efficiency. It’s not a replacement for dynamic training, but for adults navigating joint discomfort, time constraints, or training plateaus, it’s an approach worth understanding deeply.

    This guide breaks down exactly how isometric training works, who it’s best for, how to structure a routine, and the common mistakes that keep people from getting real results.

    The Science Behind Isometric Training — How It Actually Works

    When you perform a traditional bicep curl, your muscle shortens (concentric phase) and then lengthens (eccentric phase). In an isometric contraction, neither happens. Your muscle generates force — sometimes maximal force — without any visible joint movement. Think of pushing against a wall that doesn’t move. Your muscles are working hard; the wall doesn’t care.

    This type of contraction activates a high density of motor units and trains your nervous system to recruit muscle fibers more efficiently. Research published in the Journal of Strength and Conditioning Research found that isometric training at high intensities (above 70% of maximum voluntary contraction) can produce strength gains comparable to traditional resistance training, particularly in the mid-range and end-range of a movement.

    One myth to bust immediately: many people assume isometric training only builds strength at the exact angle being held. While there is an "angle specificity" effect — meaning strength gains are most pronounced within about 15 degrees of the trained position — this doesn’t make isometrics any less useful. In fact, strategically targeting weak ranges of motion with isometric holds can directly address strength gaps that dynamic training often misses.

    Beyond raw strength, isometric training has a well-documented role in tendon health. Harvard Health Publishing notes that sustained isometric loading is one of the first-line interventions recommended by physical therapists for tendinopathy — particularly in the patellar tendon (knee) and Achilles. The sustained tension appears to stimulate collagen synthesis and reduce pain signaling in the tendon.

    And then there’s blood pressure. A 2023 review published in the British Journal of Sports Medicine identified isometric exercise as the most effective exercise modality for reducing resting blood pressure — outperforming aerobic cardio and dynamic resistance training in head-to-head comparisons. That’s a headline worth remembering.

    How to Get Started With Isometric Training

    The beauty of isometric training is its accessibility. You don’t need a gym, special equipment, or even a lot of space. Here’s how to build it into your routine depending on your experience level.

    Beginner: Learn the Basics (Weeks 1–3)

    • Wall sit: Slide your back down a wall until thighs are parallel to the floor. Hold 20–30 seconds. Rest. Repeat 3 times. This targets quads, glutes, and core without joint stress.
    • Dead hang: Grip a pull-up bar and hang with arms slightly bent (not fully locked). Hold 15–20 seconds. Builds grip strength and shoulder stability.
    • Plank hold: Forearms on the floor, body in a straight line. Hold 20–40 seconds. Engages core, glutes, and shoulder girdle simultaneously.
    • Isometric chest press: Press your palms firmly together at chest height and hold for 10–15 seconds. Activates pec minor and stabilizers without equipment.

    At the beginner stage, focus on quality of tension — you should feel a deep, sustained muscular effort. Rest at least 60–90 seconds between holds. Train 2–3 days per week.

    Intermediate: Add Intensity and Specificity (Weeks 4–8)

    • Paused squats: Lower into a squat and hold at the bottom (or just above parallel) for 5–10 seconds before completing the rep. Strengthens weak ranges of motion.
    • Isometric pull-up hold: At the top of a pull-up (chin above bar), hold for 5–10 seconds. Builds lat and bicep endurance.
    • Suitcase hold: Hold a dumbbell at your side (one arm) and stand perfectly upright for 30–45 seconds. Trains anti-lateral flexion — essential for spine health.
    • 90-90 hip hold: In a seated or standing position, bring one knee up to 90 degrees and hold. Activates hip flexors and deep stabilizers often neglected by machine-based training.

    Advanced: Functional Isometric Overloads

    Advanced lifters can use functional isometrics — pressing or pulling against immovable resistance (a barbell set inside a power rack with pins above it) at specific joint angles. This is a targeted technique used to break through strength plateaus in movements like the bench press, deadlift, or overhead press. Work with a certified strength coach before attempting this.

    If you already train with progressive overload principles or incorporate functional fitness into your routine, isometric holds can complement your existing program without requiring a full restructure.

    Common Mistakes That Sabotage Your Results

    Isometric training looks simple. That’s partly why people underdo it, overdo it, or do it wrong. Here are the most common errors and how to fix them.

    Mistake 1: Holding your breath. It’s natural to brace and hold your breath during a hard isometric effort — but prolonged breath-holding raises intraabdominal pressure and can spike blood pressure dangerously, especially in those with cardiovascular conditions. Fix it: exhale slowly during the hold, or practice a 4-count breath cycle. Never strain to the point of dizziness.

    Mistake 2: Relying on passive posture instead of active tension. A plank where you’re just hanging in your joints is not an isometric exercise — it’s resting. True isometric training requires intentional, forceful muscle activation. Fix it: squeeze every muscle deliberately. Think "crush the floor with your hands," "push the wall away," or "zip your ribs down" during holds.

    Mistake 3: Training only at one angle. Because strength gains are most pronounced near the trained position, always holding a mid-range plank or a standard wall sit limits your development. Fix it: rotate your isometric holds across multiple joint positions. Hold your squat at quarter depth, half depth, and near full depth at different sessions.

    Mistake 4: Ignoring recovery. Because isometric holds don’t involve ballistic movements, people assume they’re always low-risk and can be done daily at high intensity. In reality, maximal-effort isometrics — especially those targeting tendons — require adequate recovery. Fix it: treat hard isometric sessions like any strength session. Allow 48 hours before targeting the same muscles again at high intensity.

    Mistake 5: Skipping the warm-up. Cold tendons and muscles don’t respond well to maximum isometric force. Fix it: spend 5–8 minutes doing light dynamic movement (leg swings, arm circles, bodyweight flow) before attempting any held contraction above 60% effort.

    What to Eat to Support Isometric and Strength Training

    Isometric training still creates muscular stress and demands recovery — so your nutrition matters. The Academy of Nutrition and Dietetics recommends that adults engaged in regular resistance training consume between 1.2 and 1.7 grams of protein per kilogram of body weight per day to support muscle repair and adaptation.

    For a 160-pound adult, that’s roughly 87–123 grams of protein daily. Practical sources include:

    • Chicken breast (about 31g per 3.5 oz serving)
    • Greek yogurt (15–20g per cup, plain, non-fat)
    • Eggs (6g per egg — pair two with a side of cottage cheese for a complete recovery meal)
    • Canned salmon or tuna (25–27g per 3 oz serving, with anti-inflammatory omega-3s as a bonus)
    • Lentils and legumes (15–18g per cup cooked — excellent for plant-based eaters)

    For tendon health specifically — which isometric training directly supports — collagen-supporting nutrients matter too. Research from the NIH highlights the role of vitamin C in collagen synthesis. Pairing a collagen-rich food or supplement with vitamin C from citrus, bell peppers, or kiwi before training may enhance tendon adaptation.

    The USDA Dietary Guidelines also recommend adequate carbohydrate intake to fuel muscle glycogen — don’t slash carbs if you’re training seriously. A pre-workout snack of whole grain toast with nut butter or fruit with Greek yogurt provides the fuel and protein needed to sustain a quality isometric session.

    How Long Until You See Results — And What to Track

    Results from isometric training vary based on your starting point, consistency, and how you integrate it into a broader fitness plan. Here’s what the research and real-world experience suggest:

    Weeks 1–2: Neural adaptations begin. You’ll likely notice improved ability to generate tension — holds that felt impossible at 30 seconds start to become manageable. This is your nervous system learning to recruit motor units more effectively, not muscle growth yet.

    Weeks 3–6: Strength gains at trained joint angles become measurable. You may notice that dynamic exercises (squats, presses) feel more controlled and stable — especially at previously weak points in the range of motion.

    Weeks 6–12: If combined with dynamic resistance training and proper nutrition, you’ll begin to see visible strength and muscular endurance improvements. Tendon-related discomfort (if that’s why you started) often begins to resolve meaningfully in this window, according to physical therapy research.

    What to track:

    • Hold duration at consistent effort level (e.g., plank hold time week over week)
    • Perceived exertion during holds (should feel harder as you add intensity, not just time)
    • Pain or discomfort at specific joints during dynamic exercise (key for rehabilitation users)
    • Performance in related dynamic lifts (squat depth, overhead press stability)

    If you’re using isometrics for tendon rehab and see no improvement after 8–10 weeks, consult a physical therapist. If you’re training for general strength and plateau completely, consider integrating resistance band training or additional dynamic volume to complement your isometric work.

    Frequently Asked Questions

    Can isometric training help with joint pain?
    For certain types of joint and tendon pain — particularly patellar tendinopathy and lateral elbow tendinopathy — isometric loading has strong clinical support as an early intervention. It provides mechanical stimulus without aggravating inflamed tissue. That said, results vary significantly by condition and severity. Always get a diagnosis before self-treating pain with exercise.

    Is isometric training enough on its own, or does it need to be combined with other training?
    For most healthy adults, isometric training is most effective as a complement to dynamic strength or cardio work — not as the only form of exercise. It’s excellent for targeting specific weaknesses, supporting tendon health, or training during recovery periods. Used alone long-term, it may leave gaps in full-range-of-motion strength and cardiovascular fitness.

    How long should I hold each isometric contraction?
    This depends on your goal. For strength and tendon adaptation, holds of 30–45 seconds at 70–80% maximum effort are commonly recommended. For maximal strength development using functional isometrics, shorter holds (5–10 seconds) at near-maximal effort are more appropriate. Most beginners should start in the 20–30 second range and build from there.

    Is isometric training safe for people with high blood pressure?
    The research on isometrics and blood pressure reduction is promising, but specific protocols matter. Wall sits and planks performed with controlled breathing and at moderate intensity appear safe and beneficial. However, if you have uncontrolled hypertension, avoid Valsalva-style breath-holding during maximal efforts and consult your physician before starting any structured training program.

    Can I do isometric training every day?
    Low-intensity isometrics (like gentle wall sits or supported holds) can be done daily for mobility and activation purposes. High-intensity isometric sessions targeting specific muscle groups should follow the same 48-hour recovery rule as conventional strength training. Overloading tendons daily without recovery can increase injury risk rather than prevent it.

    Start Strong, Stay Consistent

    Isometric training won’t make headlines the way a viral HIIT challenge will. It’s quieter. Slower. Surprisingly demanding. And for exactly those reasons, it works.

    Whether you’re working around a nagging knee, pushing through a strength plateau, or simply looking for a smarter way to train without always adding more weight or reps, isometric holds deliver real physiological adaptation — backed by solid science and validated in clinical settings.

    Start today with a single wall sit and a plank hold. Pay attention to how hard you can make stillness feel. Then build from there, one held contraction at a time.

    Small, consistent effort in the right direction always beats sporadic perfection.


    This article is for informational and educational purposes only. The content is not intended to replace professional medical, nutritional, or fitness advice. Always consult a qualified healthcare provider, registered dietitian, or certified fitness professional before starting a new health program or making significant changes to your lifestyle.

    Content reviewed by our wellness editorial team, with references to peer-reviewed research and guidelines from leading health organizations.

  • Resistance Band Training: Build Strength Anywhere

    Resistance Band Training: Build Strength Anywhere

    Resistance Band Training: Build Strength Anywhere

    You don’t need a gym membership, heavy dumbbells, or a dedicated workout room to build real, functional strength — just a few colorful loops and the right plan.

    Picture this: You’re traveling for work, staying in a hotel with a “fitness center” that’s really just a broken treadmill and a wall mirror. Or maybe your gym schedule fell apart when the kids’ after-school activities took over. Sound familiar?

    Here’s the thing — resistance band training is one of the most underestimated fitness tools available to everyday adults. It’s portable, affordable, and backed by a growing body of research showing it can produce strength and muscle gains comparable to free weights in many scenarios.

    Yet most people either dismiss bands as warm-up accessories or grab them once and give up because they don’t know how to use them effectively. This guide changes that.

    By the end, you’ll understand exactly how resistance bands work, how to structure a full-body routine, what mistakes to avoid, and how to track real progress — whether you’re a complete beginner or someone looking to add a versatile tool to an established training plan.

    Why Resistance Band Training Matters More Than You Think

    Resistance bands aren’t just for physical therapy clinics or warm-up sets — though they excel at both. When used intentionally, they can serve as a complete strength training system that challenges your muscles throughout the entire range of motion.

    That last part is key. Unlike dumbbells, which create the most resistance at specific angles due to gravity, bands create what’s called ascending resistance — the tension increases as you stretch the band further. This means the hardest part of the movement is often at the top, where your muscles are actually closest to full contraction.

    Research published in the Journal of Human Kinetics found that elastic resistance training produces similar electromyographic muscle activation patterns to free-weight training, particularly in exercises like squats, rows, and chest presses. In other words, your muscles are working just as hard — they just experience force differently.

    From a practical standpoint, the American College of Sports Medicine (ACSM) recognizes resistance bands as a valid tool for achieving the recommended 2 or more days per week of muscle-strengthening activity for adults. And with gym memberships averaging over $50 per month in the US, a quality set of bands for under $40 can be a genuinely smart investment.

    For adults in the 25–60 age range, resistance training isn’t just about looking good. It plays a direct role in preserving bone density, supporting joint health, managing body composition, and maintaining the functional strength that makes everyday life easier. Bands lower the barrier to making that happen consistently.

    The Science Behind How Resistance Bands Actually Work

    Resistance bands work by using elastic tension to create mechanical load on your muscles — the same fundamental stimulus that triggers muscle adaptation, whether from a barbell or a loop of latex.

    When your muscle fibers experience tension under load, microscopic damage occurs. During recovery, your body repairs those fibers and reinforces them, resulting in increased strength and, over time, hypertrophy (muscle growth). This process — known as mechanotransduction — doesn’t care whether the resistance comes from gravity or an elastic band.

    Busting the biggest myth: Many people believe bands are “too easy” to build real muscle. This misunderstanding usually comes from using the wrong band resistance level or not applying progressive overload principles. A study published in PLOS ONE that analyzed 23 randomized controlled trials found elastic resistance training to be as effective as conventional resistance training for improving muscle strength in adults — across age groups.

    There are several types of bands worth understanding:

    • Loop bands (mini bands): Short, flat loops used around ankles, thighs, or wrists — excellent for glute activation and lateral movements.
    • Flat resistance bands (therapy bands): Long, flat strips without handles — extremely versatile, often color-coded by resistance level.
    • Tube bands with handles: Best for upper body pulling and pressing movements; mimic cable machine exercises most closely.
    • Figure-8 and figure-loop bands: Compact, great for targeted upper body work.

    Most adults benefit most from a set of tube bands with handles and a pack of loop bands — this combination covers the majority of exercises without redundancy.

    One important nuance: bands don’t load your joints the same way free weights do. Because tension increases with stretch rather than being constant, they tend to be more joint-friendly, particularly for people managing mild knee or shoulder discomfort. This doesn’t mean they’re injury-proof, but it does make them a useful option when traditional lifting feels rough on your joints.

    How to Get Started: A Practical Resistance Band Routine

    The best way to start isn’t to overthink it. Begin with a simple full-body framework three days per week, with at least one rest day between sessions. Here’s how to build that foundation:

    Beginner Level (Weeks 1–4)

    Focus on movement quality and learning to feel the muscle you’re targeting. Use a light-to-medium resistance band and perform 2–3 sets of 12–15 reps per exercise. Rest 60–90 seconds between sets.

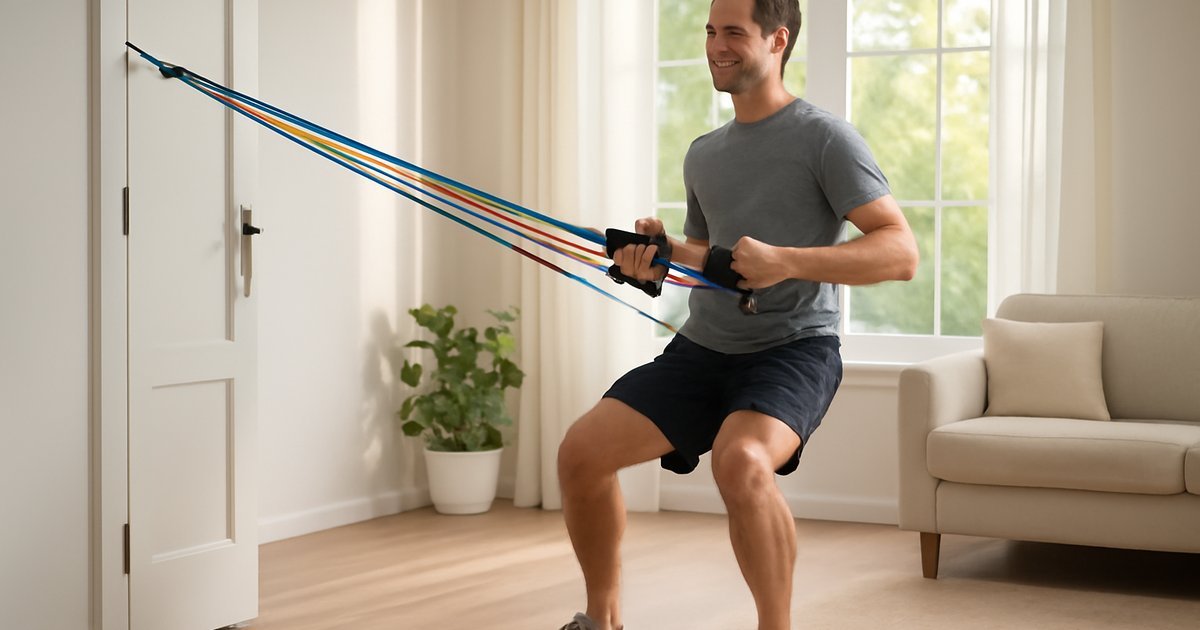
    • Banded squat: Loop band above knees, feet hip-width. Drive knees out as you lower. Targets quads, glutes, adductors.
    • Seated row (tube band): Sit on the floor, loop band around your feet, pull handles toward your torso. Targets mid-back, biceps.
    • Banded push-up: Loop band across your upper back, hold ends under each hand. Adds resistance to standard push-up. Targets chest, triceps, shoulders.
    • Glute bridge with band: Band above knees, drive hips up and press knees outward. Targets glutes, hamstrings.
    • Banded lateral walk: Band around ankles, slight squat position, step side to side. Targets hip abductors, glutes.
    • Overhead press (tube band): Stand on band, press handles overhead. Targets shoulders, triceps.

    Intermediate Level (Weeks 5–10)

    Introduce heavier resistance bands, add a fourth exercise day (upper/lower split), and incorporate supersets for efficiency. Aim for 3–4 sets of 8–12 reps.

    • Romanian deadlift with band under feet
    • Single-arm bent-over row
    • Pallof press (core anti-rotation)
    • Banded hip thrust
    • Face pulls for shoulder health and posture

    You can also pair resistance bands with bodyweight exercises from programs like Calisthenics for Adults: Build Real Strength Anywhere for a well-rounded, equipment-minimal training system.

    Advanced Options

    Use bands as a supplement to barbell or dumbbell training — attaching them to barbells for variable resistance squats and deadlifts is a technique used in powerlifting programs. Alternatively, apply progressive overload principles systematically by increasing resistance level, reducing rest periods, or adding tempo training (slow eccentric phase) to intensify band work.

    Common Mistakes That Sabotage Results

    Most people who try resistance band training and quit do so because of avoidable mistakes — not because bands don’t work. Here are the most common ones:

    1. Using the same band for everything
    One band does not fit all exercises. Your legs and back are significantly stronger than your arms and shoulders. Using a light band for squats means you’re barely stimulating your lower body, while using a heavy band for lateral raises may compromise your form. Invest in at least 3 resistance levels and match them intentionally to each exercise.

    2. Not controlling the movement
    Bands want to snap back quickly. If you’re allowing the elastic recoil to do the work on the way back (the eccentric phase), you’re leaving most of the benefit on the table. Deliberately slow down the return — aim for 2–3 seconds on the way back. This is where a significant amount of muscle-building stimulus occurs, according to research on eccentric muscle contractions published in the Journal of Applied Physiology.

    3. Anchoring bands incorrectly
    A band that slips, snaps, or moves mid-rep can cause injury or frustration. Always check that door anchor attachments are secure before pulling. Never anchor bands to anything that could break or move. Replace bands that show cracks, discoloration, or tears — latex degrades over time, especially with UV exposure.

    4. Skipping progressive overload
    This is the most common reason people plateau. Doing the same band, same reps, same sets every week won’t produce continued adaptation. Follow the same principle you’d apply to any strength program: once you can complete the top end of your rep range with good form for all sets, it’s time to progress. Increase resistance, add a set, reduce rest time, or slow your tempo.

    5. Neglecting lower body and pulling movements
    Many self-designed band routines end up being chest-and-arm-heavy, skipping the legs and back. This creates muscular imbalances over time and underutilizes the bands’ full potential. A balanced program includes at least as much pulling (rows, face pulls, pull-aparts) as pushing (presses, push-ups), plus dedicated lower body work.

    What to Eat to Support Resistance Band Training

    Training with bands creates the same physiological demand for recovery as other resistance training — which means nutrition matters just as much here as in any gym program.

    Protein: The Academy of Nutrition and Dietetics recommends that active adults consume between 1.2 and 2.0 grams of protein per kilogram of body weight daily to support muscle repair and adaptation. For a 160-pound (73 kg) adult, that’s roughly 88–146 grams of protein per day. Prioritize complete protein sources: eggs, chicken, Greek yogurt, salmon, legumes with whole grains, or a quality whey or plant-based protein supplement if needed.

    Carbohydrates: Don’t fear carbs around your workouts. Carbohydrates are your muscles’ preferred fuel source during resistance training. A small meal or snack with 20–40 grams of carbohydrates within 1–2 hours before training can support performance and energy. Think: a banana with nut butter, oatmeal with berries, or whole grain toast with eggs.

    Post-workout recovery window: Research consistently supports consuming protein within 2 hours post-exercise to optimize muscle protein synthesis. Combining 20–40 grams of protein with carbohydrates in that window — a smoothie with Greek yogurt and fruit, for example — supports both recovery and glycogen replenishment, per USDA dietary guidance on athletic nutrition.

    Hydration: Banded workouts, especially full-body circuits, generate significant sweat. The National Academy of Medicine recommends approximately 3.7 liters (125 oz) of total fluid daily for men and 2.7 liters (91 oz) for women, with additional intake to replace exercise-related fluid loss. Mild dehydration — as little as 2% body water loss — has been shown to impair muscular strength and endurance, according to research reviewed by the American College of Sports Medicine.

    For more detail on protein strategies, see Optimal Protein Intake: Your Science-Backed Guide.

    How Long Until You See Results — and What to Track

    Honest answer: most people begin noticing strength improvements within 2–4 weeks of consistent training. These early gains are largely neurological — your nervous system gets better at recruiting muscle fibers efficiently before actual muscle tissue changes become visible.

    Visible changes in muscle definition and body composition typically emerge after 6–12 weeks of consistent training, provided nutrition supports the process. This timeline varies significantly based on training frequency, starting fitness level, sleep quality, stress levels, and diet.

    Metrics worth tracking:

    • Rep progression: Are you completing more reps per set with the same band week over week? That’s a clear sign of strength adaptation.
    • Band progression: Moving from a light to a medium band on a given exercise is a concrete strength milestone.
    • Exercise quality: Is your form cleaner? Can you control the eccentric phase more consistently? These are genuine improvements.
    • Energy and recovery: Many people report improved energy, reduced daily soreness, and better sleep quality within 3–4 weeks of starting a regular resistance training routine.
    • Photos every 4 weeks: Body composition changes are slow and subtle. Weekly mirror-checks are frustrating. Monthly comparison photos under consistent lighting tell a much more honest story.

    If you’re 6–8 weeks in and feel like nothing is changing, reassess your progressive overload application, protein intake, and sleep quality before concluding the training isn’t working. And if you have underlying health conditions or experience pain during exercises, consulting a certified personal trainer or physical therapist for a personalized assessment is always the right move.

    Pairing your strength work with complementary training like Mobility Training can also accelerate visible progress by improving movement quality and reducing injury risk.

    Frequently Asked Questions

    Can resistance bands really replace weights for building muscle?
    For most recreational fitness goals — improved strength, muscle tone, body composition, and functional fitness — yes, bands can be a highly effective primary tool. The research supports this, particularly for adults who aren’t pursuing competitive bodybuilding or powerlifting. The key is applying progressive overload consistently and using appropriate resistance levels, not defaulting to the same light band indefinitely.

    How many resistance bands do I actually need to start?
    A practical starter set includes one pack of mini loop bands (typically 5 resistance levels) and one set of tube bands with handles (3 resistance levels: light, medium, heavy). You can get started with less, but having multiple resistance options from day one prevents the frustration of feeling stuck with a single tension level. Total cost is typically $25–$45 for a quality set.

    Are resistance bands safe for people with joint problems?
    Generally, bands are considered more joint-friendly than heavy free weights because the resistance profile is different — load increases gradually rather than being fixed, and bands don’t create axial compression on the spine the way loaded barbells can. That said, “joint-friendly” doesn’t mean appropriate for all conditions. If you have a diagnosed joint condition, consult with your physician or a physical therapist before starting any resistance training program.

    How often should I train with resistance bands?
    The ACSM recommends at least 2 days per week of muscle-strengthening activity for health benefits, with most research on body composition and performance improvements showing optimal results at 3–4 sessions per week. Each muscle group benefits from 48 hours of recovery between sessions, so full-body workouts 3x per week or an upper/lower split 4x per week are both practical, evidence-supported approaches.

    Do resistance bands wear out? How do I know when to replace them?
    Yes — latex bands degrade over time, especially with frequent use, UV exposure, and contact with oils or sweat. Inspect your bands regularly for surface cracks, white stress marks, discoloration, or any thinning areas. A band that snaps during use can cause injury. Most quality bands used 3–4 times per week last 1–2 years with proper storage (away from sunlight, hung or loosely coiled rather than tightly wrapped).

    Start Simple, Stay Consistent

    Resistance band training works — not because it’s a shortcut or a gimmick, but because it applies the same fundamental principles as any effective strength training program: progressive resistance, full range of motion, adequate recovery, and consistency over time.

    You don’t need to start with a perfect routine. You need to start with something you’ll actually do three times a week, in whatever space and time you have. A 30-minute full-body band workout in your living room beats a theoretical gym plan that never happens.

    Pick one or two exercises per muscle group from the beginner list in this guide. Grab a pair of bands. Do the work. Track your reps. Progress when you can. That’s the entire formula.

    Small, consistent steps taken over months create the kind of strength and body composition changes that feel genuinely transformative. And the best part? Your bands fit in a carry-on bag.


    This article is for informational and educational purposes only. The content is not intended to replace professional medical, nutritional, or fitness advice. Always consult a qualified healthcare provider, registered dietitian, or certified fitness professional before starting a new health program or making significant changes to your lifestyle.

    Content reviewed by our wellness editorial team, with references to peer-reviewed research and guidelines from leading health organizations.

  • Calisthenics for Adults: Build Real Strength Anywhere

    Calisthenics for Adults: Build Real Strength Anywhere

    You don’t need a gym membership, barbells, or expensive equipment to build a strong, capable body — you just need your own bodyweight and a plan that actually works.

    Think about the last time you felt genuinely strong. Not just “I survived that workout” strong, but the kind of strength that makes carrying groceries, playing with your kids, or moving furniture feel effortless. For millions of adults, that feeling seems locked behind gym doors — or buried under the assumption that serious fitness requires serious equipment.

    Here’s what most people don’t realize: calisthenics — the practice of using your own bodyweight as resistance — has been building functional, impressive physiques for centuries. From ancient Greek athletes to modern-day street workout communities, bodyweight training has consistently delivered results that rival, and in some ways surpass, traditional weight training.

    This guide is for adults aged 25 to 60 who want to build real, usable strength without a gym dependency. Whether you’re a complete beginner or someone returning to fitness after a long break, you’ll find practical, science-backed steps to get started, common traps to avoid, and honest timelines for what to expect.

    Why Calisthenics Matters More Than You Think

    There’s a persistent belief that bodyweight training is “beginner stuff” — something you graduate from once you discover real weights. That couldn’t be further from the truth.

    Calisthenics builds what exercise scientists call relative strength: the ability to move and control your own body through space. This type of strength has a direct carryover to everyday life, sports performance, and injury prevention in ways that isolated machine exercises often can’t replicate.

    According to the American College of Sports Medicine (ACSM), resistance training — including bodyweight exercise — reduces the risk of type 2 diabetes, improves bone density, supports cardiovascular health, and plays a significant role in maintaining healthy body composition. Adults who engage in regular resistance training also show improved insulin sensitivity and lower resting blood pressure over time.

    Perhaps more importantly for busy adults: calisthenics removes the biggest barrier to consistent training. No commute. No membership fees. No waiting for equipment. A 2019 study published in the International Journal of Environmental Research and Public Health found that convenience and accessibility were among the top predictors of long-term exercise adherence. When your gym is your living room floor, there’s one less excuse standing between you and your goals.

    And if you’re interested in pairing this with a smarter cardiovascular approach, our guide on Zone 2 Cardio: The Overlooked Key to Lasting Fitness pairs exceptionally well with a calisthenics foundation.

    The Science Behind Bodyweight Training — How It Actually Works

    Let’s bust a big myth right away: bodyweight exercises cannot build muscle or strength the same way lifting weights can. False — and science backs that up clearly.

    Muscle growth (hypertrophy) occurs when muscles are exposed to sufficient mechanical tension, metabolic stress, and muscle damage. Calisthenics delivers all three, provided you apply progressive overload — a principle that’s just as relevant to bodyweight training as it is to barbells.

    A landmark study published in the Journal of Human Kinetics found that an eight-week calisthenics program produced significant improvements in upper-body muscle thickness, strength, and postural alignment in untrained adults — without any external resistance. Researchers attributed gains to progressive skill and load manipulation, such as changing leverage, tempo, and exercise variation.

    The key mechanism is this: as you master a movement (say, a standard push-up), you manipulate variables to increase difficulty — elevating your feet, slowing the tempo, narrowing your hand placement, or eventually progressing to pike push-ups or archer push-ups. This creates a continuous training stimulus that your muscles are forced to adapt to.

    This is why calisthenics has no real ceiling. Movements like the one-arm push-up, pistol squat, muscle-up, and human flag require extraordinary levels of strength, coordination, and body control that most gym-goers never approach. For a deeper look at how progressive challenge drives results, check out our guide on Progressive Overload: The Key to Consistent Fitness Gains.

    One more point worth noting: calisthenics emphasizes compound, multi-joint movements — push-ups, pull-ups, squats, dips — that recruit large muscle groups simultaneously. This makes every session time-efficient and metabolically demanding.

    How to Get Started: Your First 8 Weeks

    Getting started with calisthenics doesn’t require a skill assessment or expensive coaching. But it does require an honest starting point and a structured approach. Here’s how to build your foundation intelligently.

    Step 1: Establish your baseline movements
    Before adding volume, confirm you can perform these five foundational patterns with solid form:

    • Push pattern: Standard push-up (or wall/knee variation)
    • Pull pattern: Dead hang (or inverted row using a table edge)
    • Squat pattern: Bodyweight squat, full depth
    • Hinge pattern: Hip hinge (think Romanian deadlift without weight)
    • Core bracing: Plank hold, 20+ seconds

    If any of these feel shaky, that’s your starting point — not a limitation.

    Step 2: Build a 3-day weekly structure (Beginner)
    Train three non-consecutive days per week. Each session should last 30 to 40 minutes and include one movement from each pattern above. Aim for 3 sets of 8 to 12 reps, or hold times for planks. Rest 60 to 90 seconds between sets.

    Step 3: Progress deliberately (Intermediate)
    After 4 to 6 weeks, when 3 sets of 12 reps feel manageable, increase difficulty by modifying the exercise — not by just doing more reps. Common progressions:

    • Push-up → Diamond push-up → Decline push-up → Pike push-up
    • Inverted row → Assisted pull-up → Negative pull-up → Full pull-up
    • Bodyweight squat → Single-leg box squat → Assisted pistol squat

    Step 4: Add skill work (Advanced)
    Once you’re comfortable with standard progressions, introduce skill-based movements: L-sit holds, handstand practice against a wall, ring dips (if you have gymnastic rings), and single-arm push-up progressions. These simultaneously build strength and proprioception in ways few gym exercises can match.

    Complement your calisthenics routine with the mobility work described in our Mobility Training Guide to move better and reduce injury risk as you progress.

    Common Mistakes That Sabotage Your Progress

    Calisthenics is deceptively simple, which is exactly why people make predictable errors that stall their progress or lead to injury. Here are the most common ones — and how to fix them.

    Mistake 1: Doing too many reps instead of progressing the movement
    This is the number-one calisthenics error. Doing 100 push-ups a day sounds impressive, but if standard push-ups are easy for you, you’re training endurance — not building strength or muscle. Fix: When you can complete 3 sets of 15 with ease, move to a harder variation. Challenge the muscle, don’t just fatigue it.

    Mistake 2: Skipping the pulling movements
    Most beginners gravitate toward push-ups and squats because they’re accessible. But neglecting pulling exercises (rows, pull-ups) creates a muscular imbalance that can lead to shoulder problems and poor posture over time. Fix: For every pushing movement in your session, include a pulling equivalent. If you can’t do pull-ups yet, use an inverted row under a table as your starting point.

    Mistake 3: Training through pain without distinction
    There’s a difference between muscular discomfort (expected) and joint pain (a warning sign). Many adults push through sharp elbow, wrist, or shoulder pain in push-up variations, which often leads to overuse injuries. Fix: If you feel joint pain — not muscle burn — stop the exercise immediately. Modify the hand position (try fists or push-up handles to reduce wrist extension), or reduce the range of motion until the discomfort resolves.

    Mistake 4: No structured rest or recovery plan
    More is not always better. Overtraining without adequate rest limits progress and increases injury risk, according to research from the National Strength and Conditioning Association. Fix: Train a maximum of 4 to 5 days per week with at least one full rest day between strength sessions. Sleep and nutrition — especially protein intake — are non-negotiable recovery tools. For a guide on fueling your training, see our article on Optimal Protein Intake: Your Science-Backed Guide.

    What to Eat to Support Your Calisthenics Training

    No training program delivers its full potential without adequate nutrition. For calisthenics specifically, your diet needs to support muscle protein synthesis, energy for training, and recovery.

    Protein: This is non-negotiable. The Academy of Nutrition and Dietetics recommends 1.2 to 2.0 grams of protein per kilogram of body weight daily for active adults. Prioritize high-quality sources: eggs, chicken breast, Greek yogurt, cottage cheese, canned tuna, legumes, and tofu. Aim to include a protein source in every meal.

    Carbohydrates: Carbs fuel your sessions and support glycogen replenishment post-workout. Don’t fear them — just choose quality sources. Oats, sweet potatoes, brown rice, fruits, and whole-grain bread provide sustained energy without blood sugar spikes. According to USDA Dietary Guidelines, 45 to 65 percent of daily calories should come from carbohydrates for active individuals.

    Fats: Healthy fats support joint health and hormone production — both critical for training adaptations. Include avocados, olive oil, fatty fish (salmon, sardines), nuts, and seeds. The American Heart Association recommends prioritizing unsaturated fats while limiting saturated fat to less than 10 percent of daily calories.

    Hydration: Even mild dehydration (as little as 2 percent body weight) has been shown to impair physical performance and cognitive function, according to research published in the Journal of the American College of Nutrition. Drink water consistently throughout the day — roughly half your body weight in ounces is a commonly cited practical target for moderately active adults.

    Pre and post-workout: Eat a small carbohydrate-protein snack 60 to 90 minutes before training (banana with peanut butter, or Greek yogurt with berries). Within 30 to 60 minutes post-session, consume a meal or snack with 20 to 40 grams of protein to maximize muscle repair.

    How Long Until You See Results — and What to Track

    This is the question everyone wants answered honestly, and it deserves a direct response.

    In the first 2 to 4 weeks, most people experience neurological improvements — your brain gets better at recruiting existing muscle fibers. You’ll feel stronger and more coordinated before you look noticeably different. This is normal and expected.

    By weeks 4 to 8, visible muscle definition and measurable strength gains typically become apparent, particularly in the shoulders, arms, chest, and core. Research published in the European Journal of Applied Physiology confirms that untrained individuals can show significant hypertrophic responses within 6 to 8 weeks of consistent resistance training.

    By the 3 to 6 month mark, you should be progressing through more advanced movement variations, noticing real-world strength improvements, and — if nutrition is aligned — meaningful changes in body composition.

    Metrics worth tracking:

    • Max clean reps per exercise (push-ups, pull-ups, dips)
    • Progression through movement tiers (which variation you’re currently training)
    • Plank hold time
    • Body weight and measurements (optional — but use trends, not single-day readings)
    • Subjective energy levels, sleep quality, and how everyday tasks feel

    If after 8 weeks you’re not progressing in any of these areas, it’s worth reassessing your program design, nutrition, and sleep quality. Consider working with a certified personal trainer (NASM or ACSM-certified) for a program review.

    Frequently Asked Questions

    Can calisthenics build as much muscle as weight training?
    For beginners and intermediate trainees, yes — research shows comparable hypertrophy outcomes between bodyweight and free-weight training when effort and progression are matched. Advanced trainees looking to maximize muscle mass may eventually benefit from adding external load, but most adults never hit that ceiling with proper calisthenics programming.

    How many days per week should I train calisthenics?
    Three to four days per week is the sweet spot for most adults. This allows adequate recovery between sessions while maintaining enough training stimulus for consistent progress. More is not always better — recovery is where adaptation actually happens.

    I have wrist pain when doing push-ups. What should I do?
    Wrist pain is common and usually related to limited wrist extension mobility or poor hand positioning. Try performing push-ups on fists (neutral wrist), on push-up handles, or on a slightly inclined surface. If pain persists beyond a few sessions with modifications, consult a physical therapist before continuing.

    Is calisthenics suitable for people over 50?
    Absolutely — and arguably more appropriate than heavy barbell training for many adults in this age group. Bodyweight movements place less compressive load on the spine and joints while still delivering meaningful strength and muscle-building stimulus. Start conservatively, prioritize form, and progress gradually. Results vary based on individual baseline fitness and health history.

    Do I need any equipment at all?
    A pull-up bar is the single most valuable piece of equipment you can own — it opens up the entire pulling movement category. A doorframe pull-up bar costs under $30 and fits most standard doorframes. Everything else (push-ups, squats, lunges, dips using a chair) requires zero equipment.

    Conclusion

    Calisthenics isn’t a workaround for people who can’t afford a gym — it’s a complete, science-backed training system that has built extraordinary athletes for centuries. Whether your goal is to lose body fat, build visible muscle, move without pain, or simply feel stronger and more capable in everyday life, bodyweight training can get you there.

    Start with the fundamentals. Build consistency before complexity. Progress your movements before adding volume. And remember — the person who trains three days a week for a year will always outperform the person who trains every day for three weeks and burns out.

    Your next step is simple: today, do three sets of push-ups, three sets of bodyweight squats, and a plank hold. That’s it. Start there, and build from that foundation one week at a time.


    This article is for informational and educational purposes only. The content is not intended to replace professional medical, nutritional, or fitness advice. Always consult a qualified healthcare provider, registered dietitian, or certified fitness professional before starting a new health program or making significant changes to your lifestyle.

    Content reviewed by our wellness editorial team, with references to peer-reviewed research and guidelines from leading health organizations.

  • Progressive Overload: The Key to Consistent Fitness Gains

    Progressive Overload: The Key to Consistent Fitness Gains

    Most people work out for months without seeing real progress — and the reason is almost never effort. It’s strategy.

    You’ve been showing up to the gym. You’re doing the work, breaking a sweat, and sticking to your routine. But somehow, three months in, your body looks and feels almost the same as when you started. Sound familiar?

    This is one of the most common frustrations in fitness — and it has a name: the plateau. The good news is that it’s almost always avoidable. The solution comes down to one of the most well-established principles in exercise science: progressive overload.

    Progressive overload is the method of consistently and systematically increasing the demands placed on your body over time. It’s how Olympic athletes train, how physical therapists rebuild strength after injury, and how everyday people finally break through frustrating fitness plateaus.

    In this guide, you’ll learn exactly what progressive overload is, why your body demands it to keep changing, and how to apply it — whether you’re a beginner lifting for the first time or someone who’s been training for years. No complicated formulas. No gym jargon. Just a science-backed system that actually works.

    Why Progressive Overload Matters More Than You Think

    Your body is extraordinarily good at adapting. When you repeat the same physical demand week after week, your muscles, joints, and cardiovascular system get efficient at handling it — and stop growing stronger in response. This is called the General Adaptation Syndrome, a concept introduced by endocrinologist Hans Selye and later integrated into modern exercise science.

    The American College of Sports Medicine (ACSM) recommends progressive overload as a foundational principle of any effective resistance training program. Their guidelines specifically state that to improve muscular strength and endurance, training variables must be systematically increased over time — otherwise, adaptation stalls.

    Here’s why this matters in your daily life: if you walk the same route at the same pace every day, your heart rate gradually drops during that walk. Your body has adapted. The same principle applies to every squat, push-up, and plank you do. Once your body masters a movement at a given load, the stimulus for growth disappears unless you change something.

    This isn’t discouraging — it’s actually empowering. It means your body is capable of constant improvement. You just have to keep giving it a reason to change.

    The Science Behind Progressive Overload and How It Actually Works

    When you place mechanical stress on muscle fibers — through lifting, resistance, or bodyweight effort — tiny microtears form in the muscle tissue. During recovery, your body repairs those fibers and rebuilds them slightly thicker and stronger than before. This process, called muscle protein synthesis, is the biological engine behind every fitness gain you’ve ever made.

    Progressive overload keeps that engine running. Without it, muscle protein synthesis returns to baseline and your body stops rebuilding with the same urgency.

    A landmark study published in the Journal of Strength and Conditioning Research found that trainees who followed a progressive overload program over 12 weeks showed significantly greater increases in both muscle hypertrophy and strength compared to those who maintained a fixed training load. The difference wasn’t in hours spent training — it was in intelligent load management.

    Common myth to bust: Many people believe that soreness equals progress. It doesn’t. Delayed onset muscle soreness (DOMS) is a response to novelty or excess volume, not a reliable indicator of effective training. You can make significant gains with little to no soreness — especially once you’ve been training for a while — as long as you’re applying progressive overload consistently.

    Progressive overload also works beyond weight training. Runners improve by adding distance or pace. Swimmers increase lap count or reduce rest intervals. Even yoga practitioners progress by holding poses longer or deepening their range of motion. The principle is universal.

    How to Apply Progressive Overload: Practical Steps for Every Level

    The beauty of progressive overload is that it doesn’t require you to lift heavier every single session. There are multiple training variables you can adjust. Here’s a breakdown by experience level:

    The 7 Variables of Progressive Overload:

    • Load (weight): Increase the resistance or weight used
    • Reps: Do more repetitions with the same weight
    • Sets: Add an additional set to your workout
    • Frequency: Train a muscle group more times per week
    • Rest intervals: Reduce rest time between sets
    • Range of motion: Perform movements through a fuller, deeper range
    • Tempo: Slow down the eccentric (lowering) phase of a lift

    Beginner (0–6 months of training):

    1. Start with a weight or resistance you can handle with good form for 10–12 reps
    2. Once you can complete all reps with control for two consecutive sessions, increase weight by 5 lbs (upper body) or 10 lbs (lower body)
    3. Focus on form before load — poor mechanics under increased load is a recipe for injury
    4. Track every session in a notebook or app so you know exactly what to beat next time

    Intermediate (6 months–2 years):

    1. Use a structured periodization model — alternate between heavier weeks (3–5 reps) and moderate weeks (8–12 reps)
    2. Introduce tempo training: try a 3-second lowering phase on squats and bench press
    3. Add a fourth training day if recovery allows
    4. Focus on weak points — if your squat is limited by hip mobility, overloading the movement won’t help until mobility improves

    Advanced (2+ years):

    1. Use planned deload weeks (reduced volume and intensity) every 4–6 weeks to allow full recovery before pushing higher
    2. Track training metrics closely — total weekly volume (sets × reps × weight) is more important than any single session
    3. Experiment with advanced techniques like drop sets, cluster sets, or rest-pause training to create novel stimuli

    If you’re currently working out at home, progressive overload is still very achievable. Check out our guide on Home Workout Plans: Build Real Fitness Without a Gym for creative ways to increase intensity without adding equipment.

    Common Mistakes That Sabotage Progressive Overload

    Even dedicated exercisers make these mistakes regularly — and they often don’t realize what’s holding them back.

    Mistake 1: Jumping up in weight too fast.
    Adding too much load too soon is the most common cause of injury in recreational trainees. When load outpaces technique and tissue capacity, tendons, ligaments, and joints take the hit. The fix: follow the “2-for-2 rule” — only increase weight when you can complete 2 extra reps over your target in 2 consecutive sessions with perfect form.

    Mistake 2: Never changing anything except weight.
    Many gym-goers focus only on lifting heavier — and ignore the six other variables. When linear weight progression stalls (and it eventually will), they feel stuck. The fix: rotate your overload variable. If you’ve been adding weight, try adding a set. If you’ve maxed your sets, try reducing rest time by 15 seconds. Keep your body guessing intelligently.

    Mistake 3: Not tracking workouts.
    This one is simple but devastating. Without a log, you’re guessing. You genuinely cannot apply progressive overload consistently if you don’t know what you did last session. The fix: use a free app like Strong or even a simple notes app. Log the exercise, weight, sets, and reps every time. It takes 60 seconds and changes everything.

    Mistake 4: Skipping recovery.
    Progress doesn’t happen during your workout — it happens while you rest. Inadequate sleep and chronic stress dramatically impair muscle protein synthesis and hormonal recovery. According to research published in Current Sports Medicine Reports, sleep deprivation reduces anabolic hormone output and slows tissue repair. The fix: treat sleep and stress management as part of your training program, not separate from it. If burnout is a concern, our article on Burnout Recovery: How to Rebuild Your Energy and Calm offers practical guidance.

    Mistake 5: Applying overload without structure.
    Random increases in volume or intensity — without a plan — lead to overtraining, not progress. The fix: plan your overload method at the start of each training block (typically 4–8 weeks), and stick to it before reassessing.

    Nutrition and Recovery: The Hidden Half of Progressive Overload

    Your training program can be perfect, but without adequate nutrition, progressive overload won’t deliver its full potential. Muscle repair and growth require raw materials — and those come from food.

    Protein: The Academy of Nutrition and Dietetics recommends 1.2–2.0 grams of protein per kilogram of body weight per day for active individuals. For a 160-pound person, that’s roughly 88–145 grams daily. Distribute intake across meals (25–40g per meal) for optimal muscle protein synthesis. Good sources include chicken breast, Greek yogurt, eggs, cottage cheese, salmon, legumes, and tofu. For a complete breakdown, see our article on Optimal Protein Intake: Your Science-Backed Guide.

    Carbohydrates: Carbs are your primary fuel source for resistance training. According to USDA Dietary Guidelines, complex carbohydrates — oats, brown rice, sweet potatoes, whole grain bread — should form the base of a performance-focused diet. Don’t fear carbs if you’re training regularly; they’re essential for glycogen replenishment and workout performance.

    Hydration: Even mild dehydration (1–2% of body weight) can reduce strength output and cognitive focus during training. The ACSM recommends drinking 17–20 oz of water 2–3 hours before exercise and continuing to hydrate throughout your session.

    Caloric intake: You cannot consistently build strength and muscle in a significant caloric deficit. If your goal is muscle growth, a modest caloric surplus of 200–300 calories per day above maintenance is typically sufficient. If you’re working on body recomposition, our article on Body Recomposition: Lose Fat and Gain Muscle Together explores how to structure this effectively.

    Post-workout recovery: Consuming 20–40 grams of protein within 2 hours post-training supports muscle repair, according to data published in the Journal of the International Society of Sports Nutrition. A simple Greek yogurt with fruit or a protein shake with a banana covers this well.

    How Long Until You See Results — and What to Track

    This is the question everyone asks — and the honest answer is: it depends on your starting point, consistency, nutrition, and sleep quality. That said, research offers some reasonable timelines.

    According to Harvard Health Publishing, most people who follow a consistent resistance training program with progressive overload begin noticing improvements in strength within 2–4 weeks — before visible muscle changes even occur. This early strength gain is largely neurological: your brain gets better at recruiting muscle fibers efficiently.

    Visible body composition changes typically become noticeable between 6–12 weeks of consistent training and adequate nutrition. Significant muscle hypertrophy in untrained individuals can begin appearing as early as 8 weeks, while more experienced trainees may need 12–20 weeks to see similar magnitude of change.

    Metrics worth tracking:

    • Weekly strength numbers (weight × reps × sets per exercise)
    • Resting heart rate over time (lower often signals improved cardiovascular fitness)
    • How you feel completing previously challenging movements
    • Energy levels and mood on training days vs. rest days
    • Progress photos every 4 weeks under consistent lighting
    • Body measurements (waist, hips, chest, arms) every 4–6 weeks

    Scale weight alone is a poor measure of progress. Muscle is denser than fat, so body composition can improve dramatically while the number on the scale barely moves. Track multiple data points.

    When to reassess: If you’ve followed a progressive overload program consistently for 8 weeks with no measurable strength improvement, it’s time to evaluate your nutrition, sleep quality, stress levels, and program design. Consider working with a certified personal trainer or registered dietitian to identify what’s missing.

    Frequently Asked Questions

    Can I apply progressive overload without weights or a gym?
    Absolutely. Bodyweight training responds beautifully to progressive overload. You can increase reps, add sets, progress to harder movement variations (push-ups to archer push-ups to single-arm push-ups), reduce rest time, or add a loaded backpack for resistance. The principle is the same — increase the demand over time.

    How often should I increase the weight or difficulty?
    For beginners, strength improvements often allow load increases every 1–2 weeks. For intermediate and advanced trainees, every 2–4 weeks is more realistic. Focus on quality over frequency of increases — premature jumps in load are the number one cause of overuse injuries in recreational fitness.

    What if I miss a week of training — do I lose my progress?
    Research suggests that strength and muscle adaptations are relatively resilient to short breaks. A 1–2 week break is unlikely to cause meaningful detraining. When you return, start at slightly lower loads (about 10–15% less) and rebuild over 1–2 sessions before pushing to your previous levels.

    Is progressive overload safe for older adults?
    Yes — and it may be especially important for this group. The NIH and ACSM both recommend resistance training with progressive overload for adults over 50 to preserve muscle mass (which naturally declines with age) and maintain bone density. The key is starting conservatively, prioritizing form, and working with a fitness professional if you have any existing health conditions.

    Can I apply progressive overload to cardio training?
    Definitely. For running, you might increase weekly mileage by no more than 10% per week (a widely accepted guideline in endurance coaching). For cycling, you can increase resistance or duration. For swimming, add laps or reduce rest intervals between sets. The same logic applies: give your cardiovascular system a slightly greater challenge over time to keep improving.

    Start Small, Stay Consistent, Go Further Than You Think

    Progressive overload isn’t about grinding yourself into the ground every session. It’s about being intentional — showing up, tracking what you do, and nudging the difficulty forward in small, sustainable steps.

    The people who make the most impressive fitness transformations aren’t the ones who go hardest in January. They’re the ones who are still training in August, doing just a little more than they did last month.

    Start where you are. Log your first session today. Pick one variable to improve next week. That’s the whole system — and it works.

    Your body is built to adapt, grow, and get stronger. Give it a reason to keep doing exactly that.


    Wellness Disclaimer: This article is for informational and educational purposes only. The content is not intended to replace professional medical, nutritional, or fitness advice. Always consult a qualified healthcare provider, registered dietitian, or certified fitness professional before starting a new health program or making significant changes to your lifestyle.

    Author Line: Content reviewed by our wellness editorial team, with references to peer-reviewed research and guidelines from leading health organizations including the American College of Sports Medicine, Academy of Nutrition and Dietetics, Harvard Health Publishing, and the National Institutes of Health.

  • Body Recomposition: Lose Fat and Gain Muscle Together

    Body Recomposition: Lose Fat and Gain Muscle Together

    You’ve been working out consistently, eating reasonably well — and yet the scale barely moves. Sound familiar? Body recomposition might be exactly what you’ve been missing.

    Here’s a number that might surprise you: according to research published in the Journal of Strength and Conditioning Research, individuals who followed a structured resistance training program combined with adequate protein intake were able to simultaneously reduce body fat and increase lean muscle mass — even without a dramatic caloric deficit. That’s not magic. That’s body recomposition.

    Most people assume you have to choose: either lose fat or build muscle. The fitness world has spent decades reinforcing this idea with bulking and cutting cycles, strict calorie phases, and complicated periodization plans. But the science tells a more nuanced story — one that’s actually more encouraging for the average person trying to look and feel better.

    In this guide, you’ll learn what body recomposition really means, how it works at a physiological level, who it’s best suited for, and exactly how to structure your training and nutrition to make it happen. No gimmicks. Just a clear, evidence-backed roadmap.

    Why Body Recomposition Matters More Than You Think

    For years, the dominant model in fitness was simple: eat in a caloric surplus to build muscle, then eat in a deficit to lose fat. Repeat. This approach works — but it’s not the only way, and for many people, it’s not even the best way.

    Body recomposition — often called "recomp" — refers to the simultaneous process of reducing fat mass while increasing or maintaining lean muscle mass. It changes your body composition without necessarily changing your body weight significantly. That’s why the scale can be a misleading tool here.

    According to the American College of Sports Medicine (ACSM), body composition — the ratio of fat mass to lean mass — is a more meaningful health marker than body weight alone. Carrying excess fat, particularly visceral fat around the abdomen, is associated with increased risk of metabolic disease, cardiovascular issues, and chronic inflammation, regardless of what the scale says.

    Improving your body composition has real-world effects you’ll notice: clothes fit differently, you feel stronger during daily activities, your energy levels tend to stabilize, and functional performance improves. These outcomes matter whether you’re 28 or 58.

    The key insight is this — recomposition is most achievable for people who are new to resistance training, returning after a break, carrying moderate body fat, or eating in a slight deficit with high protein intake. If that describes you, you’re in a great position to make this work.

    The Science Behind How Recomposition Actually Works

    Here’s the core question: how can the body build muscle (an anabolic process requiring energy) and burn fat (a catabolic process that releases energy) at the same time? The answer lies in how your body partitions and uses energy.

    Fat tissue is essentially stored energy. When you train with resistance and eat enough protein, your body can use that stored fat as fuel for the muscle-building process — especially when you’re eating at or near your maintenance calorie level. This is metabolic multitasking, and it’s real.

    A landmark study published in the American Journal of Clinical Nutrition found that participants who followed a high-protein diet (approximately 2.4 grams per kilogram of body weight) while performing resistance training in a caloric deficit actually gained lean mass while losing fat simultaneously. The protein served as a protective signal — preserving and stimulating muscle tissue even as the body shed fat stores.

    One major myth to bust here: you don’t need to be in a caloric surplus to build muscle. While a surplus does accelerate hypertrophy in experienced lifters, beginners and intermediate trainees respond robustly to resistance training stimulus even without extra calories — provided protein intake is sufficient.

    Another key factor is something called muscle protein synthesis (MPS) — the cellular process by which the body repairs and builds muscle fibers after exercise. Resistance training activates MPS, and adequate dietary protein keeps that process running efficiently. The NIH notes that this response is particularly strong in individuals who are new to structured training or returning after a period of inactivity.

    The hormonal environment also plays a role. Resistance training naturally supports testosterone and growth hormone output, both of which facilitate fat oxidation and muscle maintenance. Pair that with quality sleep — and if you want to explore that connection more, check out our guide on Sleep and Weight Gain: The Hidden Link You Can’t Ignore — and your body’s hormonal conditions become much more favorable for recomp.

    How to Get Started: A Practical Recomposition Plan

    Body recomposition isn’t one program — it’s a strategy built on a few non-negotiable pillars. Here’s how to structure your approach based on your current fitness level.

    Step 1: Prioritize resistance training 3-4 days per week
    Compound movements — squats, deadlifts, rows, presses — recruit the most muscle tissue and generate the strongest hormonal response. If you’re a beginner, a full-body 3-day program (Monday, Wednesday, Friday) is ideal. Intermediate lifters can shift to an upper/lower split 4 days per week.

    Step 2: Set your calorie target near maintenance
    For recomposition, you’re not aggressively cutting calories. Aim for maintenance calories or a modest deficit of 200-300 calories per day. A larger deficit tends to impair muscle protein synthesis and leaves you fatigued during training. Use a TDEE (Total Daily Energy Expenditure) calculator as your starting point.

    Step 3: Dial in your protein intake
    This is the most critical nutrition variable. Target 0.7 to 1 gram of protein per pound of body weight daily (roughly 1.6 to 2.2 grams per kilogram). Spread it across 3-4 meals to maximize MPS. For more on this, our Optimal Protein Intake: Your Science-Backed Guide has everything you need.

    Step 4: Add light cardio strategically
    2-3 sessions of low-to-moderate cardio per week (20-30 minutes of brisk walking, cycling, or incline treadmill) supports fat loss without eating into your recovery. Avoid excessive cardio that competes with your resistance training adaptations.

    Step 5 (Intermediate): Apply progressive overload
    Increase weights, reps, or sets every 1-2 weeks. Without this progressive challenge, your muscles adapt and stop growing. Keep a training log — even a simple one on your phone — to track progress session by session.

    Common Mistakes That Sabotage Your Recomposition Progress

    Body recomposition is achievable, but there are a handful of very common errors that stall progress — and they’re easy to make, even with good intentions.

    Mistake 1: Cutting calories too aggressively
    This is the most frequent pitfall. When you drop calories too low (under 1,400-1,500 for most adults), your body prioritizes survival — breaking down muscle for fuel and slowing metabolic rate. The result? You lose muscle along with fat, and the recomposition effect disappears. Fix: keep your deficit modest, around 200-300 calories below maintenance.

    Mistake 2: Neglecting protein intake
    Many people trying to eat "lighter" undercut their protein without realizing it. Eating salads and cutting back on meat sounds healthy, but without adequate protein, your muscles don’t have the building blocks they need. Fix: track protein for at least two weeks to see where you actually land, then adjust.

    Mistake 3: Relying only on cardio
    Cardio burns calories, but it doesn’t build the lean mass that reshapes your body. Many people who lose weight through cardio alone end up "skinny fat" — lower weight, but still soft without muscular definition. Fix: make resistance training the foundation, and use cardio as a complement.

    Mistake 4: Measuring success only on the scale
    During recomp, muscle and fat can shift simultaneously, leaving your weight relatively stable. This is actually success — but it looks like failure if you’re only watching the number. Fix: take monthly progress photos, track how clothes fit, and measure body parts (waist, hips, arms) to get the full picture.

    Mistake 5: Skipping recovery and sleep
    Muscle is not built during workouts — it’s built during rest. Poor sleep spikes cortisol, suppresses anabolic hormones, and increases fat storage. According to the National Sleep Foundation, adults need 7-9 hours per night for optimal physiological recovery. Treat sleep like a training variable, because it is one.

    What to Eat to Support Body Recomposition

    Recomposition nutrition doesn’t require perfection, but it does require intention. Here’s what to focus on, according to the Academy of Nutrition and Dietetics and the USDA Dietary Guidelines.

    Lean protein sources (every meal, every day):

    • Chicken breast, turkey, lean beef (4-6 oz per meal)
    • Eggs and egg whites (2-4 whole eggs plus whites as needed)
    • Greek yogurt (plain, 3/4 to 1 cup)
    • Cottage cheese (1/2 to 1 cup)
    • Canned tuna or salmon (3-4 oz)
    • Tofu, tempeh, or edamame (for plant-based eaters)

    Complex carbohydrates (fuel your training without blood sugar spikes):

    • Oats, sweet potatoes, brown rice, quinoa (1/2 to 1 cup per serving)
    • Fruits like berries, apples, and bananas — especially around workouts
    • Legumes: lentils, black beans, chickpeas (also contribute protein)

    Healthy fats (don’t cut these out):

    • Avocado (1/4 to 1/2 per day), olive oil (1-2 tablespoons), nuts (small handful)
    • Fatty fish like salmon or mackerel 2-3 times per week for omega-3s

    What to reduce (not eliminate):
    Ultra-processed foods, refined sugars, and alcohol. These add calories without meaningful nutrients and disrupt recovery. You don’t need to be perfect — but reducing frequency makes a real difference over time.

    Timing matters somewhat, but don’t overcomplicaste it. Prioritize getting protein within 1-2 hours post-workout to support MPS. If you’re looking at how to build an anti-inflammatory eating foundation alongside this, our Anti-Inflammatory Diet: Your Practical Guide to Eating for Wellness pairs well with a recomposition approach.

    How Long Until You See Results — and What to Track

    This is where honesty matters most. Body recomposition is slower than aggressive cutting or bulking. That’s the trade-off — and it’s worth it for most people because the results are sustainable and the process is far less miserable.

    Realistic timelines:

    • Weeks 1-4: Neurological adaptations — you’ll feel stronger and more coordinated before visible changes appear
    • Weeks 4-8: Early muscular definition may begin to emerge; energy levels often improve noticeably
    • Months 3-6: Meaningful visible changes in body composition for most consistent practitioners
    • 6-12 months: Significant transformation for those who stay consistent with training and nutrition

    Results vary significantly depending on your starting point, age, hormonal profile, training history, and consistency. Beginners will see faster changes than experienced lifters. Women may progress at a different rate than men due to hormonal differences — but both respond very well to this approach.

    Metrics to track:

    • Monthly progress photos (same lighting, same time of day)
    • Waist and hip circumference measurements
    • Strength benchmarks (how much you can lift for key exercises)
    • Energy levels and sleep quality (subjective, but meaningful)
    • Body fat percentage via DEXA scan or skinfold calipers if available

    If you’ve been consistent for 3 months with no measurable progress on any of these metrics, it’s worth reassessing your protein intake, caloric target, training program, and sleep quality — or consulting a registered dietitian or certified personal trainer for a personalized evaluation.

    Frequently Asked Questions

    Can you really lose fat and gain muscle at the same time?
    Yes — with important caveats. Body recomposition is most effective for beginners, people returning to training after a break, and those carrying moderate body fat. Highly trained athletes with low body fat will find it much more difficult, but for the majority of health-conscious adults, simultaneous fat loss and muscle gain is absolutely achievable with the right training and nutrition approach.

    How important is protein timing for recomposition?
    Post-workout protein within 1-2 hours does support muscle protein synthesis, but research suggests total daily protein intake matters far more than precise timing. According to findings reviewed by the International Society of Sports Nutrition, spreading protein across 3-4 meals throughout the day is more important than obsessing over a 30-minute post-workout window.

    Will cardio hurt my muscle gains during recomp?
    Moderate cardio (2-3 sessions per week at low-to-moderate intensity) generally supports body recomposition by increasing the caloric deficit without significantly impairing recovery. Excessive high-intensity cardio 5-6 days per week can interfere with muscle repair. The key is keeping cardio complementary to your resistance training — not competing with it.

    Is body recomposition possible for people over 40 or 50?
    Absolutely. While hormonal changes (lower testosterone in men, estrogen shifts in women post-menopause) do affect the rate of muscle building, research consistently shows that resistance training stimulates lean mass gains in adults well into their 60s and 70s. Protein needs may actually be slightly higher for older adults — some research suggests 1.2 grams per kilogram or more — making adequate dietary protein even more critical.

    Do I need supplements for body recomposition?
    No supplement is required. That said, creatine monohydrate has strong evidence supporting its role in strength and lean mass gains when combined with resistance training, according to multiple meta-analyses. A whey or plant-based protein powder can help you hit daily protein targets conveniently. Everything else in the supplement market has far weaker evidence.

    Your Next Step Starts Today

    Body recomposition isn’t a shortcut — it’s a smarter, more sustainable approach to changing how your body looks and performs. You don’t need to choose between losing fat and building muscle. You need consistency, adequate protein, progressive resistance training, and the patience to let the process unfold over months, not weeks.

    The scale may not move much. That’s okay — and it’s actually a sign things are working. Trust the non-scale metrics: how you feel during workouts, how clothes fit, how your energy holds up through the day.

    Pick one action from this guide and implement it today. Start tracking your protein. Add one more lifting session this week. Take your first progress photo. Small, consistent steps are what this process is built on — and they add up to real, lasting change.

    This article is for informational and educational purposes only. The content is not intended to replace professional medical, nutritional, or fitness advice. Always consult a qualified healthcare provider, registered dietitian, or certified fitness professional before starting a new health program or making significant changes to your lifestyle.

    Content reviewed by our wellness editorial team, with references to peer-reviewed research and guidelines from leading health organizations.

  • Strength Training for Beginners: The Complete Starter Guide

    Strength Training for Beginners: The Complete Starter Guide

    Strength Training for Beginners: The Complete Starter Guide

    You don’t need to be an athlete to start lifting — you just need to know where to begin without hurting yourself or wasting time.

    Picture this: you’ve decided to finally get into strength training. You walk into the gym, see rows of barbells, cable machines, and people who look like they’ve been lifting since kindergarten — and suddenly you have no idea what you’re doing. So you either wander aimlessly or walk right back out. Sound familiar?

    Here’s the truth: strength training is one of the most powerful tools available for improving your health, energy, body composition, and even mental well-being. But most beginners either start too hard and burn out, or never start at all because the learning curve feels overwhelming.

    This guide is designed to change that. Whether you’ve never touched a dumbbell or you tried once and gave up, you’ll walk away knowing exactly how strength training works, how to start safely, what mistakes to avoid, and what realistic progress looks like. No gym intimidation. No broscience. Just practical, evidence-based guidance you can actually use.

    Why Strength Training Matters More Than You Think

    Most people associate strength training with bodybuilders or athletes. But the science tells a very different story — and it’s one that applies directly to your everyday health.

    According to the American College of Sports Medicine (ACSM), resistance training improves muscular strength and endurance, body composition, bone density, insulin sensitivity, and cardiovascular health. In fact, a landmark meta-analysis published in the British Journal of Sports Medicine found that regular muscle-strengthening activity was associated with a 10–17% reduction in all-cause mortality, cardiovascular disease, and cancer risk.

    Beyond the numbers, strength training changes how you feel on a daily basis. You carry groceries without strain. You climb stairs without losing your breath. You sit at your desk with better posture. These aren’t small wins — they compound over time into a significantly higher quality of life.

    Here’s the detail most people miss: after age 30, adults lose roughly 3–8% of their muscle mass per decade — a process called sarcopenia. Strength training is one of the only evidence-backed ways to slow or reverse this decline. If you’re between 25 and 60, the best time to start was yesterday. The second best time is today.

    How Strength Training Actually Works

    Let’s bust the biggest myth right now: lifting weights doesn’t automatically make you bulky. Getting significantly larger muscles requires a very specific combination of training volume, caloric surplus, hormonal environment, and years of consistent work. For most adults — especially women — the realistic outcome of regular strength training is a leaner, more toned appearance with improved functional capacity.

    So what actually happens when you lift? When you perform resistance exercise, you create microscopic tears in your muscle fibers. During rest and recovery, your body repairs those fibers and builds them back slightly stronger through a process called muscle protein synthesis. Over time, this cycle of stress and adaptation leads to measurable gains in strength and muscle tissue.

    A review published in the Journal of Strength and Conditioning Research confirmed that training frequency, progressive overload (gradually increasing the challenge), and adequate protein intake are the three most critical variables for beginner gains. You don’t need fancy equipment or complex programming — you need consistency and intentional progression.

    One more important point: strength gains happen faster than muscle size gains. In your first few weeks, most of your progress is neurological — your brain is learning to recruit muscle fibers more efficiently. This is why beginners often feel significantly stronger before they see major visual changes. Don’t mistake early progress for a plateau. It’s the foundation being built.

    How to Get Started: Practical Steps for Every Level

    The biggest mistake beginners make is choosing a program that’s too complex too soon. Start simple. Build the habit first, then layer in complexity.

    Step 1 — Choose your training frequency. For beginners, 2–3 sessions per week is optimal. This gives your muscles enough stimulus to adapt while leaving adequate recovery time. The ACSM recommends at least two days of muscle-strengthening activity per week for general health.

    Step 2 — Master the foundational movements first. Before worrying about weight, learn these patterns:

    • Squat pattern — goblet squat, bodyweight squat
    • Hip hinge — Romanian deadlift, glute bridge
    • Push — push-up, dumbbell chest press
    • Pull — dumbbell row, lat pulldown
    • Carry — farmer’s carry, suitcase carry

    These five movement patterns cover nearly every major muscle group and form the backbone of any solid beginner program.

    Step 3 — Start with a full-body routine. For beginners, training each muscle group 2–3 times per week in full-body sessions outperforms body-part splits (like "chest day" or "leg day") in terms of early strength and muscle development, according to research in the Journal of Strength and Conditioning Research.

    For beginners (0–3 months): 2–3 sets of 10–15 reps per exercise, focusing on form. Rest 60–90 seconds between sets.

    For intermediate lifters (3–12 months): 3–4 sets of 6–12 reps with progressive overload. Introduce more exercise variety and shorter rest periods.

    For advanced beginners (12+ months): Consider periodization models, including heavier lifting phases (3–6 reps) and deload weeks to prevent overtraining.

    Step 4 — Track your workouts. Write down what you lifted, how many reps, and how it felt. This simple habit makes progressive overload concrete and keeps you accountable.

    Common Mistakes That Sabotage Your Results

    Most beginners hit a wall early — not because they lack potential, but because they make a handful of very predictable errors. Here’s what to watch for:

    Mistake #1: Skipping the warm-up. Jumping straight into heavy lifts with cold muscles increases injury risk significantly. A proper warm-up — 5 minutes of light cardio followed by dynamic stretches and light warm-up sets — increases blood flow to working muscles and prepares your joints. It doesn’t need to be long. It needs to happen.

    Mistake #2: Going too heavy, too fast. Ego lifting is real, and it leads to broken form, joint pain, and discouragement. If you can’t complete a rep with controlled movement from start to finish, the weight is too heavy. A study from Harvard Health Publishing noted that most beginner injuries in weight training stem from using excessive load before movement patterns are established. Start lighter than you think you need to. You can always go up.

    Mistake #3: Not eating enough protein. You can’t build muscle on air. The Academy of Nutrition and Dietetics recommends 1.2–2.0 grams of protein per kilogram of body weight per day for active individuals. For a 150-pound person, that’s roughly 82–136 grams of protein per day. Most beginners dramatically undereat protein and then wonder why they’re not gaining strength.

    Mistake #4: Neglecting rest and recovery. Your muscles don’t grow in the gym — they grow during recovery. Consistently training the same muscle groups without adequate rest (48–72 hours) can lead to overuse injuries and stalled progress. Rest days aren’t lazy. They’re part of the program.

    Mistake #5: Doing too much, too soon. Starting with five days a week, an hour each session, is a fast track to burnout. Two solid 30–45 minute sessions per week, done consistently for three months, will produce far better results than an intense two-week sprint followed by complete abandonment.

    What to Eat to Support Your Strength Training

    Nutrition doesn’t need to be complicated, but it does need to be intentional. Strength training creates a demand your body wasn’t used to — and you need to feed that demand appropriately.

    Protein: As noted above, aim for 1.2–2.0 g/kg of body weight daily. High-quality sources include chicken breast (26g per 3 oz), Greek yogurt (15–20g per cup), eggs (6g each), canned tuna (20g per 3 oz), legumes (15g per cup), and cottage cheese (25g per cup). Spread your intake across meals rather than loading it all into one sitting — research in the Journal of Nutrition suggests that muscle protein synthesis is maximized when protein is distributed evenly through the day.

    Carbohydrates: Despite the low-carb trend, carbs are your primary fuel source for strength training. Complex carbs — oats, sweet potatoes, brown rice, quinoa, whole grain bread — provide sustained energy for your workouts and replenish glycogen stores afterward. The USDA Dietary Guidelines recommend that 45–65% of total calories come from carbohydrates for most active adults.

    Fats: Don’t fear healthy fats. Avocado, olive oil, nuts, and fatty fish support hormonal health — including testosterone and estrogen balance, which directly impacts muscle development. Aim for 20–35% of daily calories from fat, with an emphasis on unsaturated sources.

    Timing: Consuming protein and carbohydrates within 30–60 minutes after your workout supports recovery and muscle protein synthesis. This doesn’t have to be elaborate — a Greek yogurt with fruit, a protein shake with a banana, or eggs on toast all qualify.

    Hydration: Even mild dehydration impairs strength performance. Aim for at least half your body weight in ounces of water per day, more on training days. If you’re 160 pounds, that’s a minimum of 80 ounces — roughly 10 cups.

    How Long Until You See Results — and What to Track

    Let’s be honest about timelines, because unrealistic expectations are one of the top reasons people quit.

    In the first 2–4 weeks, most beginners notice improved mood, better energy, and slightly less soreness as their body adapts. Strength gains — the ability to lift heavier — often begin appearing within 3–4 weeks due to neurological adaptation.

    Visible changes in body composition — reduced fat, more defined muscle — typically become noticeable at 6–12 weeks with consistent training and appropriate nutrition. Results vary significantly based on starting fitness level, sleep quality, diet adherence, genetics, and training consistency.

    According to Mayo Clinic, most beginners can expect measurable improvements in strength within one month, with more substantial body composition changes appearing at the 3-month mark when consistency is maintained.

    What to track:

    • Workout log — weights lifted, sets, reps
    • Energy levels before and after sessions
    • How clothes fit (more reliable short-term than scale weight)
    • Sleep quality (training improves it significantly for most people)
    • Progress photos every 4 weeks — changes are gradual but real

    If you’ve been training consistently for 3 months and see zero results, that’s a signal to reassess: Are you sleeping enough? Is your protein intake adequate? Are you progressively increasing weight? Consider consulting a certified personal trainer or registered dietitian for a personalized evaluation.

    Frequently Asked Questions

    Q: Can I start strength training at home without any equipment?
    Absolutely. Bodyweight training — push-ups, squats, lunges, glute bridges, planks — builds real strength, especially for beginners. Once you can perform 3 sets of 15–20 reps of most exercises with good form, you’ll benefit from adding external resistance like dumbbells or resistance bands.

    Q: How sore should I be after a workout?
    Mild to moderate soreness (called DOMS — delayed onset muscle soreness) 24–48 hours after training is normal and expected, especially early on. Sharp, joint-level pain during or immediately after exercise is not normal and warrants attention. If soreness is severe enough to limit movement, you likely did too much volume too soon — scale back next session.

    Q: Do I need to take supplements to see results?
    No. Whole food nutrition covers the needs of most beginners effectively. That said, protein powder can be a convenient tool if you’re struggling to meet protein targets through food alone. Creatine monohydrate is one of the most well-researched and safe performance supplements, with strong evidence for supporting strength gains — but it’s entirely optional. Always consult a healthcare provider before adding supplements.

    Q: Is strength training safe for people over 50?
    Not only is it safe — it’s highly recommended. Research published in JAMA Internal Medicine found that resistance training significantly reduces fall risk, improves bone density, and enhances functional independence in adults over 50. Start with lighter loads, prioritize form, and consider working with a certified trainer if you’re new to exercise or have any joint concerns.

    Q: How do I know when to increase the weight?
    A simple rule: when you can complete all prescribed sets and reps with good form and the last 2–3 reps no longer feel challenging, it’s time to increase weight by 5–10%. This is the principle of progressive overload — the engine of all strength training progress.

    Your First Step Starts Today

    Strength training doesn’t require a perfect plan, a premium gym membership, or years of experience. It requires starting — imperfectly, but consistently. The research is clear: even modest amounts of resistance training produce meaningful health benefits that compound over time.

    You don’t need to overhaul your life overnight. Pick two days this week. Learn one movement pattern. Do it with intention. Then show up again. That’s the whole formula for the first month.

    Small, repeatable actions — not dramatic efforts — are what actually produce lasting results. The version of you that trains consistently for six months will look back and wish they started sooner. Today is that start.


    Wellness Disclaimer: This article is for informational and educational purposes only. The content is not intended to replace professional medical, nutritional, or fitness advice. Always consult a qualified healthcare provider, registered dietitian, or certified fitness professional before starting a new health program or making significant changes to your lifestyle.

    Content reviewed by our wellness editorial team, with references to peer-reviewed research and guidelines from leading health organizations.