Tag: flexibility training

  • Flexibility Training: The Missing Piece in Your Fitness Routine

    Flexibility Training: The Missing Piece in Your Fitness Routine

    Flexibility Training: The Missing Piece in Your Fitness Routine

    You work hard at the gym, eat well, and get enough sleep — so why does your body still feel tight, stiff, and limited in how it moves?

    If you’ve ever rolled out of bed feeling like a board, struggled to touch your toes, or noticed your hips screaming after a long day at a desk, you already know the frustration. Most adults dedicate serious time to cardio, strength, and even sleep — but flexibility training almost always gets skipped.

    That’s a costly oversight. According to the American College of Sports Medicine (ACSM), flexibility is one of the five core components of physical fitness, right alongside cardiovascular endurance and muscular strength. Yet surveys consistently show it’s the most neglected of the five.

    This guide is here to change that. You’ll learn exactly why flexibility training matters for adults, how it works at a physiological level, what evidence-backed techniques actually deliver results, and how to build a realistic routine — even if you’re starting from zero. Whether you’re 30 or 60, your body is far more adaptable than you think.


    Why Flexibility Training Matters More Than You Think

    Most people associate flexibility with gymnasts or yogis who can fold themselves in half. That mental image makes it easy to dismiss as a niche pursuit. But flexibility training is deeply practical — and its benefits extend far beyond touching your toes.

    As we age, the connective tissue surrounding muscles — fascia, tendons, and ligaments — gradually loses elasticity. This biological shift begins earlier than most people expect. Research published in the Journal of Aging and Physical Activity found measurable declines in joint range of motion starting as early as the mid-30s, particularly in the hips, shoulders, and hamstrings.

    The downstream effects are real: reduced athletic performance, increased injury risk, chronic lower back pain, and compromised posture. The American Physical Therapy Association notes that tight hip flexors — extremely common in adults who sit for extended periods — are a primary driver of low back discomfort in the working population.

    But here’s the encouraging part: flexibility responds to training at any age. Unlike some fitness qualities that plateau quickly, range of motion can improve significantly in adults well into their 60s and 70s with consistent, appropriate training. That’s not anecdotal — it’s backed by controlled research showing meaningful joint mobility improvements in older adults after just 8 to 12 weeks of structured flexibility work.

    In short, flexibility training isn’t a bonus — it’s the scaffolding that allows every other fitness effort to function better.


    The Science Behind How Flexibility Training Works

    There’s a common myth worth busting immediately: flexibility is not just about muscle length. That oversimplification has led millions of people to stretch incorrectly, get frustrated with slow progress, and quit.

    True flexibility is a neuromuscular phenomenon. When you stretch a muscle, your nervous system — not just the tissue itself — determines how far it allows movement. Specialized receptors called muscle spindles detect changes in muscle length and trigger a protective contraction reflex. This is why forcing a stretch rarely works: your nervous system fights back.

    What effective flexibility training actually does is gradually recalibrate that nervous system threshold. Over time, with repeated and controlled exposure to a stretched position, your brain learns to tolerate — and then accept — greater ranges of motion. This is called neural adaptation, and it’s the primary driver of early flexibility gains.

    There are three main types of flexibility training, each with distinct mechanisms:

    • Static stretching: Holding a stretch for 20-60 seconds. Best for long-term flexibility improvements and post-workout recovery.
    • Dynamic stretching: Controlled, rhythmic movement through a range of motion. Ideal as a warm-up to prepare joints and muscles for exercise.
    • PNF (Proprioceptive Neuromuscular Facilitation): A technique alternating between contraction and relaxation of the target muscle. Research published in the Journal of Human Kinetics consistently identifies PNF as the most effective method for acute range-of-motion gains.

    A 2022 review in Sports Medicine confirmed that static stretching performed consistently — at least 3 times per week, for at least 4 weeks — produces significant, lasting improvements in hamstring and hip flexibility in adults across all age groups.

    The downside of static stretching: performing it immediately before high-intensity exercise may temporarily reduce force production. That’s why timing matters — dynamic stretching before, static stretching after.


    How to Get Started: A Practical Flexibility Routine

    You don’t need a yoga mat, a studio, or an hour to start. A targeted 10-15 minute flexibility session, done consistently, delivers real results. Here’s how to build it from the ground up.

    Beginner Level (Weeks 1-4)

    Focus on the major muscle groups most adults neglect: hip flexors, hamstrings, thoracic spine, and shoulders. Hold each stretch for 20-30 seconds, twice per side, and aim for 3 sessions per week.

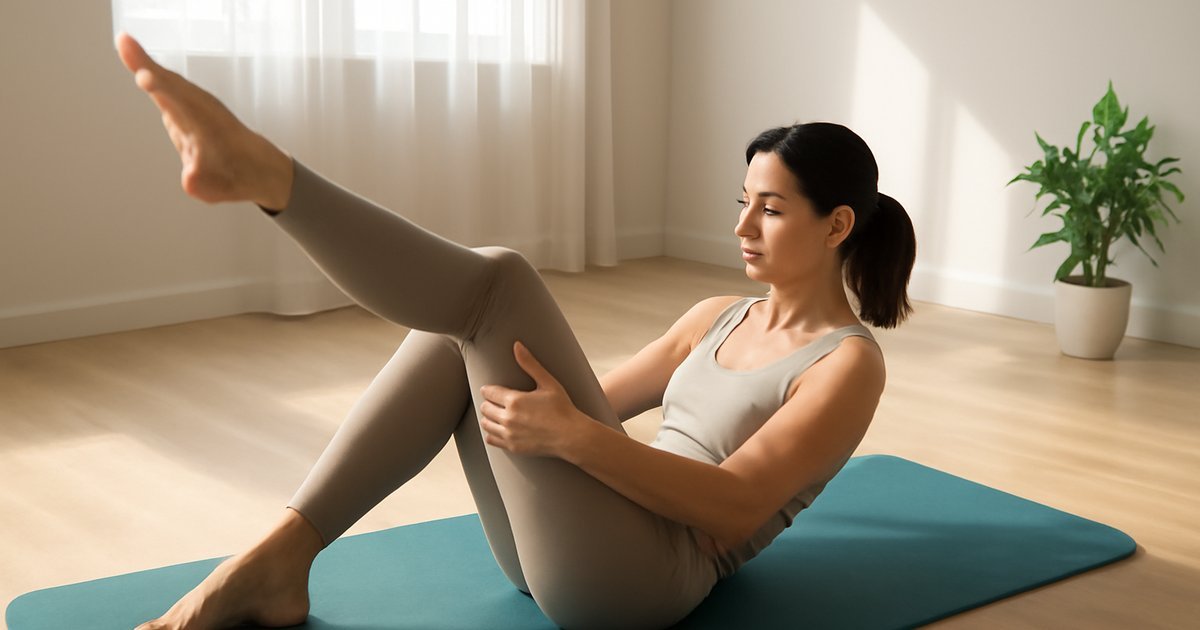
    1. 90/90 Hip Stretch — Sit on the floor with both legs at 90-degree angles. Keeps hips square. Targets hip flexors and external rotators.
    2. Standing Hamstring Stretch — Place one heel on a low surface, hinge forward at the hips (not the waist). Keep the spine neutral.
    3. Chest Opener / Doorway Stretch — Stand in a doorframe, place forearms on the frame, and gently lean forward. Opens the chest and anterior shoulder.
    4. Cat-Cow Spinal Mobilization — On hands and knees, alternate arching and rounding the spine. 8-10 slow repetitions. Excellent for thoracic mobility.
    5. Child’s Pose with Lateral Reach — From kneeling, sit back toward your heels, extend arms forward, then walk hands to each side to target lats and oblique fascia.

    Intermediate Level (Weeks 4-12)

    Increase hold times to 45-60 seconds. Begin incorporating basic PNF techniques: contract the target muscle for 6 seconds, release, then deepen the stretch for 30 seconds. Add ankle and wrist mobility work if needed for your specific activities.

    Advanced Options

    Consider adding resistance-assisted stretching (using a band for deeper hamstring work), loaded stretching (a controlled stretch under light load, shown in research to improve connective tissue adaptability), or working with a certified flexibility or movement specialist for a personalized assessment.

    For adults incorporating strength training alongside flexibility, consider exploring our Barbell Training for Adults guide to understand how to sequence flexibility and strength work effectively. And if you want a low-impact complement to your flexibility sessions, Aqua Fitness Training offers excellent joint-friendly movement that pairs beautifully with regular stretching.


    Common Mistakes That Sabotage Your Flexibility Progress

    Flexibility training looks simple — and that simplicity is exactly why so many people do it wrong. These are the most common errors, and they’re all very easy to fall into.

    1. Stretching through sharp pain.
    There’s a difference between the mild discomfort of a productive stretch and actual pain signaling tissue stress. Pushing aggressively through pain doesn’t accelerate progress — it can cause micro-tears in muscle fibers and trigger a protective tightening response. Aim for a 5-7 on a 10-point discomfort scale, never higher. If something feels sharp or stabbing, back off immediately.

    2. Inconsistency — stretching only after workouts or only when tight.
    Flexibility adapts to consistent stimulus. Stretching once a week produces far less change than three shorter sessions spread through the week. The ACSM recommends flexibility training at least 2-3 times per week for meaningful, lasting results. Building it into your daily routine — even just 10 minutes before bed — is more effective than sporadic long sessions.

    3. Holding the breath.
    This is extremely common and significantly undermines results. Holding your breath activates the sympathetic nervous system (your fight-or-flight response), which actually increases muscular tension — the exact opposite of what you want. Slow, deep breathing during a stretch activates the parasympathetic system, helping muscles relax and allowing greater range of motion. Exhale as you deepen the stretch.

    4. Skipping the warm-up.
    Stretching cold muscles is both less effective and higher risk. Connective tissue is more pliable when warm. Even a 5-minute brisk walk or light movement sequence before stretching noticeably improves the quality and safety of each session.

    5. Ignoring specific tight spots and only doing what’s comfortable.
    Most adults have predictable tightness patterns — hips, hamstrings, chest, and thoracic spine are the usual suspects. But many people default to stretches that already feel okay, avoiding the areas where they actually need work. A brief self-assessment — forward fold, overhead reach, hip rotation — can help identify your personal limitation zones.


    What to Eat to Support Flexibility and Connective Tissue Health

    Nutrition plays a real supporting role in how well your body adapts to flexibility training. You can’t stretch your way past chronic inflammation or poor collagen synthesis — so what you eat matters.

    Collagen and Vitamin C: Collagen is the primary structural protein in tendons and ligaments. Research from the American Journal of Clinical Nutrition found that consuming vitamin C-enriched gelatin or collagen peptides (approximately 15g) 30-60 minutes before a stretching session significantly increased collagen synthesis in connective tissue. Practical sources: bone broth, collagen peptide powder, citrus fruits, bell peppers, and strawberries paired together.

    Anti-inflammatory foods: Chronic low-grade inflammation reduces tissue extensibility and slows recovery. The Academy of Nutrition and Dietetics emphasizes omega-3 fatty acids (fatty fish like salmon, walnuts, flaxseed) and polyphenol-rich foods (berries, leafy greens, olive oil) as foundational for joint and connective tissue health.

    Hydration: Muscle tissue is approximately 75% water. Dehydrated tissue is measurably less elastic and more prone to injury during stretching. The USDA Dietary Guidelines recommend at least 11.5 cups (women) and 15.5 cups (men) of total water daily from all sources. On heavy training days, increase intake accordingly.

    Magnesium: This mineral plays a direct role in muscle relaxation. Research published in the Journal of Nutrition links magnesium deficiency to increased muscle cramping and tension. Good dietary sources include dark leafy greens, pumpkin seeds, black beans, and almonds.

    Avoid excessive processed foods high in refined sugars and trans fats — both promote systemic inflammation and can counteract the tissue-level changes you’re working toward with flexibility training.


    How Long Until You See Results — and What to Track

    Let’s set realistic expectations, because this is where most people get discouraged.

    With consistent flexibility training (3 sessions per week, proper technique, appropriate duration), most adults notice their first measurable improvements within 3-4 weeks. These early gains are primarily neural — your nervous system relaxing its protective tension, not significant structural tissue change.

    Structural changes in connective tissue — the real long-term improvements — develop over 8-12 weeks of sustained training. A 2021 review in PLOS ONE confirmed that 8 weeks of regular static stretching produced statistically significant improvements in hip flexor and hamstring range of motion in untrained adults aged 30-65.

    Results vary significantly depending on your starting point, age, hydration, stress levels, and training consistency. People starting with very limited range of motion often see faster relative improvements early on, while those already moderately flexible may progress more gradually.

    Metrics worth tracking:

    • Sit-and-reach test (a simple hamstring and lower back mobility benchmark)
    • Overhead shoulder reach — can you press both arms overhead without your lower back arching significantly?
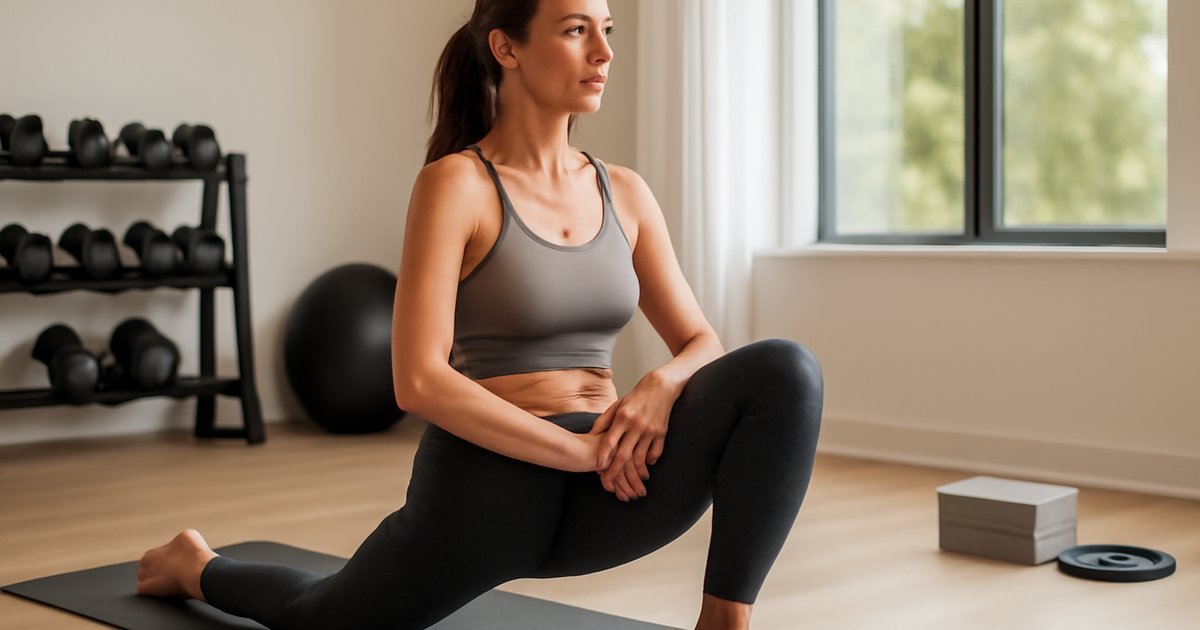
    • Hip flexor length — can you achieve a deep lunge with your rear knee on the floor and torso upright?
    • Subjective daily stiffness — do mornings feel easier? Does sitting for long periods feel less punishing?

    Reassess every 4-6 weeks. If you’re 12 weeks in with no noticeable progress despite consistent effort, consider consulting a physical therapist or certified movement specialist — there may be an underlying mobility restriction or muscular imbalance that requires a targeted approach.


    Frequently Asked Questions

    Is it too late to improve flexibility after 40 or 50?
    Absolutely not. While it’s true that connective tissue becomes less elastic with age, research consistently shows that adults in their 40s, 50s, and 60s can achieve meaningful flexibility improvements with consistent training. It may take slightly longer than in your 20s, but the capacity for adaptation remains. Patience and consistency matter far more than age.

    How long should I hold a stretch to see results?
    The ACSM recommends holding each static stretch for 15-60 seconds. For most adults, 30-45 seconds per repetition, done 2-4 times per muscle group, hits the optimal window. Going longer (over 90 seconds) doesn’t significantly add benefit for most people, and very short holds (under 15 seconds) appear insufficient to produce lasting change.

    Should I stretch every day?
    For general flexibility improvement, 3-5 times per week is ideal. Daily gentle stretching is generally safe and beneficial, especially for target areas of chronic tightness. However, rest days from intense training are still appropriate — on those days, a gentle 5-10 minute session focused on breathing and light movement is plenty.

    Does yoga count as flexibility training?
    Yes, and it’s a highly effective option. Yoga combines static stretching, dynamic movement, breath work, and body awareness in ways that research shows improve flexibility, balance, and psychological well-being. A 2021 study in Evidence-Based Complementary and Alternative Medicine found significant flexibility improvements in adults after 12 weeks of regular yoga practice. It’s especially valuable for people who find traditional stretching routines tedious.

    Can flexibility training help with back pain?
    For many adults, yes — but results vary significantly based on the cause of the pain. Tight hip flexors, hamstrings, and thoracic muscles are frequently implicated in lower back discomfort, and targeted flexibility work can meaningfully reduce symptoms. However, if you have a diagnosed spinal condition, herniated disc, or acute injury, always consult a physician or physical therapist before beginning a flexibility program.


    Your Next Step Starts Today

    Flexibility training isn’t glamorous. It doesn’t burn hundreds of calories, it won’t show up immediately in before-and-after photos, and it rarely makes for exciting gym content. But it quietly makes everything else you do — every workout, every morning, every long day at a desk — feel significantly better.

    You don’t need to commit to an hour-long stretching session. Start with 10 minutes today. Pick three of the beginner stretches from this guide, breathe slowly, and hold each one properly. Do it again tomorrow. That’s how change actually happens — not through a perfect routine, but through small, repeated effort that compounds over weeks and months.

    Your body is more adaptable than you think. Give it the chance to prove it.

    And if you’re building a well-rounded fitness approach, explore our Power Walking for Fitness guide — an excellent low-impact complement to regular flexibility work that supports joint health and cardiovascular endurance simultaneously.


    Wellness Disclaimer: This article is for informational and educational purposes only. The content is not intended to replace professional medical, nutritional, or fitness advice. Always consult a qualified healthcare provider, registered dietitian, or certified fitness professional before starting a new health program or making significant changes to your lifestyle.

    Content reviewed by our wellness editorial team, with references to peer-reviewed research and guidelines from leading health organizations including the American College of Sports Medicine, Academy of Nutrition and Dietetics, and the American Physical Therapy Association.
  • Barre Workout: Build Strength, Flexibility & Lean Muscle

    Barre Workout: Build Strength, Flexibility & Lean Muscle

    Barre Workout: Build Strength, Flexibility & Lean Muscle

    It looks like ballet class — but the results are anything but delicate.

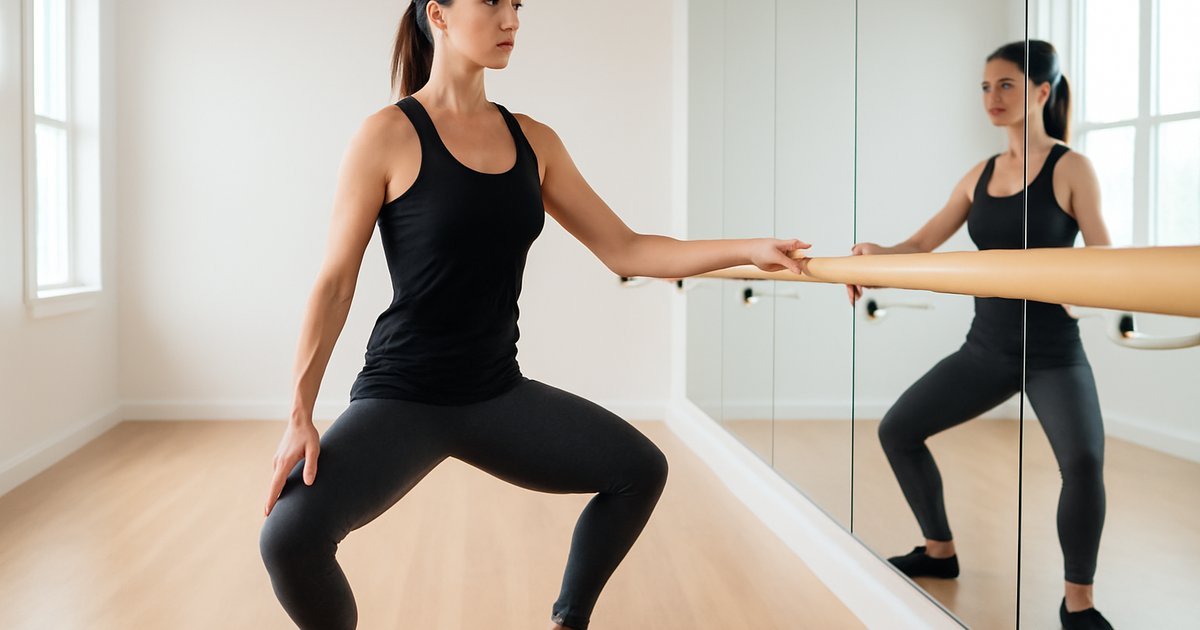
    Picture this: you’re standing at a ballet barre, legs slightly turned out, doing what looks like the tiniest pulse imaginable. Thirty seconds in, your thighs are on fire. A minute later, you’re shaking. And somehow, by the end of the 55-minute class, you feel both completely spent and surprisingly calm.

    That’s the barre workout effect — and it’s been quietly building one of the most loyal fitness followings in adult wellness. Unlike high-impact workouts that leave your joints aching, or heavy lifting sessions that demand long recovery windows, barre training sits in a uniquely effective middle ground. It builds real strength, improves flexibility, sharpens posture, and creates a deep connection between your mind and your muscles.

    If you’ve been curious about barre but assumed it was only for former dancers or younger women, this guide is going to change your mind. We’ll break down what barre actually is, what the science says about its benefits, how to get started safely, and what to realistically expect — no leotard required.

    Why Barre Workout Matters More Than You Think

    Barre training isn’t just a trend. It’s a thoughtfully designed system that addresses several fitness gaps that most adults face — especially those in the 30-to-60 age range.

    Here’s the reality: as we age, we don’t just lose muscle — we lose the smaller stabilizing muscles that support our joints, posture, and movement efficiency. Standard gym routines often neglect these deep muscle groups entirely. Barre, by contrast, directly targets them through isometric holds, small-range movements, and high-repetition sequences that require sustained muscular tension.

    Research published in the Journal of Strength and Conditioning Research has shown that isometric exercise — holding a muscle under tension without changing its length — significantly improves both muscular endurance and joint stability. Barre classes are built around this principle. Every tucked pulse, held plié, and sustained arabesque position is essentially an isometric training stimulus.

    Beyond muscle, barre is notably kind to your joints. The American College of Sports Medicine (ACSM) recommends low-impact exercise as a foundational element of adult fitness programs, particularly for those managing early-stage joint discomfort, bone density concerns, or returning from injury. Barre fits this profile precisely.

    And perhaps most importantly for busy adults: a single barre session addresses strength, flexibility, balance, and mental focus all at once. That’s serious efficiency.

    The Science Behind How Barre Actually Works

    Let’s clear something up right away: barre is not "just stretching" and it’s not a watered-down yoga class. It’s a serious training modality with a distinct physiological mechanism.

    The core science behind barre rests on three principles: muscular fatigue through high repetition, time under tension via isometric holds, and proprioceptive training — your body’s ability to sense its own position in space.

    During a typical barre sequence, you might perform 30 to 60 small pulsing reps at a partial range of motion, immediately followed by a static hold. This combination keeps the target muscle contracted for an extended period, creating deep metabolic fatigue without heavy load. This is why you shake. That trembling isn’t weakness — it’s your muscle fibers being recruited to their limit.

    A common myth is that barre only tones without building strength. That’s not accurate. A study in the Journal of Dance Medicine and Science found that regular barre participants showed measurable improvements in muscular endurance, postural alignment, and hip flexor strength over an 8-week period. These are real, functional gains.

    Barre also involves significant core activation throughout every movement. Maintaining proper form at the barre — neutral pelvis, engaged abdominals, lifted chest — requires continuous deep core work that transfers directly to better posture and reduced lower back discomfort in daily life.

    One more thing: the mind-muscle connection required in barre training is genuinely demanding. You’re not just moving — you’re cueing your body to isolate very specific muscles, which research suggests enhances neuromuscular efficiency over time.

    How to Get Started with Barre Training

    The good news: you don’t need ballet experience, extreme flexibility, or any special equipment to begin. Barre is genuinely beginner-friendly when approached correctly.

    What you actually need:

    • Grip socks (non-negotiable — they prevent slipping on smooth floors)
    • A sturdy chair or countertop if you’re working at home
    • Comfortable workout attire that allows full range of motion
    • Optional: a light set of 1-3 lb hand weights for upper body sequences

    Beginner entry point (weeks 1-3):

    1. Start with 2 sessions per week, 30-45 minutes each
    2. Focus on learning proper form over completing every rep — poor form defeats the purpose
    3. Common beginner sequences: parallel first position squats (plié), standing seat work (glute isolation), forearm plank holds, and upper body work with light weights
    4. Expect muscle soreness in places you haven’t felt before — inner thighs, outer hips, and the seat
    5. Use a mirror if possible to check your alignment

    Intermediate progression (weeks 4-8):

    1. Increase to 3-4 sessions per week
    2. Introduce turned-out positions (first, second position) for added hip external rotator engagement
    3. Add ankle weights (1-2 lbs) to standing leg work
    4. Incorporate floor barre sequences for deeper abdominal and hip work
    5. Pair with one foam rolling session per week for muscle recovery

    Advanced options (beyond 8 weeks):

    • Barre fusion formats that layer in cardio bursts between sequences
    • Adding resistance bands for progressive overload in lower body work
    • Exploring online platform barre programs with structured progression (popular options include The Ness, Barre3, and Pure Barre On Demand)

    Common Mistakes That Sabotage Your Barre Results

    Barre looks deceptively simple — small movements, light or no weights, graceful music. That visual ease is exactly why people make the same handful of mistakes that limit their progress.

    Mistake 1: Rushing through the movements
    Barre’s effectiveness depends entirely on controlled, intentional movement with sustained muscle tension. Speeding through pulsing sequences to "get them done" dissipates the muscular load and dramatically reduces the training stimulus. Fix it: slow down by at least 30%, and focus on squeezing the target muscle through every rep.

    Mistake 2: Gripping the barre too hard
    The barre is a balance tool, not a weight-bearing support. Death-gripping it allows you to cheat the core and hip stabilizers that should be doing the work. Fix it: use just your fingertips for light balance support, keeping your shoulders relaxed and your core engaged.

    Mistake 3: Skipping the stretching segments
    Many beginners treat the stretching portions of class as optional cool-down time. In barre training, those deep static stretches between muscle groups are crucial — they restore muscle length after intense isometric holds and accelerate recovery. Research from the American Council on Exercise confirms that post-exercise static stretching meaningfully reduces delayed-onset muscle soreness. Don’t skip it.

    Mistake 4: Ignoring neutral spine
    A tucked pelvis is a barre cue — but only in specific exercises. Many beginners tuck their pelvis during every movement, which strains the lower back and limits glute activation. Fix it: understand when your instructor calls for a "tuck" versus maintaining a neutral spine, and ask for clarification when in doubt.

    Mistake 5: Expecting instant lean-out results
    Barre improves muscle tone, posture, and endurance — but it is not primarily a fat-loss tool when used alone. This depends on your baseline activity level, nutrition, and frequency. Fix it: pair barre with adequate protein intake and complement it with a cardio modality like incline walking for more comprehensive body composition results.

    What to Eat to Support Your Barre Training

    Barre creates significant muscular demand — especially in smaller stabilizing muscles that aren’t often trained. Supporting that work nutritionally makes a tangible difference in recovery and performance.

    Protein is non-negotiable. The Academy of Nutrition and Dietetics recommends that active adults consume 1.2 to 1.7 grams of protein per kilogram of body weight daily to support muscle repair and development. For a 150-pound adult, that’s roughly 82-115 grams of protein per day. Good sources for barre practitioners: Greek yogurt, eggs, chicken breast, salmon, edamame, cottage cheese, and legumes.

    Pre-class fueling: Eat a small, easily digestible snack 60-90 minutes before class. A banana with almond butter, a small portion of oatmeal with berries, or a hard-boiled egg with a few whole grain crackers works well. Avoid heavy meals — barre requires deep core engagement that heavy digestion actively interferes with.

    Post-class recovery: Within 30-60 minutes after class, consume a meal or snack that combines protein and complex carbohydrates. This supports glycogen replenishment and muscle tissue repair. A smoothie with Greek yogurt, fruit, and a handful of spinach is a simple, effective option.

    Hydration: Barre classes often feel less sweaty than cardio workouts, but you’re still losing fluids. The USDA Dietary Guidelines recommend women consume approximately 2.7 liters (91 oz) and men 3.7 liters (125 oz) of total water daily. Aim for 16-20 oz of water before class and consistent hydration throughout your day.

    Anti-inflammatory foods: Given the isometric muscular demand of barre, incorporating anti-inflammatory foods can support recovery. Think fatty fish (omega-3s), leafy greens, berries, turmeric, and extra-virgin olive oil — all aligned with recommendations from Harvard Health Publishing.

    How Long Until You See Results from Barre?

    Real talk: barre results are real, but they follow a specific timeline that requires patience and consistency.

    Weeks 1-2: You’ll feel results before you see them. Expect significant muscle soreness (especially inner thighs, glutes, and outer hips), improved body awareness, and possibly better posture-consciousness throughout your day.

    Weeks 3-4: Muscle endurance begins to adapt. Sequences that made you shake and tap out early will become more manageable. Balance improves noticeably. Core stability gains become apparent in how you carry yourself.

    Weeks 6-8: This is when visible postural changes typically emerge — straighter spine, more lifted chest, leaner appearance through the torso and seat. Functional strength improvements translate to everyday tasks.

    3+ months: Consistent practitioners commonly report significant improvements in hip mobility, reduced lower back tension, improved overall body composition (results vary significantly based on nutrition and total activity level), and enhanced balance.

    What to track:

    • How long you can hold specific isometric positions before form breaks (a direct endurance marker)
    • Posture changes using side-profile photos monthly
    • Flexibility benchmarks (can you touch your toes? How far?)
    • Subjective energy levels and lower back comfort ratings

    If you’ve been consistent for 10+ weeks without any progress, it’s worth consulting a certified fitness professional to review your form, frequency, and nutritional habits.

    Frequently Asked Questions About Barre Workouts

    Is barre good for weight loss?
    Barre can contribute to weight management as part of a comprehensive approach that includes adequate nutrition and cardiovascular activity. On its own, a typical 55-minute barre class burns approximately 250-400 calories depending on intensity, body composition, and effort level. It’s most effective for improving body composition — particularly muscle tone and posture — rather than rapid weight loss.

    Can men do barre workouts?
    Absolutely. Barre’s benefits — joint stability, core strength, muscular endurance, flexibility, and postural correction — are equally valuable for men. Many male athletes, particularly runners and cyclists, incorporate barre to address hip flexibility and stabilizer muscle deficits. The cultural association with women is a branding artifact, not a physiological reality.

    How does barre compare to Pilates?
    Both share an emphasis on core engagement, controlled movement, and muscular endurance. The key differences: barre is performed standing at a ballet barre with more lower body emphasis and higher rep sequences, while Pilates is primarily mat or reformer-based with a stronger focus on spinal alignment and deep stabilizer work. Many adults benefit from combining both. If you want to explore Pilates further, our complete Pilates guide for adults covers the fundamentals in detail.

    Is barre safe if I have knee or hip issues?
    Barre is generally considered low-impact and joint-friendly, but this depends on your specific condition. Many movements can be modified for knee sensitivity — for example, avoiding deep plié positions and limiting turned-out stances. Always consult your physician or physical therapist before starting if you have a diagnosed joint condition. Let your instructor know about any limitations so they can offer appropriate modifications.

    How often should I do barre to see results?
    Most certified barre instructors and fitness professionals recommend 3-4 sessions per week for optimal results. Fewer than 2 sessions weekly limits adaptation; more than 5 sessions without rest risks overtraining the stabilizing muscles. Results vary significantly based on baseline fitness, nutrition, age, and consistency.

    Your Next Step Starts at the Barre

    Barre training occupies a rare space in the fitness world: it’s accessible enough for true beginners, effective enough for serious athletes, and sustainable enough to actually stick with long-term. That combination is harder to find than it sounds.

    The research supports it. The real-world results speak clearly. And the low injury risk makes it one of the most sensible training additions for adults navigating the realities of aging joints, busy schedules, and the genuine need for both strength and flexibility.

    You don’t need to be graceful. You don’t need experience. You just need grip socks, a chair or countertop, and the willingness to shake a little. Start with two sessions this week — that’s your one action for today. Your body will thank you in ways you didn’t expect.


    Wellness Disclaimer: This article is for informational and educational purposes only. The content is not intended to replace professional medical, nutritional, or fitness advice. Always consult a qualified healthcare provider, registered dietitian, or certified fitness professional before starting a new health program or making significant changes to your lifestyle.

    Content reviewed by our wellness editorial team, with references to peer-reviewed research and guidelines from leading health organizations.

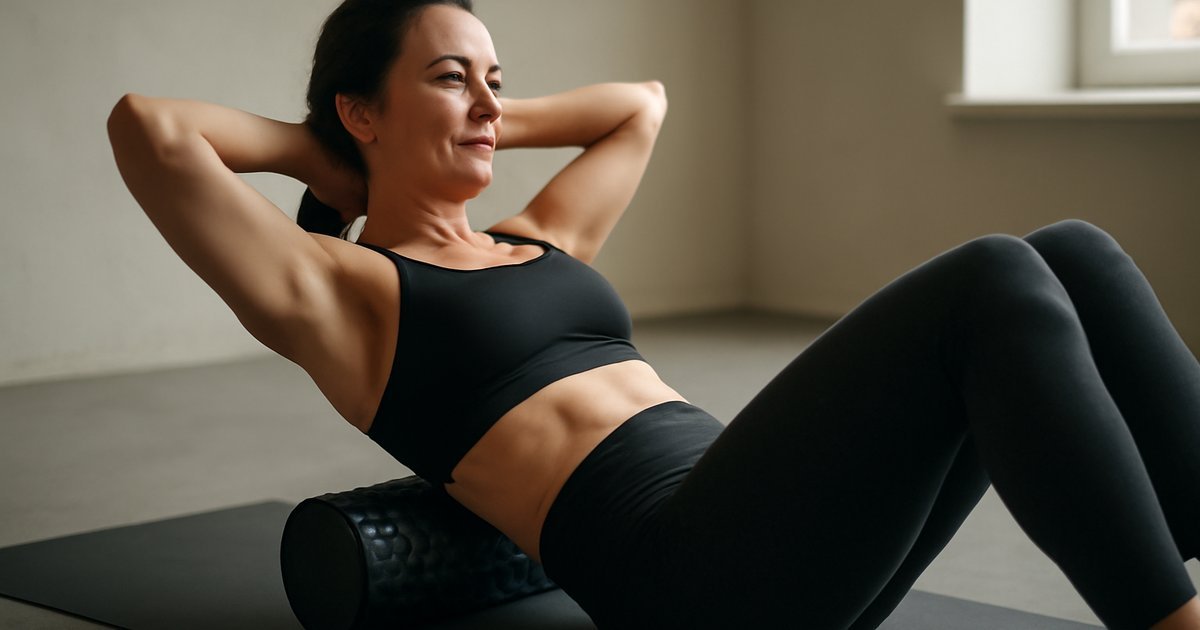
  • Foam Rolling: The Recovery Tool You’re Probably Underusing

    Foam Rolling: The Recovery Tool You’re Probably Underusing

    You finish a hard workout, your muscles are tight, and you walk past the foam roller in the corner — again. Here’s why that might be costing you more than you think.

    Why Foam Rolling Matters More Than You Think

    Most people treat foam rolling like a warm-up afterthought or something they do when a muscle is already screaming. But the evidence tells a more compelling story: consistent foam rolling — done correctly — can meaningfully improve how your body moves, recovers, and performs over time.

    A 2015 review published in the Journal of Athletic Training found that foam rolling after exercise significantly reduced delayed-onset muscle soreness (DOMS) and helped maintain muscle performance in the 24 to 72 hours following intense training. That’s not a minor detail — that’s the difference between a productive training week and a frustrating one spent limping around.

    For adults between 25 and 60 who are juggling work, family, and fitness, recovery isn’t a luxury. It’s what makes your effort sustainable. And foam rolling is one of the most accessible, low-cost tools you can use to support it.

    Think of foam rolling — technically called self-myofascial release (SMR) — as a way to hydrate and mobilize the connective tissue (fascia) that wraps around your muscles. When that tissue gets stiff, sticky, or restricted from sitting too long, training hard, or just everyday stress, your movement suffers. Foam rolling helps restore suppleness to that tissue so your muscles can work the way they’re supposed to.

    According to the American College of Sports Medicine (ACSM), SMR techniques like foam rolling are considered a valid complementary practice for improving flexibility and reducing muscle tension when used consistently. That said, results vary depending on technique, frequency, and individual muscle health — which is exactly what this guide will walk you through.

    The Science Behind How Foam Rolling Actually Works

    There’s a lot of half-baked advice floating around about foam rolling — including the idea that you’re “breaking up scar tissue” or “releasing lactic acid.” Let’s set the record straight.

    Your fascia is a web of connective tissue that surrounds every muscle, bone, nerve, and organ in your body. When it becomes restricted — from inactivity, repetitive movement patterns, or training stress — it can limit your range of motion and contribute to pain or tightness. Foam rolling applies sustained mechanical pressure to the tissue, which appears to stimulate the nervous system and alter the viscoelastic properties of the fascia itself.

    In other words, you’re not breaking anything up. You’re likely triggering a neurological response that tells the muscle to relax, and you’re applying pressure that temporarily changes the hydration and stiffness of the fascial tissue.

    A study published in the Journal of Sports Sciences (2017) found that foam rolling increased range of motion without reducing muscle performance — a key distinction, since static stretching before exercise has been shown to temporarily reduce strength and power output. This makes foam rolling particularly useful as part of a warm-up: it loosens tissue without dulling your muscles before you need them.

    Another common myth: harder pressure always means better results. Research suggests moderate pressure — uncomfortable but not painful — is most effective. Aggressive rolling that causes you to tense up may actually counteract the relaxation response you’re trying to achieve.

    Foam rolling also appears to support circulation and lymphatic flow in the rolled areas, which can contribute to the flushing of metabolic byproducts after exercise. Harvard Health Publishing notes that improved local blood flow plays a role in tissue repair, making post-workout rolling a genuinely practical recovery strategy.

    How to Get Started: Practical Foam Rolling Steps

    Whether you’ve never touched a foam roller or you use one occasionally, here’s a clear, progressive approach to building this habit into your routine.

    Beginner Level

    1. Choose the right roller. Start with a smooth, medium-density roller (not the aggressive textured kind). It gives enough feedback without overwhelming tight tissue.
    2. Target major muscle groups first. Begin with calves, hamstrings, quads, IT band, and upper back. These are the areas most people carry tension in from daily sitting and basic exercise.
    3. Spend 30 to 60 seconds per area. Slowly roll until you find a tender spot, pause on it for 20 to 30 seconds, breathe through the pressure, then move on.
    4. Roll 3 to 4 times per week to start — post-workout or in the evening is ideal for beginners focused on recovery.

    Intermediate Level

    • Add the piriformis (glutes), hip flexors, and thoracic spine (mid-back) — common problem areas for desk workers and runners.
    • Incorporate foam rolling before workouts as well, focusing on the areas you’re about to train. Keep pre-workout sessions under 90 seconds per muscle group.
    • Experiment with denser or textured rollers as your tissue adapts and initial soreness decreases.

    Advanced Level

    • Use targeted tools like lacrosse balls for smaller areas (plantar fascia, pecs, neck base).
    • Combine foam rolling with active movement: pause on a tender spot, then slowly flex and extend the joint to increase the neurological effect.
    • Integrate SMR into both your warm-up and cool-down on heavy training days.

    If you’re looking for complementary low-impact movement practices to pair with foam rolling, Pilates for Adults: Build Strength, Flexibility & Balance is an excellent pairing — both target tissue quality and movement efficiency.

    Common Foam Rolling Mistakes That Sabotage Results

    Foam rolling looks simple — and in many ways, it is. But there are a few patterns that consistently prevent people from getting the most out of it.

    Mistake 1: Rolling Too Fast

    Speed-rolling over your entire leg in 30 seconds doesn’t give your nervous system time to respond. The neurological relaxation effect that makes foam rolling work requires sustained pressure — at least 20 to 30 seconds on a tender point. Slow down. Find the spot. Breathe into it.

    Mistake 2: Rolling the Wrong Areas

    Rolling directly on a joint (like your knee or lower back) is a common and potentially harmful error. You should roll the muscles above and below the knee, not the joint itself. The lower back is also generally not recommended for direct rolling — the lumbar spine lacks the muscular padding of the upper back, and rolling it can increase rather than decrease tension. Target the glutes and thoracic spine instead.

    Mistake 3: Doing It Only When You’re Injured or Sore

    This is the equivalent of only drinking water when you’re already dehydrated. Foam rolling works best as a consistent practice, not a crisis response. Tissue that’s regularly mobilized responds better to training and is less likely to develop chronic tightness. Build it into your weekly routine before you need it.

    Mistake 4: Using Too Much Pressure Too Soon

    If you’re grimacing and holding your breath, the pressure is probably too much. Pain triggers muscular guarding — the opposite of what you want. Start lighter, especially on areas like the IT band or calves, and gradually increase pressure as your tissue adapts over weeks.

    Mistake 5: Ignoring the Upper Body

    Most people only roll their legs. But the thoracic spine, chest, shoulders, and lats accumulate significant tension — especially for anyone who trains their upper body or works at a desk. Rolling these areas can dramatically improve posture and shoulder mobility.

    What to Pair With Foam Rolling for Best Results

    Foam rolling works best as part of a broader recovery and mobility strategy, not as a standalone fix. Here’s what the evidence supports pairing with it:

    • Dynamic stretching (post-roll): After rolling a muscle, a light dynamic stretch of that area can extend the range-of-motion benefits. The ACSM recommends dynamic stretching over static stretching for pre-exercise preparation.
    • Adequate hydration: Fascia is largely water-based tissue. Rolling works better when you’re well-hydrated. The National Academies of Medicine recommends roughly 3.7 liters of total water intake daily for men and 2.7 liters for women — from food and fluids combined.
    • Quality sleep: The National Sleep Foundation notes that growth hormone — critical for muscle repair — is primarily released during deep sleep. No recovery tool replaces consistent, quality rest.
    • Anti-inflammatory nutrition: Foods rich in omega-3 fatty acids, antioxidants, and polyphenols support the repair of exercised tissue. Think fatty fish, berries, leafy greens, and turmeric. The Academy of Nutrition and Dietetics supports anti-inflammatory eating patterns as part of an active lifestyle.

    If you want to explore complementary cardio that keeps inflammation low, Incline Walking: The Low-Impact Workout That Actually Works is worth reading — it’s one of the most recovery-friendly training modalities available.

    How Long Until You See Results — and What to Track

    Managing expectations here is important. Foam rolling is not a dramatic intervention — it’s a cumulative one.

    Most people notice a reduction in post-workout soreness within the first one to two weeks of consistent use. Improved range of motion in problem areas (tight hip flexors, stiff thoracic spine) typically becomes apparent within three to four weeks of rolling three or more times per week.

    The Journal of Athletic Training review mentioned earlier showed measurable DOMS reduction within 48 to 72 hours of a single foam rolling session — but the performance and flexibility benefits are cumulative and require consistent practice over time.

    Here’s what to track:

    • Morning stiffness: How stiff are you when you get out of bed? This should gradually decrease over weeks of consistent rolling.
    • Range of motion checkpoints: Can you touch your toes more easily? Does your overhead press feel less restricted? These are practical markers.
    • Recovery quality: Are you ready to train again faster? Less DOMS after hard sessions is a reliable signal.
    • Pain patterns: Chronic tightness in specific areas (IT band, upper traps, calves) that gradually reduces over time.

    If you’ve been rolling consistently for six weeks and see no improvement in a specific area, consider seeing a licensed physical therapist. Some restrictions require hands-on assessment and targeted intervention beyond what self-myofascial release can address.

    For those pairing foam rolling with a dumbbell-based strength program, Dumbbell Training: The Complete Guide for Adults offers a structured approach that complements this recovery practice well.

    Frequently Asked Questions About Foam Rolling

    Is foam rolling the same as a massage?

    Not exactly, but there are meaningful overlaps. Both apply pressure to soft tissue and can trigger a relaxation response in the muscle. The difference is that a trained massage therapist can identify and address specific restrictions with much greater precision. Foam rolling is a practical, everyday self-care tool — not a replacement for therapeutic bodywork when it’s needed.

    Can I foam roll every day?

    Yes, for most people daily foam rolling is safe and beneficial. Unlike heavy strength training, it doesn’t break down tissue in a way that requires recovery days. Many athletes and active adults roll daily as part of their morning or evening routine. If you experience increased soreness or discomfort from daily rolling, reduce frequency and pressure.

    Should I foam roll before or after exercise?

    Both have value, and the research supports using it at either end of a session. Pre-workout rolling (under 90 seconds per area) helps prepare tissue without reducing muscle performance. Post-workout rolling (up to 2 minutes per area) is more focused on recovery and reducing DOMS. Many people benefit most from including both — brief rolling before and more focused rolling after.

    Does foam rolling actually break up scar tissue?

    This is a persistent myth. Foam rolling does not break up scar tissue or “adhesions” in any clinically proven way. What it does do is stimulate a neurological response that encourages muscle relaxation and temporarily alters the stiffness of fascial tissue. The effect is real and useful — it’s just different from what many people believe is happening.

    Which foam roller should I buy?

    For beginners, a smooth, medium-density roller (standard 6-inch diameter) is the best starting point. Once your tissue adapts — usually after four to six weeks — you can explore textured or higher-density options. Vibrating foam rollers have shown some promise in research for acute pain relief, but the evidence isn’t strong enough to justify the higher cost for most people starting out.

    Your Next Step Starts on the Floor

    Foam rolling won’t transform your fitness overnight — but done consistently, it can meaningfully change how your body feels and performs day to day. Less morning stiffness, faster recovery between sessions, better range of motion, and fewer nagging aches are all realistic outcomes for someone who makes this a regular habit.

    You don’t need to commit to a 30-minute rolling routine. Start with five to ten minutes three times a week, focusing on the areas that feel tightest or that you train most. Stay consistent, roll slowly, and pay attention to how your body responds over time.

    The foam roller in the corner of your gym or living room is one of the simplest, most underused tools in your wellness toolkit. Today is a good day to stop walking past it.


    Wellness Disclaimer: This article is for informational and educational purposes only. The content is not intended to replace professional medical, nutritional, or fitness advice. Always consult a qualified healthcare provider, registered dietitian, or certified fitness professional before starting a new health program or making significant changes to your lifestyle.

    Content reviewed by our wellness editorial team, with references to peer-reviewed research and guidelines from leading health organizations.

  • Pilates for Adults: Build Strength, Flexibility & Balance

    Pilates for Adults: Build Strength, Flexibility & Balance

    You don’t have to be a dancer or a yoga devotee to benefit from Pilates — and once you understand what it actually does to your body, you may wonder why you waited so long to try it.

    Introduction

    Here’s a scenario a lot of people recognize: you’re not out of shape exactly, but something feels off. Your lower back aches after long days at the desk. Your posture has quietly collapsed. You feel stiff in the mornings, and no matter how many crunches you do, your core just doesn’t feel stable or strong.

    That’s where Pilates comes in — and it’s not what most people think. Pilates isn’t just stretching. It isn’t just for women or dancers. And it’s far from easy. According to the American College of Sports Medicine, Pilates is a legitimate form of resistance training that improves muscular endurance, core stability, and functional movement for adults across all fitness levels.

    In this guide, you’ll learn exactly how Pilates works, what the research says about its benefits, how to start safely, and what mistakes to avoid. Whether you’ve never set foot on a mat or you’re looking to deepen an existing practice, this is the practical starting point you’ve been looking for.


    Why Pilates Matters More Than You Think

    Most adults lose somewhere between 3 and 8 percent of their muscle mass per decade after age 30, according to research published in the Journal of Aging and Physical Activity. That gradual loss affects posture, balance, joint stability, and even metabolic health. The solution isn’t always lifting heavier — it’s building smarter, more intentional movement patterns.

    Pilates was originally developed by Joseph Pilates in the early 20th century as a rehabilitation system — what he called “Contrology” — for injured dancers and soldiers. Decades later, the method has been refined and validated by physical therapists, sports medicine professionals, and exercise scientists worldwide.

    What makes it uniquely valuable for busy adults is that it targets the deep stabilizing muscles that conventional gym workouts tend to ignore: the transverse abdominis, the multifidus, the pelvic floor, and the muscles around the shoulder girdle. These are the muscles that hold your spine upright, protect your joints, and allow you to move efficiently in daily life.

    A 2015 meta-analysis published in the Journal of Bodywork and Movement Therapies found that consistent Pilates practice significantly improved core strength, flexibility, and balance in healthy adults, with effects that showed up in as little as eight weeks of regular practice. That’s not a long time to see real, functional change in your body.

    The bottom line: Pilates isn’t a "soft" workout. It’s a precision-based training method that builds the kind of strength that actually improves how you feel and move every single day.


    The Science Behind How Pilates Works

    At its core — literally — Pilates is built around a concept called the "powerhouse." This refers to the group of muscles spanning the lower torso: the abdominals, lower back, hips, and glutes. Every Pilates movement is initiated from this center, which trains your nervous system to recruit deep stabilizers before larger muscle groups take over.

    This is fundamentally different from how most people exercise. In a standard gym session, you might use your larger, more dominant muscles — your quads, your upper traps, your hip flexors — while the smaller stabilizers remain underworked. Over time, this imbalance contributes to poor posture, joint pain, and movement inefficiency.

    Pilates corrects this by slowing movements down and demanding precise muscle engagement. You can’t cheat your way through a properly cued Pilates exercise. The method incorporates six foundational principles: concentration, control, center, flow, precision, and breath. Each one is designed to make your nervous system work harder than the load itself might suggest.

    Let’s bust a common myth: many people believe Pilates only develops "long, lean muscles" — a phrase repeated so often it’s practically folklore. Muscle shape is largely determined by genetics, not training style. What Pilates actually does is improve neuromuscular coordination, core endurance, joint mobility, and postural alignment. That’s not a marketing claim — it’s physiology.

    Research published in PLOS ONE (2016) demonstrated that Pilates training leads to measurable improvements in proprioception — your body’s sense of its own position in space. Better proprioception means better balance, fewer falls, and more efficient movement patterns across all physical activities. For adults in their 40s and 50s especially, this benefit is significant and underappreciated.

    Pilates also has meaningful implications for back health. The Mayo Clinic notes that low back pain affects up to 80% of adults at some point in their lives, and Pilates-based rehabilitation has become a standard recommendation from physical therapists for chronic lower back pain management. It’s not a cure, but it’s a well-supported adjunct to care.


    How to Get Started with Pilates

    Starting Pilates doesn’t require expensive equipment or a boutique studio membership. Here’s how to build in gradually, depending on where you’re starting from.

    Beginner Level

    1. Start mat-based. Mat Pilates requires only a non-slip exercise mat and a small amount of floor space. Begin with two to three 20-minute sessions per week, focusing on foundational exercises like the Hundred, single-leg stretches, and pelvic tilts.
    2. Prioritize breath. In Pilates, you inhale to prepare and exhale to execute effort. Learning this pattern before worrying about movement complexity will accelerate your progress dramatically.
    3. Use a qualified instructor or video guide for form feedback. Even one in-person session with a certified Pilates instructor can correct habits that self-study tends to miss. Look for instructors certified through the Pilates Method Alliance (PMA) or STOTT Pilates.
    4. Work on the Big 5 beginner moves: the Hundred, the Roll-Up, single-leg circles, rolling like a ball, and the single-leg stretch. These build the foundational body awareness the entire system depends on.

    Intermediate Level

    • Introduce Reformer Pilates, which uses a spring-resistance sliding carriage to add load and variety. Many gyms and studios offer Reformer classes that significantly increase muscular challenge.
    • Extend sessions to 40-50 minutes, three to four times per week.
    • Incorporate prop-based exercises using resistance circles (magic circles), light hand weights, or foam rollers to progressively challenge stability.

    Advanced Level

    • Combine mat and Reformer work with apparatus exercises on the Cadillac, Wunda Chair, or ladder barrel for full-system Pilates training.
    • Integrate Pilates principles into your other workouts — using the breath and core engagement cues during strength training or running can improve performance and reduce injury risk.

    If you enjoy training with your own bodyweight and want to pair Pilates with a complementary approach, our guide on Bodyweight Training: Build Real Strength Anywhere offers excellent foundational work that pairs well with a Pilates practice.


    Common Mistakes That Sabotage Your Pilates Results

    Even motivated adults run into predictable pitfalls when starting Pilates. Here are the most common ones — and how to fix them before they become habits.

    1. Holding your breath. This is the number one error beginners make. Breath is not optional in Pilates — it’s the mechanism that activates intra-abdominal pressure and protects the spine during movement. If you notice yourself holding your breath, slow down. Return to breath control before increasing complexity.

    2. Rushing through repetitions. Pilates is a slow-training system by design. Performing exercises quickly reduces muscle time under tension and bypasses the neuromuscular control the method is built to develop. Fewer, slower, better reps always outperform more, faster, sloppy ones.

    3. Leading with your neck during abdominal work. Many people unconsciously strain their neck forward during exercises like the Hundred or crunching movements. This recruits the sternocleidomastoid instead of the deep abdominals and can cause cervical strain. Fix: think about lengthening through the back of your skull, and keep your gaze toward your knees, not the ceiling.

    4. Treating it as a warm-up-only practice. Some people only do Pilates before "real" workouts, never giving it a full session of its own. While Pilates integrates beautifully with other training, dismissing it as supplementary means you’ll never develop the deep strength and coordination it can build on its own terms.

    5. Skipping consistency. Results from Pilates are cumulative. The neuromuscular changes that drive better posture and core stability take weeks of consistent practice to consolidate. Going twice a month won’t get you there. Two to three times per week, practiced consistently over eight to twelve weeks, is where the real transformation begins.


    What to Eat to Support Your Pilates Practice

    Pilates may not burn as many calories per session as a high-intensity interval workout, but it does demand muscular endurance, concentration, and recovery. Your nutrition should reflect that.

    Protein: The Academy of Nutrition and Dietetics recommends 1.2 to 1.7 grams of protein per kilogram of body weight for active adults. Prioritize lean sources like chicken, fish, eggs, Greek yogurt, legumes, and tofu to support muscle repair and adaptation. A 150-pound active adult should aim for roughly 82 to 115 grams of protein per day.

    Complex carbohydrates: Pilates sessions, especially longer or Reformer-based ones, require glycogen. Don’t undercut your training by going too low-carb. Whole grains, sweet potatoes, oats, and fruit are your best fueling choices before and after sessions.

    Anti-inflammatory foods: Since Pilates is often used for joint health and injury prevention, foods that support inflammation management are a smart addition. According to Harvard Health Publishing, omega-3 rich foods (salmon, walnuts, flaxseed), leafy greens, and berries help manage the inflammatory response tied to exercise and aging.

    Hydration: Even low-impact workouts drive fluid loss through breath and perspiration. The USDA Dietary Guidelines recommend at least 11.5 cups (women) to 15.5 cups (men) of total fluid daily. Drink 16 ounces of water about 90 minutes before your session and replenish afterward.

    What to avoid: Ultra-processed foods, excess sugar, and alcohol in the hours around your sessions can impair muscle recovery and concentration — two things Pilates demands. You don’t need to be perfect, but timing matters.


    How Long Until You See Results — and What to Track

    This is the question everyone wants answered honestly, and the answer is: it depends on your starting point, your consistency, and what results you’re measuring.

    Here’s what the research and clinical experience suggest:

    • Weeks 1-3: Body awareness increases. You’ll start to feel muscles you didn’t know were there. Expect some soreness in the deep abdominals, inner thighs, and mid-back — areas often underdeveloped in conventional training.
    • Weeks 4-6: Postural improvements often become noticeable. Colleagues or family may comment that you’re "standing taller." Mild back discomfort may begin to ease with consistent practice.
    • Weeks 8-12: Core endurance, balance, and flexibility show measurable gains. Research supports this timeline — the 2015 Journal of Bodywork and Movement Therapies meta-analysis noted statistically significant changes within this window.
    • Months 4-6+: Functional strength translates into other areas — better performance in other workouts, reduced injury frequency, improved posture under fatigue.

    What to track:

    • How long you can hold a plank with proper form (start and measure again at week 8)
    • Range of motion in forward fold and lateral spine flexion
    • Subjective back pain or stiffness levels on a 1-10 scale
    • Balance test: single-leg stance with eyes closed (aim for 10-20 seconds)

    If you’re not seeing any changes after 10-12 consistent weeks, consider booking a session with a certified Pilates instructor or physical therapist to evaluate your form and program design.

    Pilates pairs exceptionally well with low-impact cardio. If you’re looking to complement your mat work with joint-friendly aerobic training, check out our guide on Swim Training for Fitness: Your Complete Guide for a natural pairing that keeps your joints healthy while building cardiovascular endurance.


    Frequently Asked Questions About Pilates

    Is Pilates enough on its own as a complete fitness program?
    For many adults, especially those focused on injury prevention, rehabilitation, or improving daily movement quality, Pilates can serve as a primary fitness practice. However, the American College of Sports Medicine recommends that most adults also include aerobic exercise (150+ minutes per week at moderate intensity) for cardiovascular health. The best approach combines Pilates with some form of cardio, even walking.

    Can Pilates help with weight loss?
    Pilates can support weight management as part of a broader healthy lifestyle, but it’s not primarily a calorie-burning exercise. A 45-minute mat session burns roughly 175-250 calories depending on body weight and intensity — less than running or cycling. That said, improved body composition, muscle tone, and movement efficiency can support long-term weight management goals when combined with good nutrition and other movement.

    Is Pilates safe for people with back pain?
    For most adults with chronic low back pain, modified Pilates is considered safe and beneficial when guided by a qualified instructor. The Mayo Clinic notes that Pilates strengthens the muscles that support the lumbar spine, which often reduces chronic pain over time. However, always get clearance from your physician or physical therapist before starting, especially if you have a disc herniation, osteoporosis, or recent spinal surgery.

    Mat Pilates vs. Reformer Pilates — which is better?
    Neither is objectively superior — they serve different purposes. Mat Pilates is accessible, equipment-free, and excellent for building foundational body awareness. Reformer Pilates adds spring resistance, which increases the challenge significantly and allows for a wider range of exercises. Most practitioners benefit from both. Start with mat work to build your foundation, then explore Reformer training as you progress.

    How often should I do Pilates?
    Two to three sessions per week is the sweet spot for most adults looking to see consistent results without overtraining. Joseph Pilates famously said, "In 10 sessions you will feel the difference, in 20 you will see the difference, and in 30 you’ll have a whole new body." That quote reflects the cumulative, consistent nature of the practice — and it still holds up.


    Conclusion

    Pilates isn’t a trend. It’s a century-old, scientifically supported training method that happens to address some of the most common physical complaints of modern adult life: back pain, poor posture, weak core stability, and reduced mobility.

    You don’t need a boutique studio or expensive equipment to start. You need a mat, a commitment to showing up two or three times a week, and enough patience to let the method work its way through your nervous system over several weeks.

    Start simple. Master the breath. Feel the muscles you’ve been ignoring. Small, consistent reps of precise movement will outperform any workout you ever rush through. Your body — especially the parts that ache and feel tight — will thank you for it.

    Start today with 20 minutes on your mat. That’s it. That’s the whole first step.


    This article is for informational and educational purposes only. The content is not intended to replace professional medical, nutritional, or fitness advice. Always consult a qualified healthcare provider, registered dietitian, or certified fitness professional before starting a new health program or making significant changes to your lifestyle.

    Content reviewed by our wellness editorial team, with references to peer-reviewed research and guidelines from leading health organizations.

  • Yoga for Beginners: Build Flexibility, Strength & Calm

    Yoga for Beginners: Build Flexibility, Strength & Calm

    Yoga for Beginners: Build Flexibility, Strength & Calm

    You don’t need to be flexible to start yoga — you just need to start.

    Picture this: you’ve been sitting at your desk for six hours straight, your lower back is tight, your shoulders are creeping up toward your ears, and your brain feels like a browser with 47 tabs open. You’ve heard that yoga helps with all of this. But every time you search for "beginner yoga," you’re met with images of people twisted into pretzel shapes on a cliff at sunrise — and suddenly it feels like something that’s not for you.

    Here’s the truth: yoga is one of the most accessible forms of fitness and wellness available to adults of any age, body type, or flexibility level. It doesn’t require expensive equipment, a gym membership, or years of practice to feel the benefits. In fact, research suggests that even two sessions per week can produce measurable improvements in flexibility, stress hormones, and muscular endurance within just a few weeks.

    In this guide, you’ll learn exactly how yoga works, why it belongs in your fitness routine, how to get started safely, and what common mistakes trip up most beginners. Whether you’re brand new to movement or looking to complement your existing workouts, this is your no-nonsense, evidence-backed starting point.

    Why Yoga Matters More Than You Think

    Most people file yoga under "stretching class" and leave it at that. But that framing misses the bigger picture. Yoga is a full-body practice that integrates strength, mobility, breath control, and mental focus — all of which are foundational to long-term health and physical performance.

    According to a review published in the International Journal of Yoga, consistent yoga practice has been associated with reductions in perceived stress, improvements in balance and muscular endurance, and better scores on measures of psychological well-being across a range of adult age groups. These aren’t minor benefits — they’re the kind of outcomes people spend hundreds of dollars on supplements chasing.

    What makes yoga particularly relevant for busy adults aged 25 to 60 is its dual nature: it trains your body and your nervous system at the same time. While you’re holding a Warrior II pose and building leg strength, you’re also practicing slow, intentional breathing that directly activates your parasympathetic nervous system — your "rest and digest" mode. In a culture defined by chronic stress, that combination is genuinely hard to find in a single workout format.

    On the physical side, yoga addresses several of the most common complaints in this age group: tight hip flexors from sitting, weak core muscles, poor posture, and limited shoulder mobility. And unlike high-impact activities, yoga is low on joint stress — making it something you can do consistently without the wear-and-tear that sometimes comes with running or heavy lifting.

    How Yoga Actually Works: The Science Behind the Practice

    Let’s bust the biggest myth first: yoga is not just passive stretching. Many yoga styles — including Vinyasa, Power Yoga, and Ashtanga — are genuinely demanding strength workouts. Holding a plank, a Chaturanga (a yoga push-up), or a Chair Pose for 30 to 60 seconds recruits significant muscular effort from your core, shoulders, glutes, and legs.

    From a physiological standpoint, yoga improves flexibility primarily through two mechanisms: muscle elongation via sustained holds, and improved neuromuscular signaling — meaning your nervous system learns to "allow" a greater range of motion over time. This is why even one session can leave you feeling looser than when you walked in, even if your muscle fibers haven’t physically changed yet.

    A landmark study published in The Journal of Strength and Conditioning Research found that 10 weeks of yoga training significantly improved flexibility and muscular endurance in college-aged adults compared to a control group. Importantly, core strength was also meaningfully enhanced — reinforcing that yoga is more than a flexibility tool.

    On the neurological side, breath-focused yoga triggers measurable reductions in cortisol, the body’s primary stress hormone. Harvard Health Publishing notes that the slow, diaphragmatic breathing used in yoga engages the vagus nerve, which plays a central role in calming the stress response. This is why you genuinely feel calmer after a session — not just psychologically, but physiologically.

    The downside worth acknowledging: yoga alone won’t provide the cardiovascular stimulus needed to improve VO2 max or the mechanical load required for significant bone density improvements. For those goals, you’d want to combine yoga with activities like brisk walking or resistance training. Yoga works best as part of a complete fitness approach, not as a standalone solution for all health goals.

    How to Get Started: Your Beginner Yoga Roadmap

    Starting yoga doesn’t have to be overwhelming. Here’s a clear, stage-by-stage approach based on your current experience level.

    Step 1 — Choose the Right Style

    Not all yoga is the same. As a beginner, these three styles are the most accessible:

    • Hatha Yoga: Slow-paced, holds poses longer, ideal for true beginners. Great for learning alignment.
    • Yin Yoga: Very gentle, floor-based, focuses on deep connective tissue and relaxation. Perfect if stress or tension is your main concern.
    • Vinyasa (Beginner Level): Flowing movement linked to breath. More dynamic, but beginner classes are well-modified.

    Avoid jumping into Hot Yoga, Power Yoga, or Ashtanga until you’ve built a foundation of at least 4 to 6 weeks in a gentler style.

    Step 2 — Set Up Your Space

    You need very little: a yoga mat (6mm thickness is comfortable for beginners), a small open floor space, and two yoga blocks if possible. Blocks cost under $15 and make many poses significantly more accessible. A strap or resistance band can also help with tight hamstrings.

    Step 3 — Start with These 5 Foundational Poses

    • Child’s Pose (Balasana): Your resting position. Stretches lower back and hips. Stay here 30 to 60 seconds whenever you need a break.
    • Cat-Cow: Gentle spinal warm-up. Move in sync with your breath for 5 to 8 rounds.
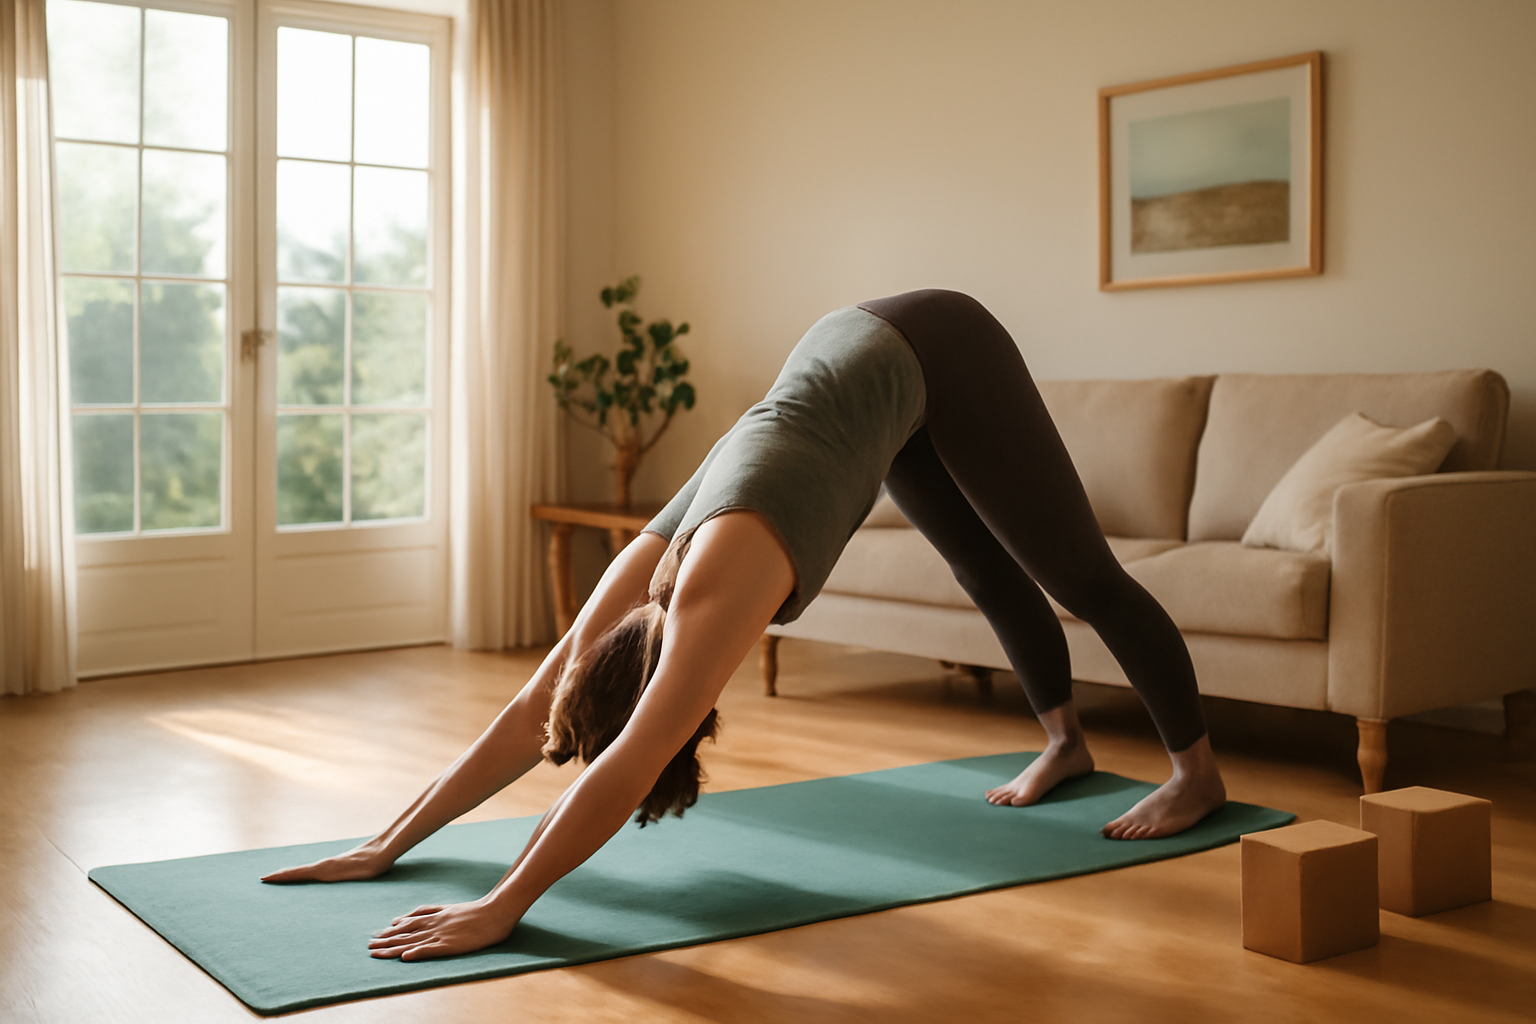
    • Downward-Facing Dog: Full-body stretch and mild upper-body strengthener. Bend your knees generously — straight legs are not required.
    • Warrior I: Builds leg strength, opens the chest, improves balance. Use a shorter stance if your hips feel restricted.
    • Seated Forward Fold (Paschimottanasana): Hamstring and lower back release. Use a strap around your feet if you can’t reach them — that’s completely normal.

    Step 4 — Build a Realistic Schedule

    Beginner: 2 sessions per week, 20 to 30 minutes each. Prioritize consistency over duration.
    Intermediate: 3 to 4 sessions per week, 30 to 45 minutes. Begin incorporating more standing sequences and balance work.
    Advanced: 5 to 6 sessions per week with varied styles (strength-focused, yin, and flow). Consider adding a weekly class with a certified instructor for feedback.

    Common Mistakes That Sabotage Yoga Progress

    Even well-intentioned beginners fall into predictable traps. Here are the most common ones — and exactly how to avoid them.

    Mistake 1 — Forcing Flexibility Before Building Strength

    Many beginners try to push into deep stretches immediately, ignoring pain signals in the name of "progress." This is one of the fastest routes to a yoga-related injury, particularly in the hamstrings and lower back. The fix: honor your end range on any given day and approach it with curiosity rather than aggression. Flexibility develops gradually — typically over 6 to 12 weeks of consistent practice.

    Mistake 2 — Holding Your Breath

    When a pose feels challenging, most people instinctively hold their breath. This is counterproductive because breath is literally the mechanism that helps your nervous system relax into a stretch. If you notice you’ve stopped breathing, that’s a clear signal you’ve gone too deep. Back off slightly until you can maintain a slow, steady inhale and exhale.

    Mistake 3 — Skipping Savasana

    Savasana — the final resting pose at the end of class — looks like a nap. But it’s physiologically important. Research cited by the American Psychological Association supports the idea that brief, intentional relaxation following physical exertion helps consolidate the neurological benefits of the practice and supports stress hormone regulation. Skipping it to save five minutes undercuts the full effect of your session.

    Mistake 4 — Comparing Yourself to Online Instructors

    YouTube and social media yoga content is heavily curated. The instructor demonstrating a deep backbend has likely been practicing for 10 to 20 years. Measuring your Week 2 practice against their highlight reel is a quick path to discouragement. Focus on how your body feels session to session, not how it looks.

    Mistake 5 — Practicing Only When You Feel Stiff

    Some beginners treat yoga as a remedy for a bad day only. Consistency, even on days when you feel fine, is what builds the cumulative benefits. Short 15-minute sessions count — don’t skip them because they feel "too easy."

    What to Eat and How to Time Your Practice

    Yoga isn’t as metabolically demanding as running or heavy lifting, but nutrition still plays a role in how you feel on the mat and how your body recovers.

    Before Practice: Avoid large meals within 1.5 to 2 hours before yoga. A heavy stomach during twists and inversions is genuinely uncomfortable. If you’re practicing in the morning, a small snack — like half a banana or a handful of almonds — is enough for most sessions under 45 minutes.

    Post-Practice Recovery: After a more demanding session (Vinyasa or Power Yoga), follow the same recovery principles as any strength workout. The Academy of Nutrition and Dietetics recommends a combination of protein and carbohydrates within 30 to 60 minutes post-exercise. A Greek yogurt with fruit, a smoothie with protein powder, or eggs on whole-grain toast are all solid options.

    Hydration: The USDA Dietary Guidelines recommend consistent fluid intake throughout the day, not just during exercise. For yoga specifically, aim to be well-hydrated going in rather than chugging water mid-session. In a standard yoga class, you typically lose less fluid than in cardio — but Hot Yoga is a significant exception. If you’re attending heated classes, increase your pre-class hydration meaningfully and consider electrolytes if you’re sweating heavily.

    Anti-inflammatory foods are particularly complementary to a yoga lifestyle. Foods rich in omega-3 fatty acids (salmon, walnuts, flaxseed), colorful vegetables, and turmeric have been associated with reduced exercise-related inflammation, according to Harvard Health Publishing. These aren’t magic, but they support the recovery and mobility goals yoga targets.

    How Long Until You See Results — and What to Track

    Expectations are everything. Here’s an honest, research-grounded look at what to expect and when.

    Week 1 to 2: You’ll likely feel soreness in muscles you forgot existed — particularly hip flexors, inner thighs, and shoulders. This is normal. You may also notice improved sleep and a subtle but real reduction in mental tension after sessions.

    Week 3 to 4: Flexibility improvements become noticeable. Most people can measurably go deeper into a forward fold or hold a balance pose longer than when they started. Core engagement in poses like plank and Downward Dog starts feeling less effortful.

    Week 6 to 10: Research aligns here — the Journal of Strength and Conditioning Research study mentioned earlier showed significant flexibility and strength improvements at the 10-week mark. Posture often improves as back and shoulder muscles strengthen. Stress resilience also typically improves by this point for consistent practitioners.

    What to track:

    • How far you can reach in a seated forward fold (use a tape measure for objectivity)
    • How long you can hold Warrior I without your thigh burning excessively
    • Sleep quality and morning stiffness — both are often the first things to improve
    • Stress levels on a simple 1 to 10 self-reported scale before and after sessions

    If after 8 weeks of consistent practice (2 to 3 times per week) you’re experiencing pain rather than productive discomfort, consult a physical therapist or certified yoga instructor. Certain poses may need modification based on individual anatomy or pre-existing conditions.

    If you’re also interested in combining yoga with higher-intensity cardio work, our guide on HIIT vs. Steady-State Cardio can help you build a balanced weekly routine.

    Frequently Asked Questions

    Do I need to be flexible to start yoga?
    Absolutely not — and this is probably the most pervasive myth in yoga culture. Flexibility is a result of yoga practice, not a prerequisite for it. Every pose has modifications, and any qualified instructor will offer options for all levels. You start where you are, not where you wish you were.

    Can yoga help with back pain?
    For non-specific lower back pain (the most common type), yoga has a reasonably strong evidence base. The American College of Sports Medicine notes that flexibility training and core strengthening — both central to yoga — are recommended components of lower back pain management. That said, if your back pain has a specific diagnosis (disc herniation, spinal stenosis, etc.), check with your physician before starting.

    How many calories does yoga burn?
    This varies widely by style and intensity. A gentle Hatha session might burn 150 to 200 calories per hour. A vigorous Power Yoga or Vinyasa flow class can reach 350 to 400 calories per hour. By comparison, this is lower than running or HIIT — but yoga’s value isn’t primarily caloric. Its strength, stress, mobility, and recovery benefits are the real return on investment.

    Is yoga a good workout on its own, or should I combine it with other exercise?
    Yoga is a legitimate workout, but it’s most powerful as part of a balanced routine. It complements cardio training by improving flexibility and reducing injury risk, and it complements strength training by targeting mobility and recovery. Think of it as the connective tissue of a well-rounded fitness plan — it makes everything else work better.

    How do I find a good beginner yoga class or instructor?
    Look for instructors registered with Yoga Alliance (RYT 200 or RYT 500 credentials indicate formal training). Community centers, the YMCA, and reputable apps like Down Dog or Glo offer beginner-specific programming. If attending in person, don’t hesitate to tell the instructor it’s your first class — a good teacher will offer guidance throughout.

    Start Small, Stay Consistent

    Yoga doesn’t ask you to be perfect. It asks you to show up — on the mat, in your body, as you are today. The science backs it up: even two short sessions per week can meaningfully improve flexibility, reduce stress, and build a form of strength that translates directly into how you move and feel in everyday life.

    You don’t need a perfect schedule, an expensive studio membership, or an Instagram-worthy pose. You need a mat, a clear 20 minutes, and a willingness to start imperfectly.

    Your next step is simple: try one of the five foundational poses from this guide today. Just one. Then do it again tomorrow. Momentum builds from exactly that kind of quiet, consistent effort.

    This article is for informational and educational purposes only. The content is not intended to replace professional medical, nutritional, or fitness advice. Always consult a qualified healthcare provider, registered dietitian, or certified fitness professional before starting a new health program or making significant changes to your lifestyle.

    Content reviewed by our wellness editorial team, with references to peer-reviewed research and guidelines from leading health organizations.