Tag: endurance training

  • Sport-Specific Conditioning: Train Smarter for Your Sport

    Sport-Specific Conditioning: Train Smarter for Your Sport

    Sport-Specific Conditioning: Train Smarter for Your Sport

    If your gym workouts feel disconnected from the sport you actually love playing, you’re probably training the wrong way.

    Picture this: you’ve been hitting the gym three times a week for months. Your squat is stronger, your cardio is better, and you feel great on the treadmill. But the moment you step onto the tennis court, the soccer field, or the basketball court, you gas out by the second half — and your performance hasn’t improved much at all.

    Sound familiar? You’re not alone. Millions of recreational and amateur athletes in the US train consistently but never bridge the gap between general fitness and sport-specific performance. The missing link is sport-specific conditioning — a targeted approach to training that mirrors the actual demands of your sport.

    This guide breaks down exactly what sport-specific conditioning is, why it works, and how everyday adults can apply it — whether you play weekend soccer, compete in amateur tennis, run 5Ks, or shoot hoops on Saturday mornings. No elite coaching contract required.

    Why Sport-Specific Conditioning Matters More Than You Think

    General fitness is a fantastic foundation — but it’s not the same as athletic preparedness. Your body adapts to the specific demands you place on it, a principle known in exercise science as the SAID principle: Specific Adaptation to Imposed Demands.

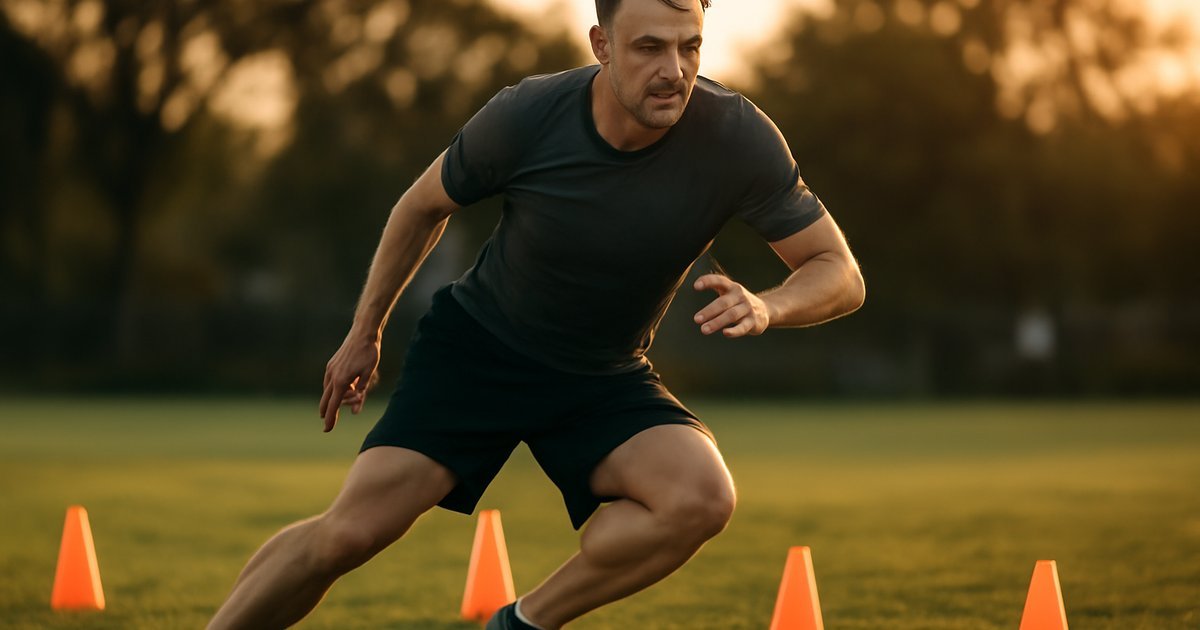
    In plain terms: if you only run on a treadmill, your body gets better at running on a treadmill. But soccer requires explosive lateral cuts, rapid direction changes, and repeated sprint-recovery cycles — patterns that a steady jog simply doesn’t train.

    According to the American College of Sports Medicine (ACSM), sport-specific training that mirrors the energy systems and movement patterns of an activity produces significantly greater performance gains than generalized exercise programming alone. This isn’t just for professionals — recreational athletes benefit just as much, and often more, because they’re typically training with less precision.

    Beyond performance, sport-specific conditioning also reduces injury risk. Research published in the British Journal of Sports Medicine found that athletes who incorporated movement-specific strength and neuromuscular training experienced up to 50% fewer non-contact injuries compared to those doing general fitness work only. That’s a compelling reason to get more intentional about how you prepare for your sport.

    The Science Behind Sport-Specific Training — How It Actually Works

    Every sport makes unique demands on your body. Those demands fall into three key categories: energy systems, movement patterns, and neuromuscular recruitment. Sport-specific conditioning targets all three at once.

    Energy Systems: Your body uses different fuel pathways depending on the duration and intensity of effort. A 100-meter sprinter relies almost exclusively on the phosphocreatine (ATP-PC) system. A distance runner leans on aerobic metabolism. Most team sport athletes — soccer, basketball, lacrosse — use a blend of all three systems, requiring both high-end aerobic capacity and explosive anaerobic bursts.

    Movement Patterns: A common myth is that getting stronger in the gym automatically translates to better athletic performance. It helps — but only if those strength gains are built in positions and angles that mimic your sport. A golfer needs rotational hip power and thoracic mobility. A tennis player needs lateral agility and shoulder stability. A cyclist needs single-leg strength and hip flexor endurance. General barbell work alone won’t replicate those demands.

    Neuromuscular Recruitment: This is about how quickly and efficiently your nervous system activates muscle fibers in sport-relevant sequences. Research from Harvard Health Publishing highlights that neural adaptations — not just muscle size — account for a large portion of early performance improvements when training becomes more specific.

    The myth to bust here: more volume always equals better results. In sport-specific conditioning, relevance matters more than quantity. Two focused sessions per week of targeted work often outperform five unfocused gym sessions for athletic carryover.

    How to Get Started: Build Your Sport-Specific Training Plan

    You don’t need a D1 strength coach to apply these principles. Here’s how to start building a smarter program based on your sport.

    Step 1 — Audit Your Sport’s Demands
    Before you train, analyze. Ask yourself: Is my sport primarily aerobic or anaerobic? Does it involve explosive power, sustained endurance, or intervals of both? What movement patterns dominate — running, jumping, throwing, cutting, rotating?

    • Soccer, basketball, hockey: Mixed energy systems, lateral agility, sprint-recovery intervals
    • Tennis, racquetball: Rotational power, explosive lateral movement, shoulder endurance
    • Running (5K–marathon): Aerobic base, single-leg stability, hip and core strength
    • Golf: Rotational mobility, hip hinge power, core stability
    • Cycling: Aerobic capacity, quad dominance, hip flexor endurance

    Step 2 — Match Your Conditioning to Your Energy System

    • Beginner: Start with 2 days per week of sport-relevant cardio intervals. For example, soccer players can do 10 x 30-second sprints with 90 seconds of walking recovery. Tennis players can do lateral shuffle drills for 20 seconds on, 40 seconds off.
    • Intermediate: Add one day of sport-pattern strength work. Golfers: landmine rotations and single-leg Romanian deadlifts. Runners: Bulgarian split squats and single-leg calf raises.
    • Advanced: Periodize your training with sport season in mind — a higher-volume off-season phase, a strength-focused pre-season phase, and a maintenance in-season phase.

    Step 3 — Prioritize Movement Quality Over Load
    Sport-specific training rewards precision. A lateral shuffle done with proper deceleration mechanics is worth more than a heavier squat done sloppily. Focus on movement quality before adding intensity.

    For a solid foundation in functional movement, combining this work with foam rolling for recovery and CrossFit-style functional training can help you build the durability your sport demands.

    Common Mistakes That Sabotage Sport-Specific Results

    Even motivated athletes make these errors — and they’re easy to fix once you know what to look for.

    Mistake #1 — Training Only for Aesthetics, Not Function
    It’s tempting to default to mirror-muscle training — biceps curls, chest press, crunches. These aren’t inherently bad, but they don’t replicate most sport demands. If all your training is isolation-focused, you’re leaving athletic gains on the table. Fix it by replacing at least half your accessory work with compound, multi-joint movements that mirror your sport’s patterns.

    Mistake #2 — Ignoring the Recovery Side of Conditioning
    Sport-specific conditioning isn’t just about working harder — it’s about recovering smarter between efforts. Many recreational athletes train their output but never train their recovery intervals. For sports like basketball or soccer, your ability to recover quickly between sprints is as important as your top-end speed. Incorporate structured rest periods in your conditioning work that match your sport’s actual work-to-rest ratios.

    Mistake #3 — Skipping Deceleration and Change-of-Direction Training
    Most injuries in court and field sports happen during deceleration — the stopping and cutting phase, not the acceleration. Yet most athletes only train forward-speed work. Add lateral bounds, deceleration drills, and reactive agility work (like responding to a visual cue before changing direction) to build injury-resilient movement mechanics.

    Mistake #4 — Training Year-Round at the Same Intensity
    Recreational athletes often skip periodization entirely, training the same way in January as they do in July. This leads to stagnation and burnout. Even a simple three-phase approach — off-season (build base), pre-season (build sport fitness), in-season (maintain and recover) — dramatically improves results over time.

    What to Eat to Support Sport-Specific Conditioning

    Nutrition strategy should match your sport’s demands, not just your general health goals.

    Carbohydrates for Energy: The Academy of Nutrition and Dietetics recommends that athletes engaged in moderate-to-high intensity sport training consume 5–7 grams of carbohydrate per kilogram of body weight daily. Sports with repeated sprint efforts (soccer, basketball, tennis) are particularly carbohydrate-dependent. Don’t undercut your glycogen stores by going too low-carb during heavy training periods.

    Protein for Repair: The ACSM recommends 1.2–2.0 grams of protein per kilogram of body weight for active individuals engaged in regular sport training. Aim for 25–40 grams of high-quality protein (chicken, eggs, Greek yogurt, legumes) within two hours post-training to support muscle repair.

    Hydration: Even mild dehydration — as little as 2% of body weight — has been shown in research from the NIH to impair athletic performance, reaction time, and decision-making. For sport-specific training sessions lasting more than 60 minutes, aim for 16–24 ounces of fluid per hour, and consider electrolyte replacement for high-sweat activities.

    Pre-training fuel: Eat a mixed meal of carbohydrates and protein 2–3 hours before training (e.g., oatmeal with eggs, or a turkey sandwich on whole grain). For sessions starting in under an hour, a smaller snack like a banana with almond butter is easier on digestion.

    What to limit: Avoid high-fat meals and high-fiber foods in the 1–2 hours before intense sport sessions — they slow gastric emptying and can cause GI distress during performance.

    How Long Until You See Results — and What to Track

    Realistic expectations matter. Sport-specific conditioning is not a two-week fix — it’s a progressive system that compounds over time.

    Weeks 1–3: Expect neural adaptations first. You’ll notice improved coordination, slightly faster reaction times, and better body awareness in your sport. These changes happen before visible strength or endurance gains.

    Weeks 4–8: You should begin noticing meaningful improvements in on-field or on-court performance — less fatigue in the final stretch of a match, faster recovery between sprints, or more confident lateral movement. Research published in the Journal of Strength and Conditioning Research found that six weeks of sport-specific conditioning produced measurable agility and anaerobic capacity improvements in recreational athletes across multiple sports.

    Weeks 8–16: Structural adaptations kick in — improved muscle fiber recruitment, cardiovascular efficiency specific to your sport’s energy demands, and genuine power output gains.

    What to track:

    • Resting heart rate (decreasing = improving aerobic base)
    • Time-to-fatigue during sport-specific drill sets
    • Perceived exertion during matches compared to early in the program
    • Injury frequency and recovery speed
    • Subjective performance ratings after your sport sessions

    If you’re not seeing any improvement after 8–10 weeks, reassess your program structure and consider consulting a certified strength and conditioning specialist (CSCS).

    Frequently Asked Questions

    Can recreational athletes really benefit from sport-specific conditioning?
    Absolutely — in fact, recreational athletes often see the most dramatic improvements because they have the most room to optimize. You don’t need to compete professionally to train with intention. Applying even basic sport-specific principles 2–3 times per week will meaningfully improve your performance and enjoyment of your sport.

    How do I balance sport-specific training with my regular gym workouts?
    The key is integration, not replacement. You don’t have to choose one or the other. A well-structured week might include 2 days of general strength training, 1–2 days of sport-specific conditioning (energy system work, movement drills), and 1–2 days of actual sport play. Adjust volume based on your recovery capacity — more is not always better.

    Is sport-specific conditioning safe for adults over 40?
    Yes, with appropriate modifications. The core principles apply at any age, though adults over 40 typically need slightly longer recovery windows and benefit from more emphasis on mobility and deceleration mechanics. The American College of Sports Medicine explicitly supports sport-specific training for older adults as a strategy for maintaining athleticism, coordination, and injury resilience. Start conservatively and progress gradually.

    Do I need special equipment?
    Not necessarily. Many sport-specific drills — lateral shuffles, reactive agility work, plyometric progressions, and interval conditioning — require minimal or no equipment. Resistance bands, a timer, cones, and your own bodyweight can cover most of what you need to get started. More equipment can add variety and load over time, but it’s not a prerequisite.

    What if I play multiple sports or activities?
    Focus on the most universal athletic qualities: aerobic base, multi-directional agility, single-leg strength, core stability, and rotational power. These transfer well across most sports. Then add sport-specific layers during the weeks leading up to your primary sport season. You can reference medicine ball training as a great cross-sport power builder that works for almost any athletic context.

    Start Where You Are — Your Sport Deserves Better Preparation

    You don’t have to overhaul your entire training life to start getting more out of it. The first step is simply asking one question before your next workout: Does this training session actually reflect what my sport demands of me?

    If the answer is no, you now have the framework to change that. Pick one sport-specific drill, one energy system protocol, or one movement pattern to focus on this week. Build from there. Small, consistent adjustments in training specificity add up to real performance gains over a season.

    Your weekend games, competitive leagues, and personal fitness milestones are worth training for with intention. Start smarter — and your sport will reward you for it.


    This article is for informational and educational purposes only. The content is not intended to replace professional medical, nutritional, or fitness advice. Always consult a qualified healthcare provider, registered dietitian, or certified fitness professional before starting a new health program or making significant changes to your lifestyle.

    Content reviewed by our wellness editorial team, with references to peer-reviewed research and guidelines from leading health organizations.
  • Rowing Machine Workouts: The Complete Guide for Adults

    Rowing Machine Workouts: The Complete Guide for Adults

    It sits in the corner of most gyms, largely ignored — but the rowing machine might be the most complete piece of cardio equipment you’re not using.

    Think about the last time you saw a long line for the rowing machine at your gym. Chances are, you can’t. Most people walk right past it on their way to the treadmill or elliptical — and that’s a missed opportunity of serious proportions.

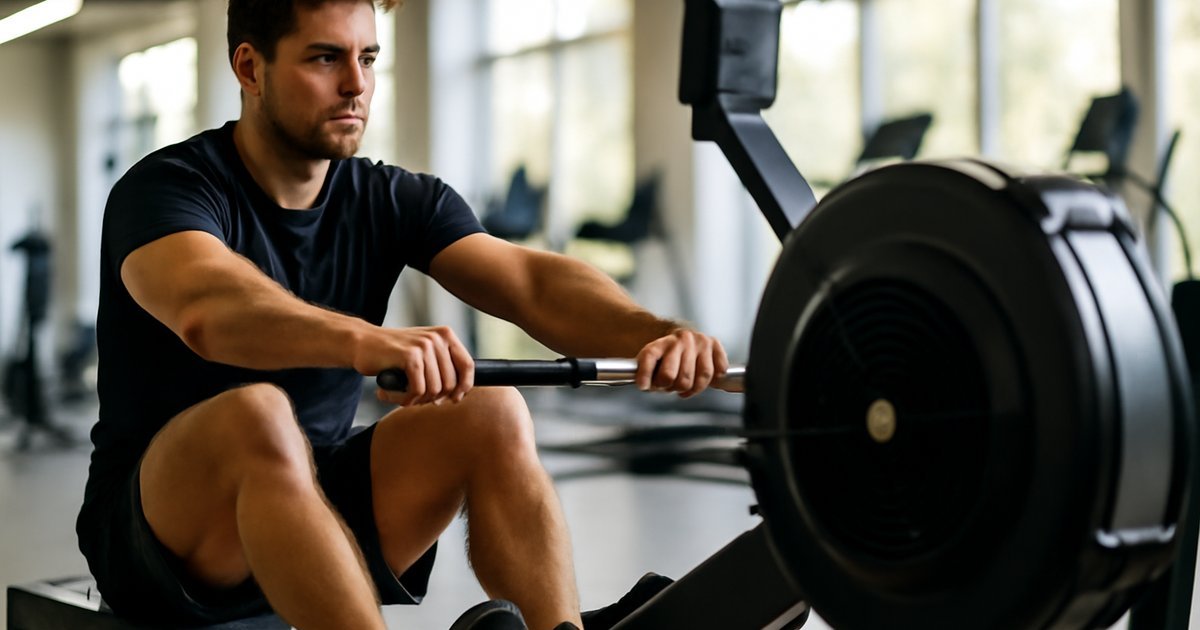
    The rowing machine, also known as an ergometer or "erg," delivers a full-body workout that simultaneously trains cardiovascular endurance, muscular strength, and coordination. Unlike most cardio machines that focus primarily on the lower body, rowing engages approximately 86% of your major muscle groups in every single stroke.

    Whether you’re looking to burn more calories in less time, build functional strength, protect your joints, or simply break out of a fitness plateau, rowing machine workouts offer a surprisingly accessible and deeply effective solution. And the good news? You don’t need to be an athlete to get started.

    This guide will walk you through the science behind rowing, how to nail proper technique, the best workout formats for every fitness level, and what to realistically expect from consistent training. Let’s get on the water — or at least, the erg.

    Why Rowing Machine Workouts Matter More Than You Think

    Here’s a statistic worth sitting with: according to the American College of Sports Medicine (ACSM), adults need at least 150 minutes of moderate-intensity aerobic activity per week — yet more than half of US adults fail to meet even basic physical activity guidelines. Part of the problem isn’t motivation. It’s boredom, joint pain, and inefficient use of limited workout time.

    Rowing addresses all three of those obstacles head-on.

    First, it’s a low-impact exercise, meaning it places significantly less stress on your knees, hips, and ankles compared to running or jumping. This makes it an excellent option for adults dealing with mild joint sensitivity or those returning from lower-body injuries — though always consult your physician before starting any new exercise program if you have existing conditions.

    Second, rowing is a genuine full-body workout. Research published in the Journal of Strength and Conditioning Research confirmed that a single rowing session activates muscles across the legs, core, back, shoulders, and arms — making it one of the few cardio formats that also delivers meaningful muscular endurance benefits.

    Third, rowing burns a substantial number of calories in a compact time window. Harvard Health Publishing estimates that a 155-pound person burns approximately 260 calories in just 30 minutes of vigorous rowing — comparable to running at a 6-minute-mile pace, without the joint impact.

    In a world where most people are time-crunched, that efficiency matters enormously.

    The Science Behind How Rowing Works

    Let’s clear up one of the most persistent myths about rowing: it is not primarily a back or arms exercise. Most beginners muscle through strokes using only their upper body, leading to fatigue, poor form, and occasionally lower back discomfort. In reality, roughly 60% of the rowing stroke’s power should come from your legs, 20% from your core, and only 20% from your arms and shoulders.

    The proper rowing stroke follows a precise sequence called the drive and the recovery.

    During the drive: you push with your legs first, then hinge your torso slightly back, then pull the handle to your lower ribs. During the recovery: you extend your arms first, lean forward, then bend your knees and slide back to the starting position. This sequencing protects your spine and maximizes power output from your largest muscle groups.

    From a physiological standpoint, rowing is a dual-system exercise. At lower intensities, it trains your aerobic energy system — building cardiovascular endurance and improving mitochondrial efficiency over time. At higher intensities (think short sprint intervals), it recruits your anaerobic system, which supports power output and metabolic conditioning.

    A 2020 study published in PLOS ONE found that 12 weeks of rowing training significantly improved VO2 max — a gold-standard measure of cardiovascular fitness — in previously sedentary adults. VO2 max improvements are strongly associated with reduced risk of heart disease, metabolic syndrome, and all-cause mortality, according to the American Heart Association.

    The takeaway: rowing isn’t just cardio. It’s a comprehensive conditioning tool backed by solid science.

    How to Get Started: Beginner to Advanced

    Rowing rewards patience with technique. Rushing into high-intensity sessions before mastering the stroke is the fastest way to plateau — or get hurt. Here’s how to build your rowing practice intelligently.

    Beginner Level (Weeks 1–3)

    1. Master the stroke sequence first. Before adding any intensity, spend 5–10 minutes per session practicing the drive-and-recovery pattern at a slow, controlled pace. Set the resistance damper to 3–5 (on a Concept2 machine) — higher doesn’t always mean harder; it changes the feel of the stroke, not the actual intensity.
    2. Start with 15–20 minutes at a conversational pace. You should be able to talk in short sentences. Aim for a stroke rate (measured in strokes per minute, or SPM) of 18–22 SPM — slow and powerful beats fast and sloppy.
    3. Row 3 days per week with rest days between sessions. Your muscles need recovery time, especially in the early weeks when your body is adapting to a new movement pattern.
    4. Focus on the "legs-back-arms, arms-back-legs" mantra to reinforce correct sequencing.

    Intermediate Level (Weeks 4–8)

    • Introduce interval training: alternate 2 minutes at moderate effort with 1 minute at high effort, for 5–6 rounds.
    • Extend steady-state sessions to 25–35 minutes.
    • Begin tracking your split time (time per 500 meters) as a performance benchmark.
    • Aim for 4 sessions per week, mixing steady-state and interval formats.

    Advanced Level (Week 9+)

    • Incorporate structured workouts like 4 x 1000-meter repeats with 2-minute rest between sets.
    • Explore "pyramid" intervals: 250m, 500m, 750m, 1000m, 750m, 500m, 250m with equal rest between pieces.
    • Monitor heart rate zones and aim to spend meaningful time in Zone 3–4 during interval work (roughly 70–85% of your max heart rate).
    • Consider pairing rowing with complementary strength training for a well-rounded program.

    If you enjoy training with your own body weight, rowing pairs exceptionally well with calisthenics for adults — combining upper-body pulling movements with full-body cardio conditioning.

    Common Mistakes That Sabotage Rowing Results

    These errors are easy to make — and most people commit at least two of them in the first month of rowing. Knowing them in advance saves you time and frustration.

    1. Pulling with your arms too early
    This is the #1 form mistake in rowing. When you initiate the drive by bending your elbows before fully extending your legs, you rob yourself of your most powerful muscle group (your legs) and overload your biceps and upper back. Fix: drill the sequence — push, lean, pull — until it becomes automatic.

    2. Setting the resistance damper too high
    Many beginners crank the resistance to 10, assuming more resistance equals a better workout. In reality, elite rowers often train on settings of 4–6. High damper settings slow your stroke, reduce cardiovascular stimulus, and increase fatigue in a way that doesn’t translate to better fitness gains. Fix: keep the damper between 3–6 and focus on power per stroke and cadence.

    3. Rowing at maximum effort every session
    More isn’t always better. Training at 100% every session leads to cumulative fatigue, diminished performance, and higher injury risk. The Mayo Clinic and exercise physiology consensus recommend incorporating easy aerobic sessions — sometimes called "recovery rows" — into your weekly plan. Fix: roughly 80% of your sessions should feel moderate, with only 20% feeling genuinely hard.

    4. Ignoring posture on the recovery phase
    Many rowers collapse forward or round their lower back as they slide toward the front of the machine. Over time, this stresses lumbar structures. Fix: initiate the recovery by extending your arms fully first, then hinge at the hips with a tall, neutral spine before bending your knees.

    5. Skipping the warm-up
    Jumping straight into vigorous rowing with cold muscles increases injury risk and delivers a poorer workout overall. Fix: spend 3–5 minutes rowing at very easy effort before increasing intensity. This primes your cardiovascular system and lubricates the hip and knee joints that rowing heavily engages.

    Nutrition to Support Your Rowing Training

    Rowing is a calorie-demanding activity, which means your nutrition strategy matters — especially if you’re training multiple days per week.

    Before your row: Aim for a light, carbohydrate-focused snack 30–60 minutes before a workout if training at moderate-to-high intensity. The Academy of Nutrition and Dietetics recommends easily digestible options like a banana, a rice cake with nut butter, or a small bowl of oatmeal. Avoid heavy, high-fat meals within 90 minutes of rowing.

    After your row: Muscle recovery depends on the post-workout protein-and-carbohydrate window. Research published in the Journal of the International Society of Sports Nutrition supports consuming 20–40 grams of high-quality protein within 2 hours of training to optimize muscle repair. A Greek yogurt parfait, eggs with whole-grain toast, or a protein shake with fruit are practical options.

    Hydration: Rowing generates significant sweat, particularly in warm environments. The USDA Dietary Guidelines and ACSM recommend drinking approximately 16–20 oz of water in the hour before exercise and continuing to hydrate during and after your session. Electrolyte intake (from whole foods or low-sugar sports drinks) becomes important during sessions lasting longer than 60 minutes.

    If you’re pairing rowing with a specific nutrition strategy — such as an anti-inflammatory eating approach — those dietary foundations generally complement endurance-based training well. Results, of course, depend on your individual baseline, training intensity, and overall caloric balance.

    How Long Until You See Results — and What to Track

    Expectations matter. Rowing is effective, but it’s not magic — and the timeline for noticeable changes depends on your starting fitness level, training consistency, and goals.

    Weeks 1–2: You’ll likely feel cardiovascular fatigue quickly and notice muscle soreness in your legs, lats, and core. Your form will improve rapidly in the first 10 sessions if you focus on technique. These weeks are about building the neural patterns that make rowing efficient.

    Weeks 3–6: Most people notice improved breathing efficiency, reduced post-workout soreness, and measurable gains in endurance. Your split time (time per 500 meters) will likely improve as your stroke becomes more coordinated and powerful.

    Weeks 6–12: Research, including the PLOS ONE study mentioned earlier, shows meaningful VO2 max improvements within this window for previously sedentary individuals. You may also notice improved posture, more defined muscles in your back and arms, and better energy throughout the day.

    What to track:

    • Split time (500-meter pace) — your primary performance indicator
    • Stroke rate (SPM) — lower and more powerful is generally better
    • Total meters rowed per session and per week
    • Resting heart rate — a declining resting HR over weeks signals improved cardiovascular fitness
    • Perceived effort — the same effort should feel easier over time if you’re adapting

    If after 8–10 weeks of consistent rowing you’re not noticing any performance improvement or the workouts aren’t feeling progressively more manageable, consider consulting a certified fitness professional. They can assess your technique and programming. For related training methods that complement rowing’s full-body demands, explore resistance band training to build supporting muscular strength on your rest days.

    Frequently Asked Questions About Rowing Machine Workouts

    Is rowing good for weight loss?
    Rowing can absolutely support a weight management strategy. It burns a substantial number of calories, builds lean muscle (which supports metabolic rate), and provides both cardiovascular and resistance training stimulus in a single session. However, sustainable fat loss depends on the interaction between your overall caloric intake and expenditure — rowing alone won’t override a poor diet. According to Harvard Health Publishing, a 185-pound person burns roughly 294 calories in 30 minutes of vigorous rowing.

    Is rowing safe if I have lower back pain?
    This depends significantly on the cause and severity of your back pain. Rowing with poor technique — specifically, rounding the lumbar spine or initiating the drive incorrectly — can aggravate existing back issues. However, rowing with proper form is considered relatively spine-friendly and is sometimes used in physical rehabilitation settings. Always get clearance from your physician or physical therapist before starting, and work with a qualified coach to ensure correct form.

    How many days a week should I row?
    For most adults, 3–5 sessions per week is effective and sustainable. The ACSM recommends at least 1–2 rest or active recovery days per week for aerobic training programs. Beginners should start with 3 sessions and progress gradually. More advanced athletes can row 5 days with varied intensity across sessions.

    Do I need a special rowing machine, or will any gym machine work?
    Concept2 ergometers are the industry gold standard and are found in most commercial gyms and CrossFit facilities. Water rowers offer a different feel and aesthetic appeal. Magnetic rowers tend to be quieter and budget-friendly but may offer less accurate performance data. For most people, any rowing machine at a gym will be sufficient to achieve great results — the brand matters far less than consistent effort and proper form.

    Can rowing replace strength training entirely?
    Rowing provides significant muscular endurance and some hypertrophy stimulus — particularly in the legs, back, and core — but it doesn’t replace dedicated resistance training for building maximal strength or muscle mass. The ACSM recommends that adults perform muscle-strengthening activities at least 2 days per week in addition to aerobic exercise. Rowing is best viewed as a powerful complement to strength work, not a complete replacement. Consider pairing it with circuit training for a well-rounded weekly program.

    Final Stroke: Start Simple, Stay Consistent

    The rowing machine is one of the most underrated fitness tools available to everyday adults. It trains your entire body, respects your joints, burns substantial calories, and scales from gentle beginner sessions to elite-level interval training — all in one piece of equipment.

    You don’t need to be fast. You don’t need to be an athlete. You need 15–20 focused minutes, a willingness to learn the stroke, and the patience to let consistency do its work.

    Start today with a simple 15-minute session at easy effort. Focus on the sequence: legs, back, arms — arms, back, legs. Let your body learn the movement before you push the intensity. That’s it. That’s the whole secret.

    The results will follow.


    This article is for informational and educational purposes only. The content is not intended to replace professional medical, nutritional, or fitness advice. Always consult a qualified healthcare provider, registered dietitian, or certified fitness professional before starting a new health program or making significant changes to your lifestyle.

    Content reviewed by our wellness editorial team, with references to peer-reviewed research and guidelines from leading health organizations.