
Tag: joint health

  • Isometric Training: Build Strength Without Moving a Muscle

    Isometric Training: Build Strength Without Moving a Muscle

    You’re holding a wall sit, shaking at the 45-second mark, wondering how something so still can be so brutally effective — welcome to isometric training.

    Why Isometric Training Matters More Than You Think

    Most people associate a good workout with movement — squats, presses, lunges, rows. The more dynamic, the better, right? Not necessarily. Isometric training, which involves contracting your muscles without changing their length or moving your joints, has been quietly backed by decades of research as one of the most effective — and underutilized — tools for building strength, improving joint stability, and even managing pain.

    If you’ve ever held a plank, pressed your palms together during a chest squeeze, or braced hard at the bottom of a squat, you’ve already done isometric work. You just didn’t realize how powerful it was.

    According to the American College of Sports Medicine (ACSM), isometric exercise can produce significant strength gains — particularly at the specific joint angle being trained — and plays a meaningful role in rehabilitation, injury prevention, and neuromuscular efficiency. It’s not a replacement for dynamic training, but for adults navigating joint discomfort, time constraints, or training plateaus, it’s an approach worth understanding deeply.

    This guide breaks down exactly how isometric training works, who it’s best for, how to structure a routine, and the common mistakes that keep people from getting real results.

    The Science Behind Isometric Training — How It Actually Works

    When you perform a traditional bicep curl, your muscle shortens (concentric phase) and then lengthens (eccentric phase). In an isometric contraction, neither happens. Your muscle generates force — sometimes maximal force — without any visible joint movement. Think of pushing against a wall that doesn’t move. Your muscles are working hard; the wall doesn’t care.

    This type of contraction activates a high density of motor units and trains your nervous system to recruit muscle fibers more efficiently. Research published in the Journal of Strength and Conditioning Research found that isometric training at high intensities (above 70% of maximum voluntary contraction) can produce strength gains comparable to traditional resistance training, particularly in the mid-range and end-range of a movement.

    One myth to bust immediately: many people assume isometric training only builds strength at the exact angle being held. While there is an "angle specificity" effect — meaning strength gains are most pronounced within about 15 degrees of the trained position — this doesn’t make isometrics any less useful. In fact, strategically targeting weak ranges of motion with isometric holds can directly address strength gaps that dynamic training often misses.

    Beyond raw strength, isometric training has a well-documented role in tendon health. Harvard Health Publishing notes that sustained isometric loading is one of the first-line interventions recommended by physical therapists for tendinopathy — particularly in the patellar tendon (knee) and Achilles. The sustained tension appears to stimulate collagen synthesis and reduce pain signaling in the tendon.

    And then there’s blood pressure. A 2023 review published in the British Journal of Sports Medicine identified isometric exercise as the most effective exercise modality for reducing resting blood pressure — outperforming aerobic cardio and dynamic resistance training in head-to-head comparisons. That’s a headline worth remembering.

    How to Get Started With Isometric Training

    The beauty of isometric training is its accessibility. You don’t need a gym, special equipment, or even a lot of space. Here’s how to build it into your routine depending on your experience level.

    Beginner: Learn the Basics (Weeks 1–3)

    • Wall sit: Slide your back down a wall until thighs are parallel to the floor. Hold 20–30 seconds. Rest. Repeat 3 times. This targets quads, glutes, and core without joint stress.
    • Dead hang: Grip a pull-up bar and hang with arms slightly bent (not fully locked). Hold 15–20 seconds. Builds grip strength and shoulder stability.
    • Plank hold: Forearms on the floor, body in a straight line. Hold 20–40 seconds. Engages core, glutes, and shoulder girdle simultaneously.
    • Isometric chest press: Press your palms firmly together at chest height and hold for 10–15 seconds. Activates pec minor and stabilizers without equipment.

    At the beginner stage, focus on quality of tension — you should feel a deep, sustained muscular effort. Rest at least 60–90 seconds between holds. Train 2–3 days per week.

    Intermediate: Add Intensity and Specificity (Weeks 4–8)

    • Paused squats: Lower into a squat and hold at the bottom (or just above parallel) for 5–10 seconds before completing the rep. Strengthens weak ranges of motion.
    • Isometric pull-up hold: At the top of a pull-up (chin above bar), hold for 5–10 seconds. Builds lat and bicep endurance.
    • Suitcase hold: Hold a dumbbell at your side (one arm) and stand perfectly upright for 30–45 seconds. Trains anti-lateral flexion — essential for spine health.
    • 90-90 hip hold: In a seated or standing position, bring one knee up to 90 degrees and hold. Activates hip flexors and deep stabilizers often neglected by machine-based training.

    Advanced: Functional Isometric Overloads

    Advanced lifters can use functional isometrics — pressing or pulling against immovable resistance (a barbell set inside a power rack with pins above it) at specific joint angles. This is a targeted technique used to break through strength plateaus in movements like the bench press, deadlift, or overhead press. Work with a certified strength coach before attempting this.

    If you already train with progressive overload principles or incorporate functional fitness into your routine, isometric holds can complement your existing program without requiring a full restructure.

    Common Mistakes That Sabotage Your Results

    Isometric training looks simple. That’s partly why people underdo it, overdo it, or do it wrong. Here are the most common errors and how to fix them.

    Mistake 1: Holding your breath. It’s natural to brace and hold your breath during a hard isometric effort — but prolonged breath-holding raises intraabdominal pressure and can spike blood pressure dangerously, especially in those with cardiovascular conditions. Fix it: exhale slowly during the hold, or practice a 4-count breath cycle. Never strain to the point of dizziness.

    Mistake 2: Relying on passive posture instead of active tension. A plank where you’re just hanging in your joints is not an isometric exercise — it’s resting. True isometric training requires intentional, forceful muscle activation. Fix it: squeeze every muscle deliberately. Think "crush the floor with your hands," "push the wall away," or "zip your ribs down" during holds.

    Mistake 3: Training only at one angle. Because strength gains are most pronounced near the trained position, always holding a mid-range plank or a standard wall sit limits your development. Fix it: rotate your isometric holds across multiple joint positions. Hold your squat at quarter depth, half depth, and near full depth at different sessions.

    Mistake 4: Ignoring recovery. Because isometric holds don’t involve ballistic movements, people assume they’re always low-risk and can be done daily at high intensity. In reality, maximal-effort isometrics — especially those targeting tendons — require adequate recovery. Fix it: treat hard isometric sessions like any strength session. Allow 48 hours before targeting the same muscles again at high intensity.

    Mistake 5: Skipping the warm-up. Cold tendons and muscles don’t respond well to maximum isometric force. Fix it: spend 5–8 minutes doing light dynamic movement (leg swings, arm circles, bodyweight flow) before attempting any held contraction above 60% effort.

    What to Eat to Support Isometric and Strength Training

    Isometric training still creates muscular stress and demands recovery — so your nutrition matters. The Academy of Nutrition and Dietetics recommends that adults engaged in regular resistance training consume between 1.2 and 1.7 grams of protein per kilogram of body weight per day to support muscle repair and adaptation.

    For a 160-pound adult, that’s roughly 87–123 grams of protein daily. Practical sources include:

    • Chicken breast (about 31g per 3.5 oz serving)
    • Greek yogurt (15–20g per cup, plain, non-fat)
    • Eggs (6g per egg — pair two with a side of cottage cheese for a complete recovery meal)
    • Canned salmon or tuna (25–27g per 3 oz serving, with anti-inflammatory omega-3s as a bonus)
    • Lentils and legumes (15–18g per cup cooked — excellent for plant-based eaters)

    For tendon health specifically — which isometric training directly supports — collagen-supporting nutrients matter too. Research from the NIH highlights the role of vitamin C in collagen synthesis. Pairing a collagen-rich food or supplement with vitamin C from citrus, bell peppers, or kiwi before training may enhance tendon adaptation.

    The USDA Dietary Guidelines also recommend adequate carbohydrate intake to fuel muscle glycogen — don’t slash carbs if you’re training seriously. A pre-workout snack of whole grain toast with nut butter or fruit with Greek yogurt provides the fuel and protein needed to sustain a quality isometric session.

    How Long Until You See Results — And What to Track

    Results from isometric training vary based on your starting point, consistency, and how you integrate it into a broader fitness plan. Here’s what the research and real-world experience suggest:

    Weeks 1–2: Neural adaptations begin. You’ll likely notice improved ability to generate tension — holds that felt impossible at 30 seconds start to become manageable. This is your nervous system learning to recruit motor units more effectively, not muscle growth yet.

    Weeks 3–6: Strength gains at trained joint angles become measurable. You may notice that dynamic exercises (squats, presses) feel more controlled and stable — especially at previously weak points in the range of motion.

    Weeks 6–12: If combined with dynamic resistance training and proper nutrition, you’ll begin to see visible strength and muscular endurance improvements. Tendon-related discomfort (if that’s why you started) often begins to resolve meaningfully in this window, according to physical therapy research.

    What to track:

    • Hold duration at consistent effort level (e.g., plank hold time week over week)
    • Perceived exertion during holds (should feel harder as you add intensity, not just time)
    • Pain or discomfort at specific joints during dynamic exercise (key for rehabilitation users)
    • Performance in related dynamic lifts (squat depth, overhead press stability)

    If you’re using isometrics for tendon rehab and see no improvement after 8–10 weeks, consult a physical therapist. If you’re training for general strength and plateau completely, consider integrating resistance band training or additional dynamic volume to complement your isometric work.

    Frequently Asked Questions

    Can isometric training help with joint pain?
    For certain types of joint and tendon pain — particularly patellar tendinopathy and lateral elbow tendinopathy — isometric loading has strong clinical support as an early intervention. It provides mechanical stimulus without aggravating inflamed tissue. That said, results vary significantly by condition and severity. Always get a diagnosis before self-treating pain with exercise.

    Is isometric training enough on its own, or does it need to be combined with other training?
    For most healthy adults, isometric training is most effective as a complement to dynamic strength or cardio work — not as the only form of exercise. It’s excellent for targeting specific weaknesses, supporting tendon health, or training during recovery periods. Used alone long-term, it may leave gaps in full-range-of-motion strength and cardiovascular fitness.

    How long should I hold each isometric contraction?
    This depends on your goal. For strength and tendon adaptation, holds of 30–45 seconds at 70–80% maximum effort are commonly recommended. For maximal strength development using functional isometrics, shorter holds (5–10 seconds) at near-maximal effort are more appropriate. Most beginners should start in the 20–30 second range and build from there.

    Is isometric training safe for people with high blood pressure?
    The research on isometrics and blood pressure reduction is promising, but specific protocols matter. Wall sits and planks performed with controlled breathing and at moderate intensity appear safe and beneficial. However, if you have uncontrolled hypertension, avoid Valsalva-style breath-holding during maximal efforts and consult your physician before starting any structured training program.

    Can I do isometric training every day?
    Low-intensity isometrics (like gentle wall sits or supported holds) can be done daily for mobility and activation purposes. High-intensity isometric sessions targeting specific muscle groups should follow the same 48-hour recovery rule as conventional strength training. Overloading tendons daily without recovery can increase injury risk rather than prevent it.

    Start Strong, Stay Consistent

    Isometric training won’t make headlines the way a viral HIIT challenge will. It’s quieter. Slower. Surprisingly demanding. And for exactly those reasons, it works.

    Whether you’re working around a nagging knee, pushing through a strength plateau, or simply looking for a smarter way to train without always adding more weight or reps, isometric holds deliver real physiological adaptation — backed by solid science and validated in clinical settings.

    Start today with a single wall sit and a plank hold. Pay attention to how hard you can make stillness feel. Then build from there, one held contraction at a time.

    Small, consistent effort in the right direction always beats sporadic perfection.


    This article is for informational and educational purposes only. The content is not intended to replace professional medical, nutritional, or fitness advice. Always consult a qualified healthcare provider, registered dietitian, or certified fitness professional before starting a new health program or making significant changes to your lifestyle.

    Content reviewed by our wellness editorial team, with references to peer-reviewed research and guidelines from leading health organizations.
  • Mobility Training: Move Better, Feel Stronger Every Day

    Mobility Training: Move Better, Feel Stronger Every Day

    Mobility Training: Move Better, Feel Stronger Every Day

    You don’t have to be injured or inflexible to benefit from mobility work — but if you skip it long enough, you probably will be.

    Picture this: you bend down to pick something up off the floor and feel a sharp pull in your lower back. Or you try to reach overhead at the gym and your shoulders just… won’t cooperate. Maybe you’ve noticed that getting up from the floor takes more effort than it used to. These aren’t signs that you’re getting old — they’re signs that your joints and tissues need more deliberate attention than most workout routines provide.

    Mobility training is one of the most underrated pillars of fitness. It’s not just stretching. It’s not just warming up. It’s a targeted practice that improves your joints’ ability to move through their full range of motion with control and strength — and research shows it has significant effects on performance, injury prevention, and long-term physical function.

    In this guide, you’ll learn exactly what mobility training is, why it matters at every fitness level, how to build a practical routine, and what results you can realistically expect. Whether you’re a gym regular or someone who mostly sits at a desk, this is for you.

    Why Mobility Training Matters More Than You Think

    Most people focus on strength, cardio, or aesthetics — and mobility gets treated as an afterthought, if it gets any attention at all. That’s a costly oversight.

    According to the American College of Sports Medicine (ACSM), flexibility and mobility training are one of the five core components of physical fitness, alongside cardiorespiratory endurance, muscular strength, muscular endurance, and body composition. Yet it’s consistently the most neglected.

    Here’s why that matters in real life: when your joints can’t move through their full range of motion, your body compensates. Your lower back takes over for tight hips. Your neck strains because your thoracic spine is stiff. Your knees bear extra load because your ankles lack dorsiflexion. Over time, these compensation patterns lead to pain, dysfunction, and eventually injury.

    A 2019 study published in the Journal of Strength and Conditioning Research found that individuals with greater hip and ankle mobility demonstrated significantly better movement mechanics during fundamental exercises like squats and deadlifts — and lower rates of knee and lumbar complaints. The connection between mobility and injury risk is well-established.

    Beyond injury prevention, mobility work directly improves how you perform in every other type of exercise. Better shoulder mobility means more effective pressing and pulling movements. Better hip mobility allows deeper, more powerful squats. As noted by functional fitness principles, the ability to move well in multiple planes of motion is foundational to real-world physical capacity.

    The Science Behind Mobility: How It Actually Works

    Mobility is often confused with flexibility — but they’re not the same thing. Flexibility is your muscle’s passive ability to lengthen. Mobility is your joint’s active ability to move through a range of motion with control. You can be flexible without being mobile, and that distinction changes everything about how you train.

    When you improve mobility, you’re working on several interconnected systems: joint capsule health, connective tissue extensibility, neuromuscular control, and motor patterning. It’s not just about how far you can move — it’s about how well you can control that movement.

    One common myth is that you need to hold long static stretches to improve mobility. The research actually tells a more nuanced story. A meta-analysis published in the British Journal of Sports Medicine found that while static stretching improves passive range of motion, active mobility drills — movements where you control the joint through its range — produce more functional and lasting results, particularly for athletic performance and injury prevention.

    Fascia, the connective tissue that wraps around your muscles and joints, also plays a major role. Research from Harvard Medical School suggests that fascia responds well to consistent, controlled movement and loading — not just passive lengthening. This is why mobility training incorporates dynamic movement patterns rather than simply holding poses.

    The nervous system is equally important. Many mobility restrictions aren’t purely structural — they’re neurological. Your nervous system limits range of motion as a protective mechanism. Deliberate mobility practice essentially "teaches" your nervous system that it’s safe to access greater ranges, gradually expanding what’s available to you.

    How to Get Started: Your Practical Mobility Routine

    The good news is that you don’t need a lot of time or equipment to build meaningful mobility. Consistency matters far more than duration or complexity.

    Beginner Level (10–15 minutes, 3–4x per week):

    Start with the five areas most people restrict in daily life: ankles, hips, thoracic spine, shoulders, and wrists. A simple daily circuit might look like this:

    1. Ankle Circles and Dorsiflexion Rocks (60 seconds per side): Sit in a squat position or kneel and rock your knee forward over your toes. This directly improves squat depth and reduces knee strain.
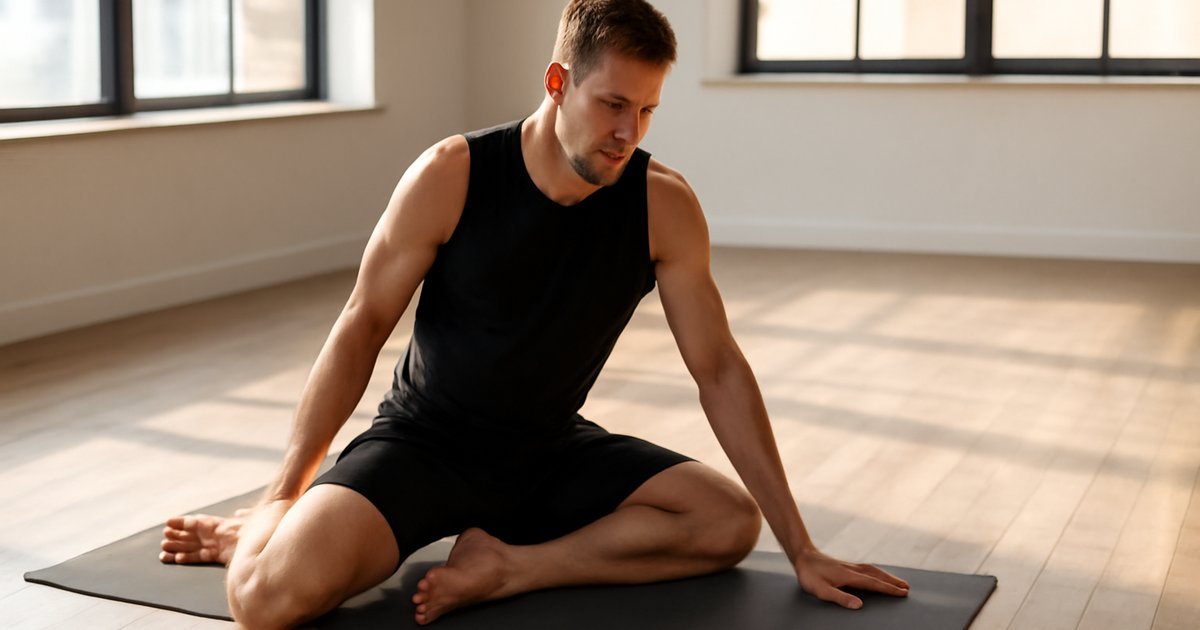
    2. 90/90 Hip Switches (60–90 seconds): Sit on the floor with both legs bent to 90 degrees. Slowly rotate your hips from side to side, keeping your torso upright. One of the most effective hip mobility drills available.
    3. Cat-Cow with Thoracic Rotation (10 reps each): Begin on all fours, cycle through spinal flexion and extension, then add a rotation — threading one arm under your body and reaching toward the ceiling. Targets the mid-back, which stiffens from prolonged sitting.
    4. Shoulder CARs — Controlled Articular Rotations (5 reps per arm): Slowly rotate your shoulder through its full range in a controlled circle. This technique, popularized by the Functional Range Conditioning system, trains joint health directly.
    5. Deep Squat Hold (30–60 seconds): Use a doorframe or TRX strap for support if needed. Simply maintaining this position consistently builds significant hip, ankle, and lower back mobility over time.

    Intermediate Level: Add end-range isometric holds — get to the edge of your range of motion and squeeze the muscles there for 5–10 seconds. This builds active mobility, not just passive flexibility. Incorporate tools like a foam roller for myofascial release before your mobility work.

    Advanced Level: Incorporate loaded mobility — using light resistance bands or weights at end ranges (e.g., goblet squat holds, Jefferson curls with light loading). This builds strength through full ranges and translates directly to performance. Consider pairing with progressive overload principles to gradually increase challenge in your mobility practice.

    Common Mistakes That Sabotage Your Mobility Progress

    Mobility training sounds simple — and it is — but there are a few common errors that significantly slow results or even cause setbacks.

    Mistake 1: Confusing pain with progress. Feeling a deep stretch is normal. Feeling sharp, pinching, or joint pain is not. Mobility work should feel intense but not painful. Many beginners push too hard too fast and aggravate existing restrictions. Fix it: stay at a 6 or 7 out of 10 on sensation intensity. If you feel pinching in a joint, back off immediately.

    Mistake 2: Only doing static stretching and calling it mobility work. Holding a hamstring stretch for 30 seconds may improve passive flexibility, but it won’t build the active control needed for functional movement. Fix it: balance passive stretches with active drills like leg lifts, controlled rotations, and end-range isometrics. This is the difference between going through a range and owning it.

    Mistake 3: Doing mobility work only when something hurts. This is the equivalent of only brushing your teeth when you have a toothache. Mobility work is most effective as a preventive practice. Fix it: schedule it like any other workout. Even 10 minutes before bed or first thing in the morning compounds significantly over weeks and months.

    Mistake 4: Ignoring the areas you’re weakest in. It’s natural to gravitate toward drills that feel good — usually the areas that are already mobile. But the restriction points are where you need the most attention. Fix it: do a basic movement screen (or work with a physical therapist or certified trainer) to identify your actual limitations, not just where you feel tight.

    Mistake 5: Skipping recovery. Tissues adapt between sessions, not during them. Poor sleep, chronic stress, and dehydration all impair connective tissue recovery. Research from the National Institutes of Health links sleep deprivation to increased musculoskeletal stiffness and reduced tissue repair. Fix it: treat sleep and hydration as part of your mobility protocol, not separate from it.

    What to Eat to Support Joint and Connective Tissue Health

    Mobility training creates the stimulus for change — but what you eat determines how well your tissues respond and recover.

    Collagen-supporting nutrients: Collagen is the primary structural protein in tendons, ligaments, and cartilage. Vitamin C is essential for collagen synthesis. According to research published in the American Journal of Clinical Nutrition, consuming 15 grams of gelatin or collagen peptides with 50 mg of vitamin C approximately 30–60 minutes before exercise significantly increased collagen synthesis in tendons and connective tissues. Foods like citrus fruits, bell peppers, and leafy greens provide excellent vitamin C sources.

    Omega-3 fatty acids: Found in fatty fish (salmon, sardines, mackerel), walnuts, and flaxseeds, omega-3s have well-documented anti-inflammatory effects that support joint comfort and tissue recovery. The Academy of Nutrition and Dietetics recommends at least two servings of fatty fish per week.

    Protein adequacy: Your muscles, tendons, and ligaments are built from protein. Inadequate protein intake impairs tissue repair and adaptation. USDA Dietary Guidelines and sports nutrition research suggest aiming for 0.7–1 gram of protein per pound of body weight for active adults. You can explore more on this in the optimal protein intake guide.

    Hydration: Joint cartilage is largely water. Even mild dehydration reduces synovial fluid production, increasing friction in joints. Mayo Clinic recommends approximately 3.7 liters (125 oz) of total daily water intake for men and 2.7 liters (91 oz) for women, from all sources.

    Anti-inflammatory foods: Berries, turmeric, ginger, dark leafy greens, and olive oil all contribute to a dietary pattern that reduces systemic inflammation — which directly affects how your joints feel and recover. Avoid excess processed foods and added sugars, which research consistently links to elevated inflammatory markers.

    How Long Until You See Results — and What to Track

    This is where honest expectations matter. Mobility improvements take longer than most people expect and happen more gradually than strength or cardiovascular gains. That’s not a reason to skip them — it’s a reason to start now.

    Research suggests that consistent mobility training produces measurable improvements in range of motion within 4–8 weeks. However, the functional benefits — moving better, feeling less stiff, lifting with more ease — often appear sooner, sometimes within 2–3 weeks, as the nervous system adapts before the structural tissues do.

    Results vary significantly based on your starting point, training history, age, and consistency. Someone who has been sedentary for years may notice faster initial gains than a trained athlete trying to unlock the last 10% of a restricted range.

    What to track:

    • Squat depth: Can you squat to parallel with a neutral spine? With your heels on the ground? This is a useful baseline marker.
    • Shoulder reach: Can you raise both arms straight overhead without your lower back arching? A simple wall test reveals a lot.
    • Morning stiffness: Note how long it takes to feel "loose" in the morning. This typically decreases within 2–4 weeks of consistent practice.
    • Exercise performance: Are your squats feeling deeper? Your pressing movements smoother? These functional gains confirm that your mobility work is transferring.

    If you’ve been consistent for 8–12 weeks without noticeable progress, consider consulting a physical therapist or certified mobility specialist. Some restrictions — particularly around joints with past injuries or structural changes — may require professional assessment.

    Frequently Asked Questions About Mobility Training

    Is mobility training the same as stretching?
    Not exactly. Stretching typically refers to passive lengthening of muscles. Mobility training is broader — it includes active range-of-motion work, joint circles, controlled movements through end ranges, and strength in those positions. Think of stretching as a component of mobility, not the whole picture.

    How often should I do mobility training?
    Daily practice is ideal, even if it’s just 10–15 minutes. Unlike heavy strength training, mobility work doesn’t require significant recovery time. Short, frequent sessions produce better results than one long weekly session. ACSM recommends flexibility work at least 2–3 days per week at minimum.

    Can mobility training help with chronic back or joint pain?
    For many people, yes — but this depends heavily on the cause of the pain. Mobility restrictions often contribute to compensatory patterns that cause discomfort. However, if you have a diagnosed condition like a herniated disc, osteoarthritis, or previous injury, always consult a healthcare provider or physical therapist before beginning a new mobility practice.

    Should I do mobility work before or after my workout?
    Both have a place. Dynamic mobility drills (active, movement-based) are ideal before training to prepare joints and activate ranges. Static and restorative mobility work is better suited for post-workout or standalone sessions. Avoid heavy static stretching immediately before intense strength training — research suggests it may temporarily reduce force production.

    I’m not an athlete. Do I still need mobility training?
    Absolutely — arguably more so. Non-athletes tend to spend more time in fixed positions (sitting, driving, screen time) that progressively restrict joint range of motion. Mobility training is arguably most impactful for sedentary or lightly active adults, where small improvements translate directly into better quality of daily movement and reduced discomfort.

    Your Move Starts Today

    Mobility training isn’t glamorous. It won’t make for a dramatic before-and-after photo. But it might be the single most impactful addition you can make to your fitness routine if you want to keep moving well — not just for the next few months, but for the next few decades.

    You don’t need an hour or a perfect setup. Start with 10 minutes. Pick two or three drills that address your tightest areas. Do them consistently. Track how you feel, how you move, and how exercises that used to feel stiff start to feel more natural.

    Small, consistent effort applied in the right direction compounds into remarkable results. Your joints will thank you — and so will every other workout you do.


    This article is for informational and educational purposes only. The content is not intended to replace professional medical, nutritional, or fitness advice. Always consult a qualified healthcare provider, registered dietitian, or certified fitness professional before starting a new health program or making significant changes to your lifestyle.

    Content reviewed by our wellness editorial team, with references to peer-reviewed research and guidelines from leading health organizations.