Tag: functional fitness

  • Suspension Training: Build Strength with Your Own Body

    Suspension Training: Build Strength with Your Own Body

    Suspension Training: Build Strength with Your Own Body

    One piece of equipment, anchored anywhere — and suddenly, every muscle in your body has to show up and work.

    You’ve probably seen those yellow and black straps hanging from a pull-up bar at the gym or dangling from a park bench — and maybe you walked right past them. Most people do. But suspension training is quietly one of the most effective, scalable, and underused training methods available to everyday adults.

    Here’s a number worth knowing: a study published in the Journal of Human Kinetics found that suspension training exercises produced significantly higher core muscle activation compared to traditional floor-based exercises — even when the movement patterns looked similar on the surface.

    Whether you’re returning to fitness after a long break, hitting a plateau with conventional gym equipment, or looking for a smarter way to train at home or while traveling, suspension training deserves a serious look. In this guide, you’ll learn how it works, what the science says, how to start safely, and how to keep progressing — no matter your current fitness level.

    Why Suspension Training Matters More Than You Think

    Most fitness conversations orbit around two poles: lifting heavy things or doing cardio. Suspension training lives in a different space — one that prioritizes control, stability, and multi-joint coordination over isolated muscle pumping.

    When you perform a suspension row or a single-leg squat using straps anchored overhead, your body can’t cheat. There’s no bench to support your back, no machine to keep you in a fixed path. Every rep requires your stabilizer muscles — those smaller, deeper muscles surrounding your joints — to fire alongside the primary movers.

    According to the American College of Sports Medicine (ACSM), functional training — which trains movement patterns rather than isolated muscles — is consistently ranked among the top fitness trends for good reason. It translates directly to real-life strength: lifting groceries, climbing stairs, getting up from the floor without strain.

    Beyond functional strength, suspension training offers something that weights often can’t: immediate scalability. You don’t need to load a barbell or switch dumbbells. You adjust the angle of your body, and the exercise gets harder or easier in seconds. That makes it genuinely accessible across a wide range of fitness levels.

    For adults aged 25-60, this matters especially. Joint health becomes a growing concern with age, and suspension training allows for significant training stimulus with far less compressive load on the spine and knees compared to heavy barbell work.

    The Science Behind Suspension Training and How It Actually Works

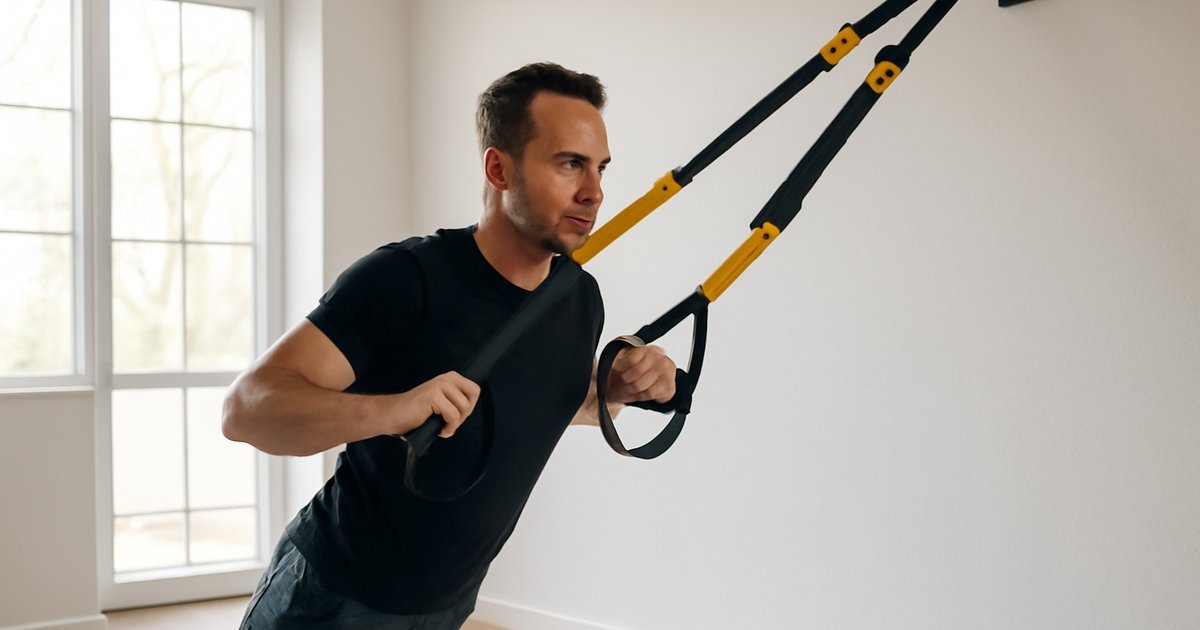
    The core mechanic of suspension training is simple but biomechanically powerful: your body creates resistance by working against gravity at an angle, using adjustable straps anchored to a fixed point above you. The further you lean away from the anchor point, the more of your bodyweight becomes the load. The closer you stand, the easier the movement.

    What makes this uniquely effective is what researchers call “instability-induced muscle activation.” Because the straps can move freely, your body is never in a perfectly stable environment. Your nervous system responds by recruiting more muscle fibers — particularly in the core, hips, and shoulder girdle — to maintain control throughout the movement.

    A study published in the Journal of Strength and Conditioning Research compared EMG (electromyographic) muscle activation during suspension push-ups versus traditional push-ups on the floor. The suspension version showed meaningfully greater activation of the rectus abdominis and obliques — not because it was a core exercise, but because the instability demanded more from those muscles automatically.

    One myth worth addressing: suspension training is often dismissed as “too easy” or “only for rehab.” This misunderstands the physics. At steeper angles — for example, a suspended atomic push-up or an inverted row with feet elevated — the difficulty matches or exceeds many barbell movements. Elite athletes, military personnel, and professional sports teams have incorporated suspension training precisely because of its high ceiling, not just its low floor.

    It’s also worth noting that suspension training is particularly valuable for shoulder health. Because the movement path is not fixed, the shoulder joint tracks its natural arc rather than being forced into a machine’s predetermined path. For people with a history of minor shoulder discomfort (not acute injury), this can feel noticeably better than pressing machines or even free weights.

    How to Get Started with Suspension Training

    The good news: you don’t need a lot. A quality suspension trainer (TRX is the most widely recognized brand, though comparable options exist at various price points), a sturdy anchor point — a door frame, pull-up bar, tree branch, or ceiling mount — and enough space to move freely are all you need.

    Step 1: Set up safely. Your anchor point must support your full bodyweight plus dynamic force. A standard door anchor that comes with most suspension kits works for most adults. Test it by pulling hard before your first session.

    Step 2: Learn the body position basics. Your alignment is everything in suspension training. Keep your ears over your shoulders, shoulders over your hips, and hips over your ankles whenever possible. A “plank on your feet” posture is the foundation of most movements.

    Beginner Starting Exercises:

    • Suspension Row: Stand facing the anchor, lean back at roughly 45 degrees, and pull your chest to your hands. This builds upper back and bicep strength with minimal joint stress.
    • Suspension Squat: Hold handles facing the anchor, lower into a squat while keeping your torso upright. The straps assist balance and allow you to sit deeper safely.
    • Suspension Chest Press: Face away from anchor, lean forward, and press as you would a push-up. Easier than a floor push-up — a great entry point for beginners.
    • Suspension Plank: Feet in the foot cradles, hands on the floor. Hold a plank position. Even 20 seconds is genuinely challenging.

    Intermediate Progressions:

    • Suspension Pike (from plank, drive hips toward ceiling)
    • Single-Leg Squat (one foot elevated in cradle)
    • Suspended Push-Up (both hands in handles)
    • Atomic Push-Up (push-up followed immediately by a knee tuck)

    Advanced Options:

    • Suspended Body Saw
    • Single-Arm Row
    • Inverted Row with Feet Elevated
    • Suspended Fallout (similar to an ab wheel rollout)

    A good beginner session looks like 3 rounds of 4-5 exercises, 8-12 reps each, with 60-90 seconds rest between rounds. Three sessions per week allows sufficient recovery. If you’re also exploring bodyweight-based training more broadly, you might find our guide on Calisthenics for Adults: Build Real Strength Anywhere a useful companion resource.

    Common Mistakes That Sabotage Your Suspension Training Results

    Suspension training is intuitive — but a few consistent errors can keep you stuck or increase your injury risk. These mistakes are easy to make, especially without a coach watching your form.

    Mistake 1: Ignoring strap length adjustment. Most people set their straps once and never change them. But strap length dramatically affects the difficulty of every movement. Too long and a row becomes too easy; too short and a chest press becomes dangerous. Get in the habit of adjusting before each exercise — it takes ten seconds and changes everything.

    Mistake 2: Moving too fast. The instability of suspension training punishes momentum-driven reps. When you swing through a row or rush a squat, your stabilizers disengage and the primary movers do all the work — defeating the purpose. Slow the tempo down. A 3-second lowering phase will transform even basic exercises into serious challenges. For more on training tempo, see our guide on Tempo Training: The Secret to Smarter Muscle Growth.

    Mistake 3: Letting the hips sag or pike out of alignment. Poor body alignment is the most common form error in suspension training. In any plank-based movement — push-ups, pikes, body saws — a sagging lower back or elevated hips shifts load away from the target muscles and places it on the lumbar spine. Before each rep, consciously brace your core as if you’re about to absorb a punch.

    Mistake 4: Skipping the warm-up. Because suspension training activates stabilizer muscles that don’t get much work in daily life, jumping in cold can lead to shoulder, wrist, or hip irritation. A 5-minute dynamic warm-up — arm circles, hip hinges, leg swings, and a few bodyweight squats — makes a significant difference in how your joints feel mid-session.

    Mistake 5: Underestimating recovery needs. Suspension training creates real muscle damage — particularly in the core and stabilizers — that needs time to repair. Many beginners feel surprisingly sore after their first session and make the mistake of training again the next day. Allow 48 hours between sessions targeting the same muscle groups, especially early on.

    Supporting Your Training with the Right Nutrition

    Suspension training creates a meaningful stimulus for muscle protein synthesis — your body’s process of repairing and building muscle tissue. Without adequate nutritional support, your results will plateau regardless of how well-designed your workouts are.

    According to the Academy of Nutrition and Dietetics, active adults should target approximately 1.2 to 2.0 grams of protein per kilogram of body weight per day to support muscle maintenance and growth — the higher end of that range applies when training intensity is elevated.

    Practical protein sources to prioritize include:

    • Chicken breast: roughly 26g of protein per 3-ounce cooked serving
    • Greek yogurt (plain): approximately 17-20g per cup
    • Eggs: about 6g per egg — 3 whole eggs post-workout is a solid start
    • Canned salmon or tuna: 20-25g per 3-ounce serving, with the added benefit of omega-3 fatty acids that support joint and muscle recovery
    • Lentils or black beans: 15-18g per cooked cup — excellent plant-based options

    Carbohydrates matter too. Suspension training depletes muscle glycogen — your muscles’ preferred fuel source. Consuming moderate amounts of complex carbohydrates (oats, sweet potatoes, brown rice, quinoa) around your training windows helps sustain energy and supports recovery. USDA Dietary Guidelines recommend that carbohydrates make up 45-65% of total caloric intake for active adults.

    Hydration is often overlooked but critical. Even mild dehydration — as little as 2% of body weight — can impair strength output and mental focus, according to research cited by the American College of Sports Medicine. Aim for at least 8-10 cups of water daily, more on training days.

    How Long Until You See Results — and What to Track

    Results from suspension training are real, but they follow a predictable timeline that beginners often misunderstand. Here’s what to expect and what to measure.

    Weeks 1-2: Neural adaptation. Your nervous system is learning to recruit muscles more efficiently. You’ll likely feel shaky, uncoordinated, and surprisingly fatigued — but that’s your brain and muscles building new communication pathways. Don’t expect visible changes yet, but do expect to feel noticeably more controlled by week two.

    Weeks 3-6: Functional strength gains. Most people notice that daily movements feel easier — carrying bags, climbing stairs, getting up off the floor. Your posture may improve as your posterior chain and core become more engaged. If you’re tracking, you should see reps increasing or body angle steepening without additional effort.

    Weeks 6-12: Visible and measurable changes. With consistent training and adequate nutrition, body composition shifts become more apparent. Lean muscle increases, and fat mass may decrease — though this depends significantly on your dietary habits. Research published in the Journal of Physiology supports that visible hypertrophy typically requires at least 6-8 weeks of progressive overload training.

    What to track:

    • Reps completed per exercise each session
    • Body angle for key exercises (steeper = harder = progress)
    • Perceived exertion on a 1-10 scale
    • Energy and recovery quality (soreness duration, sleep quality)
    • Optional: monthly photos from the same angle and lighting

    If you’ve been training consistently for 8+ weeks and see no measurable progress, consider reassessing your nutrition, sleep quality, and whether you’re progressively challenging yourself. A session with a certified personal trainer can identify form issues or programming gaps that are easy to miss on your own. For those interested in understanding progressive loading more deeply, our guide on Mobility Training: Move Better, Feel Stronger Every Day pairs well with suspension work by addressing the joint range of motion that makes advanced progressions possible.

    Frequently Asked Questions

    Can suspension training replace weightlifting entirely?
    It depends on your goals. For general fitness, functional strength, core stability, and body composition, suspension training can serve as a primary training method. However, for maximum hypertrophy (muscle size) or sport-specific strength development, it works best as a complement to barbell or dumbbell training rather than a full replacement. Results vary based on baseline fitness and specific objectives.

    Is suspension training safe for people with lower back pain?
    For many people with chronic low-grade lower back discomfort (not acute injury or diagnosed conditions), suspension training can actually be beneficial — because it strengthens the deep stabilizer muscles that support the spine. That said, always consult a physical therapist or physician before beginning any new training program if you have a history of back issues. Some exercises, like the suspended fallout, may be contraindicated until baseline core strength is established.

    How much does a suspension trainer cost?
    Entry-level options from reputable brands start around $30-40. The TRX brand — widely used in clinical and commercial settings — ranges from $100-200 depending on the model. Most fitness professionals agree that any well-constructed suspension trainer with secure attachment hardware will deliver excellent results. Avoid very cheap, no-brand options that may not support dynamic loading safely.

    Can I use suspension training for cardio as well as strength?
    Absolutely. When structured as a circuit — minimal rest between exercises, dynamic movements like mountain climbers, jump squats in foot cradles, and explosive rows — suspension training elevates heart rate significantly and can serve as an effective cardiovascular stimulus. The American College of Sports Medicine recognizes circuit-style resistance training as a valid mode of cardiovascular conditioning.

    How is suspension training different from using resistance bands?
    Resistance bands create external resistance — they pull against your movement. Suspension training uses your body weight and gravity as resistance, and the instability element is a key differentiator. Both are valuable, and many people use them together for comprehensive training variety. If you’re curious about band training specifically, our guide on Resistance Band Training: Build Strength Anywhere covers that method in detail.

    Start Moving Smarter — One Rep at a Time

    Suspension training won’t hand you a transformation overnight — nothing honest ever does. But what it offers is something genuinely rare in fitness: a method that scales with you, challenges your whole body simultaneously, demands real control rather than raw force, and can be done almost anywhere with minimal equipment.

    Start with the basics. A suspension row. A squat holding the handles. A modified chest press. Do those consistently for three weeks, and then progress the angle, the tempo, the complexity. That’s the whole game.

    Your body doesn’t need more equipment. It needs a smarter challenge — and a set of straps might be exactly that.


    This article is for informational and educational purposes only. The content is not intended to replace professional medical, nutritional, or fitness advice. Always consult a qualified healthcare provider, registered dietitian, or certified fitness professional before starting a new health program or making significant changes to your lifestyle.

    Content reviewed by our wellness editorial team, with references to peer-reviewed research and guidelines from leading health organizations.

  • Kettlebell Training: The Full-Body Workout You’re Missing

    Kettlebell Training: The Full-Body Workout You’re Missing

    Kettlebell Training: The Full-Body Workout You’re Missing

    One tool. Hundreds of movements. And a workout style that builds strength, cardio, and mobility all at once — if you know how to use it.

    Introduction

    Picture this: you have 30 minutes, a single piece of equipment, and you want a workout that actually does something — not just burns time. No treadmill. No stack of machines. No complicated gym setup. Just you, the floor, and a kettlebell.

    Kettlebell training has been around for centuries — originally used by Russian strongmen in the 1700s — but it’s had a massive resurgence in modern fitness culture, and for good reason. Unlike traditional dumbbells or barbells, the offset center of gravity in a kettlebell forces your body to stabilize, rotate, and engage muscles you’d normally ignore during conventional weightlifting.

    If you’ve ever felt like your workouts were stuck in a rut — or you’ve been told kettlebells are "too complicated" or "only for advanced athletes" — this guide is going to change your perspective. You’ll learn the real science behind why kettlebell training works, how to start safely, what mistakes to avoid, and how long it takes before you start seeing meaningful results.

    Whether you’re a complete beginner or someone looking to add variety and intensity to an existing routine, kettlebell training has a version that works for you.

    Why Kettlebell Training Matters More Than You Think

    Most adults spend the majority of their day sitting — at a desk, in a car, on a couch. That sedentary pattern doesn’t just affect cardiovascular health; it leads to weakened posterior chains (the muscles along the back of your body), poor hip mobility, and a nagging vulnerability to low back pain.

    Kettlebell training directly addresses all of these. The signature movement — the kettlebell swing — is a hip-hinge pattern that reactivates glutes, hamstrings, and spinal erectors that tend to go dormant from prolonged sitting.

    According to a study published in the Journal of Strength and Conditioning Research, participants who completed an eight-week kettlebell training program showed significant improvements in both aerobic capacity and muscular strength — results that typically require separate training modalities to achieve. That dual-efficiency is rare in fitness.

    The American College of Sports Medicine (ACSM) also recognizes kettlebell training as a legitimate form of resistance training that, when performed correctly, can meet weekly physical activity recommendations for both muscle-strengthening and moderate-intensity aerobic exercise in a single session.

    For busy adults who struggle to compartmentalize "cardio days" and "lifting days," this kind of metabolic overlap is genuinely valuable — not just as a time-saver, but as a smarter way to train.

    The Science Behind Kettlebell Training: How It Actually Works

    Here’s the part most people skip — and why their kettlebell results fall flat: understanding the biomechanics.

    Kettlebells differ from dumbbells primarily in their center of mass. The ball-shaped body with a flat handle means the weight hangs below your grip instead of being balanced symmetrically on either side. This creates rotational force during movement, requiring your stabilizer muscles — particularly the rotator cuff, deep core, and hip stabilizers — to work continuously throughout every rep.

    This is why kettlebell exercises tend to recruit more total muscle mass than comparable dumbbell exercises. A 2010 study published in the Journal of Human Kinetics found that kettlebell swings activated the erector spinae (lower back muscles) significantly more than conventional deadlifts at matched loads — a finding that surprised even the researchers.

    Common myth to bust: "Kettlebells are just dumbbells shaped differently." Not true. You cannot simply substitute one for the other and expect the same training stimulus. A kettlebell goblet squat, for example, naturally shifts your center of gravity forward and allows for greater squat depth than a dumbbell goblet squat — making it inherently more effective for hip mobility and lower-body development.

    Additionally, many kettlebell movements — swings, cleans, snatches — are ballistic in nature. This means they train power output: the ability to generate force quickly. According to Harvard Health Publishing, power training is particularly important for adults over 40, as fast-twitch muscle fibers (responsible for explosive strength) decline significantly faster than slow-twitch fibers with age.

    Training power isn’t just about athletics — it’s about fall prevention, functional independence, and maintaining the physical capacity to live actively into your later decades.

    How to Get Started With Kettlebell Training

    Starting kettlebell training well means starting smart. Here’s a structured path from absolute beginner to confident practitioner.

    Choose the Right Starting Weight

    This is where many beginners go wrong immediately — picking a weight that’s either too light to build skill or too heavy to maintain form. As a general starting guideline:

    • Women: 8–12 kg (18–26 lbs) for most exercises
    • Men: 12–16 kg (26–35 lbs) for most exercises

    These ranges apply to foundational movements. Pressing movements may require lighter weights; deadlift patterns can often handle more. Adjust based on your current fitness level and honest assessment of your form.

    Master These Foundation Movements First (Beginner)

    1. Deadlift — Learn to hinge at the hip safely before any swing variations
    2. Goblet Squat — Builds lower-body strength and teaches bracing technique
    3. Two-Handed Swing — The cornerstone of kettlebell training; non-negotiable as a starting point
    4. Halo — Develops shoulder mobility and grip familiarity with the bell
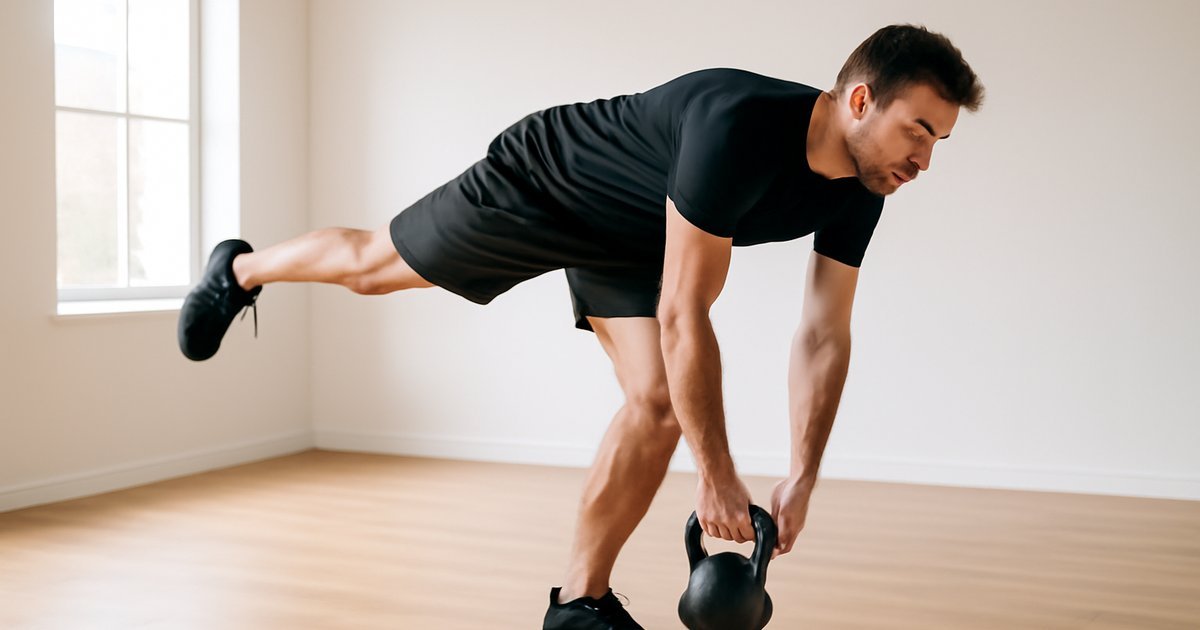
    5. Romanian Deadlift (single leg) — Trains balance and unilateral hip stability

    Spend at least two to four weeks on these before moving forward. Form matters more than load or speed at this stage.

    Build Your First Workout Structure (Beginner–Intermediate)

    A simple but effective format:

    • 3 days per week, non-consecutive days
    • 3–4 exercises per session
    • 3 rounds of 8–12 reps each (or timed sets of 20–30 seconds)
    • 60–90 seconds rest between rounds

    Progress to More Complex Movements (Intermediate)

    Once the fundamentals are solid, add:

    • One-arm swing — Greater demand on anti-rotation core stability
    • Clean and Press — Full-body compound movement combining hip drive and overhead pressing
    • Turkish Get-Up — A slow, controlled movement that develops mobility, stability, and proprioception
    • Single-arm rows — Posterior chain and lat development

    If you’re interested in pairing this with bodyweight training for added variety, our guide on Calisthenics for Adults: Build Real Strength Anywhere offers an excellent complement to kettlebell work.

    Common Mistakes That Sabotage Kettlebell Results

    These mistakes are almost universal among beginners — and even some intermediate trainees. Recognizing them now can save you weeks of wasted effort (and potential injury).

    Mistake #1: Using Your Arms to Swing, Not Your Hips

    The kettlebell swing is a hip-hinge, not a front raise. When you rely on shoulder and arm strength to lift the bell, you lose the explosive hip power that makes the swing effective — and you dramatically increase the risk of shoulder impingement. Fix: Think of the bell as a pendulum. Your hips snap forward; the arms just guide the bell.

    Mistake #2: Not Bracing the Core Properly

    A soft core during ballistic movements like swings or cleans puts direct strain on the lumbar spine. Many people hold their breath incorrectly or simply don’t engage their midsection at all. Fix: Breathe in before the movement, brace the core as if bracing for a punch, and exhale sharply at the top of the swing. For a deeper understanding of core engagement mechanics, visit our guide on Core Training: Build a Stronger, More Stable Body.

    Mistake #3: Going Too Heavy, Too Fast

    Ego lifting is just as problematic with kettlebells as it is with barbells — arguably more so, since poor form in dynamic movements amplifies injury risk. Fix: Stick with a weight where you can complete all reps with clean, controlled mechanics. Technical breakdown is a clear signal to reduce load.

    Mistake #4: Skipping Mobility Work

    Kettlebell training places significant demands on hip mobility, thoracic spine rotation, and shoulder stability. Jumping into training without addressing existing restrictions leads to compensatory movement patterns that reduce effectiveness and build in dysfunction. Fix: Spend 5–10 minutes before each session on targeted mobility work — particularly hip openers, thoracic rotations, and shoulder circles. Our Mobility Training guide is a great starting resource.

    Mistake #5: Inconsistent Practice

    Kettlebell skills — especially the swing, clean, and snatch — are motor patterns. They require repetition over time to become automatic. Training once every two weeks won’t build that neuromuscular efficiency. Fix: Commit to at least 2–3 sessions per week, even if they’re short. Consistent practice beats sporadic intensity every time.

    What to Eat to Support Kettlebell Training

    Nutrition doesn’t need to be complicated, but a few key principles can significantly impact your recovery and progress.

    Protein is non-negotiable. Kettlebell training — especially when using heavier loads or high-rep swings — creates enough mechanical tension to stimulate muscle protein synthesis. The Academy of Nutrition and Dietetics recommends 1.2–1.7 grams of protein per kilogram of body weight per day for active adults engaged in regular resistance training. Prioritize lean sources: chicken, turkey, eggs, Greek yogurt, legumes, and fish.

    Don’t underestimate carbohydrates. Ballistic kettlebell movements are metabolically demanding. Glycogen (stored from carbohydrates) is your primary fuel source during moderate-to-high intensity training. The USDA Dietary Guidelines suggest that 45–65% of daily calories should come from carbohydrates for active adults. Whole grains, sweet potatoes, oats, and fruit are excellent choices.

    Hydration matters more than you think. Even mild dehydration — as little as 1–2% of body weight in fluid loss — can impair strength output and coordination, according to research from the National Institutes of Health. Aim for at least half your body weight in ounces of water per day, and more on training days.

    Timing tip: A light meal or snack containing both protein and carbohydrates within 1–2 hours before training can support performance. Post-workout, aim to consume protein within 30–60 minutes of finishing to support muscle recovery.

    How Long Until You See Results — and What to Track

    Realistic timelines are important here. Kettlebell training is effective, but it is not magic — and results will vary based on your starting fitness level, training frequency, nutrition, and recovery habits.

    Weeks 1–3: You’ll primarily be developing motor patterns and coordination. Don’t expect visible physical changes yet. What you should notice: improved awareness of your hip hinge, better grip strength, and some initial muscle soreness (particularly in the glutes and upper back).

    Weeks 4–8: Noticeable improvements in movement quality. Many people report increased energy, better posture, and a tighter mid-section. Strength gains in the major muscle groups become measurable.

    Weeks 8–16: Visible changes in body composition are more likely for those training 3+ times per week and supporting their training with appropriate nutrition. Research supports that eight to twelve weeks of consistent kettlebell training produces significant improvements in both lean mass and aerobic endurance markers.

    What to track:

    • Reps completed at a given weight (strength indicator)
    • Heart rate recovery after timed sets (cardiovascular adaptation)
    • How your clothes fit (body composition proxy)
    • Quality of movement — video yourself occasionally to spot form improvements
    • Energy levels and sleep quality — often the first things people notice improving

    When to reassess or get guidance: If you’ve been training consistently for 12 weeks with no noticeable progress, consider consulting a certified kettlebell instructor (look for RKC or StrongFirst certifications) or a registered dietitian to evaluate your nutrition strategy.

    Frequently Asked Questions About Kettlebell Training

    Can I use kettlebells if I have low back pain?
    This depends on the cause and severity. For many people with non-specific low back pain caused by muscular weakness or sedentary habits, properly coached kettlebell training — particularly hip hinge and swing patterns — can actually be rehabilitative. However, if you have a disc herniation, spinal stenosis, or acute injury, consult a physical therapist before starting any kettlebell program. Always get clearance from a healthcare provider first.

    How many kettlebells do I need?
    One well-chosen kettlebell is enough to build a complete training program, especially for beginners. Most people benefit from eventually having two or three bells at different weights — one for pressing movements, one for swings and lower-body work. But start with one. The skill matters more than the equipment.

    Can kettlebell training replace the gym entirely?
    For many adults, yes — particularly those focused on general fitness, fat loss, and functional strength rather than competitive bodybuilding or powerlifting. A comprehensive kettlebell program can deliver strength, cardiovascular conditioning, and mobility work in a single tool. Results will vary based on your goals and current fitness baseline.

    Is kettlebell training safe for people over 50?
    Yes — with appropriate progression and coaching. In fact, the hip-dominant, full-body nature of kettlebell training makes it particularly valuable for older adults looking to maintain power output, bone density, and functional independence. Start light, prioritize form, and work with a qualified instructor if possible.

    How does kettlebell training compare to HIIT?
    Kettlebell training can function as HIIT when performed in timed circuits with minimal rest — or as more traditional strength training when done with heavier loads and longer rest periods. It’s genuinely flexible. The intensity is largely determined by your programming choices rather than the tool itself.

    Conclusion

    Kettlebell training isn’t a trend. It’s a time-tested, science-backed approach to building strength, power, endurance, and mobility — all from a single piece of equipment you can use anywhere.

    The key is starting with the right weight, mastering the fundamentals before pushing complexity, and showing up consistently. You don’t need perfect technique on day one. You need enough awareness to train safely and enough consistency to build the skills that make this tool genuinely transformative.

    If you’ve been looking for a workout approach that fits a busy life without sacrificing results — this is worth your time. Pick up one kettlebell, learn the swing, and give it eight weeks of honest effort. Small, consistent steps will always outperform sporadic intensity.

    Your action step for today: Choose a starting weight, find a certified kettlebell instructor or reliable instructional resource, and schedule your first three sessions this week. That’s it. The rest follows from there.


    This article is for informational and educational purposes only. The content is not intended to replace professional medical, nutritional, or fitness advice. Always consult a qualified healthcare provider, registered dietitian, or certified fitness professional before starting a new health program or making significant changes to your lifestyle.

    Content reviewed by our wellness editorial team, with references to peer-reviewed research and guidelines from leading health organizations.
  • Core Training: Build a Stronger, More Stable Body

    Core Training: Build a Stronger, More Stable Body

    You’ve been doing sit-ups for years and wondering why your lower back still aches — here’s what’s actually going on.

    Here’s a stat that might surprise you: according to the National Institutes of Health, nearly 80% of American adults will experience significant low back pain at some point in their lives. And a huge piece of that puzzle? A weak or poorly trained core.

    Most people think core training means doing endless crunches or chasing a six-pack. But that’s only scratching the surface — and missing the point entirely. Your core isn’t just your abs. It’s a complex system of muscles wrapping around your entire midsection, from your deep stabilizers to your glutes and hips, all working together to keep you upright, pain-free, and functional.

    In this guide, you’ll learn how your core actually works, why it matters for everything from posture to athletic performance, the most effective evidence-based exercises to train it, and the common mistakes that keep most people stuck. Whether you’re a complete beginner or someone who’s been working out for years, there’s something here that will change how you train.

    Why Core Training Matters More Than You Think

    Most people associate core strength with aesthetics — a flat stomach or visible abs. But that framing sells the core dramatically short. Your core is the literal center of every movement you make, whether you’re lifting groceries, sitting at a desk, or running a 5K.

    According to the American College of Sports Medicine (ACSM), core stability is a foundational component of functional fitness. Without it, force production throughout the rest of the body becomes inefficient and injury risk rises — particularly in the lumbar spine, hips, and knees.

    A landmark study published in the Journal of Orthopaedic & Sports Physical Therapy found that targeted core stabilization training significantly reduced chronic low back pain in adults more effectively than general exercise alone. That’s not just a quality-of-life issue — chronic back pain is one of the leading causes of missed work days and reduced physical activity in the US.

    Beyond injury prevention, a strong core improves your posture (critical if you work at a desk for hours), enhances athletic performance, and even supports better breathing mechanics. Think of your core as the foundation of a house — everything else is built on top of it.

    How Your Core Actually Works

    Here’s where most people get it wrong: they think “core” means the rectus abdominis — the muscles responsible for the coveted six-pack appearance. In reality, your core is a three-dimensional system of muscles surrounding the spine, pelvis, and hips.

    The key players include:

    • Transverse abdominis — the deepest layer, acts like a natural weightlifting belt
    • Multifidus — runs along the spine and provides vertebral stability
    • Diaphragm — yes, your breathing muscle is part of your core
    • Pelvic floor muscles — support the base of your trunk
    • Internal and external obliques — control rotation and lateral movement
    • Erector spinae — helps keep you upright and extends the spine

    These muscles don’t just flex and extend — they stabilize. Research published in Spine journal identified the transverse abdominis as the first muscle to activate before any limb movement, acting as the body’s automatic stabilizer. When this system is weak or poorly coordinated, other muscles overcompensate, leading to pain and dysfunction.

    The myth to bust: Doing more crunches will not give you a stronger core. Crunches primarily target the rectus abdominis in a flexion pattern — but real-world core demands are mostly about resisting movement, not creating it. That’s why anti-extension, anti-rotation, and anti-lateral-flexion exercises are far more functional and effective for most people.

    How to Get Started: Core Training for Every Level

    The beauty of core training is that it requires zero equipment and very little space. Here’s a progression-based approach that works whether you’re just starting out or looking to level up.

    Beginner Level (Weeks 1–4)

    At this stage, the goal is to establish mind-muscle connection and build foundational stability. Aim for 3 sessions per week, 10–15 minutes each.

    1. Dead Bug — 3 sets of 6 reps per side. Lie on your back, arms extended toward the ceiling, knees at 90 degrees. Slowly lower opposite arm and leg toward the floor while keeping your lower back pressed flat. This trains anti-extension stability.
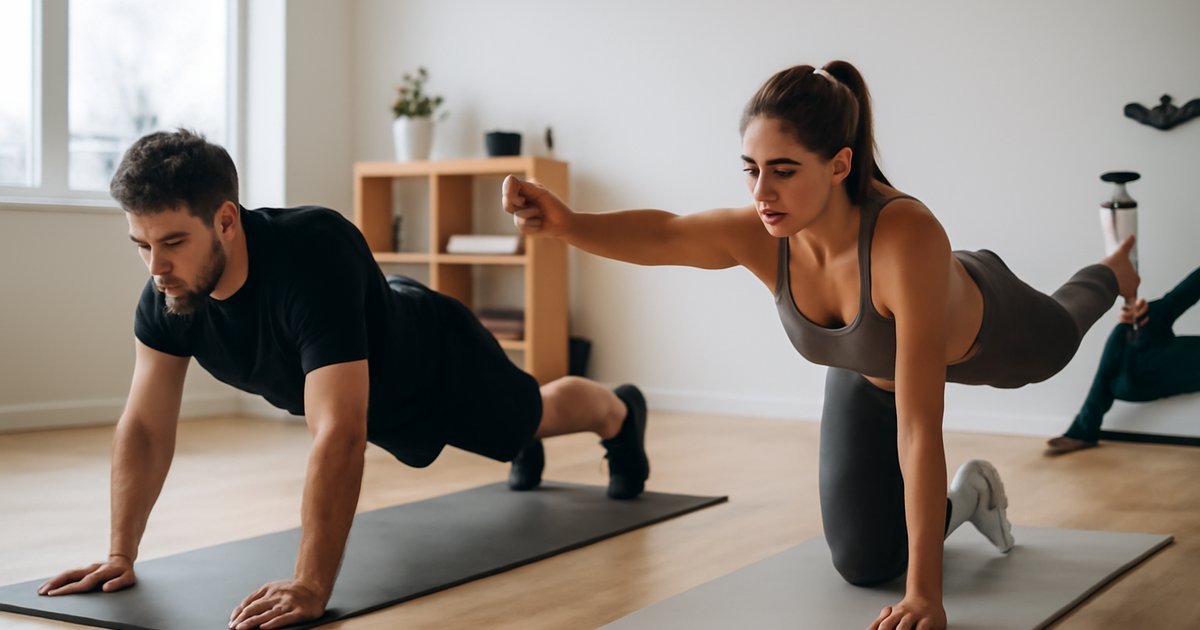
    2. Bird Dog — 3 sets of 8 reps per side. On hands and knees, extend the opposite arm and leg simultaneously while maintaining a neutral spine. Pause for 2 seconds at the top.
    3. Hollow Body Hold — 3 sets of 15–20 seconds. Lie on your back, arms overhead, legs straight and raised slightly. Press your lower back into the floor. This builds deep core tension without spinal flexion.
    4. Glute Bridge — 3 sets of 12 reps. Targets the posterior chain that supports your core from behind.

    Intermediate Level (Weeks 5–10)

    Now we add load, instability, and longer time under tension.

    1. Plank with Shoulder Taps — 3 sets of 10 taps per side. Tap each shoulder alternately while minimizing hip rotation.
    2. Pallof Press (using a resistance band or cable) — 3 sets of 10 reps per side. Stand perpendicular to the anchor, press the band straight out from your chest and hold for 2 seconds. This is a premier anti-rotation exercise. Resistance bands are ideal for this movement and easy to use at home.
    3. Side Plank with Hip Dip — 3 sets of 10 reps per side. Trains the lateral core and obliques.
    4. RKC Plank — 3 sets of 20 seconds. Unlike a standard plank, squeeze every muscle in your body — glutes, quads, lats, and abs — creating maximal tension. Research shows this dramatically increases core muscle activation compared to a passive hold.

    Advanced Level (Weeks 11+)

    1. Ab Wheel Rollout — 3 sets of 6–10 reps. One of the highest-activation anti-extension exercises available.
    2. Hanging Leg Raise — 3 sets of 8–12 reps. Requires a pull-up bar; targets lower abs and hip flexors.
    3. Single-Leg Romanian Deadlift — 3 sets of 8 reps per side. Integrates core stability into full-body, functional movement patterns — exactly the kind of training your core was designed for. This complements functional fitness principles beautifully.

    Common Mistakes That Sabotage Core Training Results

    Even well-meaning, consistent exercisers make these errors — and they can stall progress or cause injury.

    1. Overloading the spine with poor-form sit-ups
    Traditional sit-ups place significant compressive force on the lumbar discs, especially when performed with the feet anchored and the spine forcefully flexed. Research from Dr. Stuart McGill at the University of Waterloo — widely regarded as the leading authority on spine biomechanics — consistently shows that repeated spinal flexion under load increases disc herniation risk over time. Fix: replace sit-ups with neutral-spine anti-movement exercises like dead bugs, bird dogs, and planks.

    2. Training the core in isolation only
    Doing 20 minutes of floor ab exercises is fine — but your core gets its most functional training during compound movements like deadlifts, squats, and carries. If you only do isolation work, you’re training the core in a very narrow context. Fix: treat core training as both dedicated practice AND a skill you integrate into full-body training sessions.

    3. Neglecting the posterior chain
    Most people train the front of their core (abs) while ignoring the back — glutes, erectors, and multifidus. This creates an imbalance that can pull the pelvis into an anterior tilt, increasing low back strain. Fix: include glute bridges, hip hinges, and back extensions in your core routine. Think 360-degree training, not just front-facing.

    4. Holding their breath
    Breath control is integral to core function. The diaphragm and pelvic floor work together to manage intra-abdominal pressure. Holding your breath through every rep breaks this coordination. Fix: practice bracing (taking a deep belly breath in and then bracing the abs as if ready to take a punch) before hard efforts, then exhale on the exertion.

    5. Skipping progressive overload
    The core adapts just like any other muscle. If you’re doing the same plank for the same duration every week for months, you’ve hit a plateau. Fix: apply the same progressive overload principles you’d use for any other muscle group — add time, reps, instability, or resistance over time.

    What to Eat to Support Core Training and Recovery

    Core training alone won’t make your midsection visible if your nutrition isn’t aligned. But more importantly, what you eat directly affects your core’s ability to recover, perform, and stay injury-resistant.

    Protein is non-negotiable. The Academy of Nutrition and Dietetics recommends 1.2–2.0 grams of protein per kilogram of body weight for active adults. Protein supports muscle repair and helps maintain the lean mass that makes your core function efficiently. Focus on chicken, fish, Greek yogurt, eggs, legumes, and lean beef.

    Anti-inflammatory foods support recovery. Chronic systemic inflammation impairs muscle repair and contributes to back pain. The American Heart Association and Dietary Guidelines for Americans both support diets rich in fatty fish (salmon, mackerel), leafy greens, berries, olive oil, and nuts as anti-inflammatory staples.

    Magnesium and potassium matter. Muscle cramps and tightness in the core region are often tied to electrolyte imbalances. The USDA recommends foods like bananas, sweet potatoes, spinach, and pumpkin seeds as practical dietary sources.

    Hydration affects muscle function. Even mild dehydration (1–2% of body weight) reduces muscle endurance and increases injury risk, according to research from the American College of Sports Medicine. Aim for consistent water intake throughout the day — not just during workouts.

    Be mindful of excess processed food and alcohol. Both promote visceral fat accumulation around the midsection, which physically compresses the core musculature and increases metabolic risk. This isn’t about perfection — it’s about making the majority of your meals whole, minimally processed foods.

    How Long Until You See Results? What to Track

    Results depend on your starting point, consistency, and what you’re measuring. Here’s what science-backed timelines actually look like:

    Weeks 1–2: You’ll likely notice improved body awareness and better posture during daily activities. This is neuromuscular adaptation — your nervous system is learning to recruit your core muscles more efficiently.

    Weeks 3–6: Functional improvements become noticeable — less back fatigue during long sits, better balance, easier time holding static positions. Research consistently shows measurable strength and stability gains within this window with consistent training (3x per week).

    Weeks 8–12: If your nutrition supports a healthy body composition, visual changes in the midsection may appear. Results here vary significantly based on individual body fat percentage, genetics, and diet quality.

    What to track:

    • Plank hold time (a reliable functional benchmark)
    • How many reps of a given exercise you can complete with perfect form
    • Back pain frequency and intensity (on a 1–10 scale)
    • Posture quality after long work sessions
    • How stable you feel during compound lifts like squats and deadlifts

    If you’ve been training consistently for 12 weeks and still experience persistent back pain, limited range of motion, or significant discomfort during exercise, it’s time to consult a physical therapist or certified personal trainer for individualized assessment.

    Frequently Asked Questions

    How often should I train my core?
    For most adults, 3–4 dedicated core sessions per week is the sweet spot. Because many core exercises are low-impact and don’t create significant muscle damage, you can train them more frequently than larger muscle groups — but rest days are still important for adaptation. If you also do compound training (like squats or deadlifts), your core is already working on those days too.

    Can I get a flat stomach just from core exercises?
    Not directly. Spot reduction — the idea that you can burn fat in a specific area through targeted exercise — has been consistently debunked by research in the Journal of Strength and Conditioning Research. Core training strengthens and tones the musculature underneath, but fat loss over the midsection comes from overall caloric balance and body composition changes. Both matter.

    Is core training safe during pregnancy?
    Many core exercises can be modified and are encouraged during pregnancy, but certain movements (like traditional crunches and full planks in later trimesters) may need to be avoided or adjusted due to diastasis recti risk. The American College of Obstetricians and Gynecologists recommends consulting your OB or a pelvic floor physical therapist for personalized guidance.

    Are planks better than sit-ups for core strength?
    For most people, yes — particularly from a spinal health perspective. Planks train isometric core stability with minimal spinal loading, which aligns with how the core functions in real life. Dr. Stuart McGill’s research specifically highlights anti-extension and anti-rotation exercises as superior for building functional, injury-resistant core strength compared to flexion-dominant exercises like sit-ups and crunches.

    Can core training help with posture?
    Absolutely — and this is one of its most underrated benefits. Weak deep core muscles, particularly the multifidus and transverse abdominis, allow the pelvis and spine to drift into poor alignment over time. Consistent core training — especially exercises that emphasize neutral spine positioning — can meaningfully improve postural habits, especially for people who sit for extended periods during the day.

    Start Building Your Core the Right Way

    Core training isn’t glamorous. It won’t always feel intense, and the results take time to show up in the mirror. But what it gives you — a pain-free back, better posture, stronger lifts, and a body that moves the way it’s supposed to — is worth every plank, every bird dog, and every mindful breath.

    You don’t need a gym membership or expensive equipment. You need 15–20 minutes, three times a week, and the patience to trust the process. Start with the beginner exercises today. Do them well, build slowly, and your core will reward you for it — in the gym and in real life.

    Pick one exercise from the beginner list above and commit to it every day this week. That’s your starting point.


    This article is for informational and educational purposes only. The content is not intended to replace professional medical, nutritional, or fitness advice. Always consult a qualified healthcare provider, registered dietitian, or certified fitness professional before starting a new health program or making significant changes to your lifestyle.

    Content reviewed by our wellness editorial team, with references to peer-reviewed research and guidelines from leading health organizations.

  • Functional Fitness: Train for Real Life, Not Just the Gym

    Functional Fitness: Train for Real Life, Not Just the Gym

    You can bench press your own bodyweight — but does carrying two full grocery bags up three flights of stairs still leave you winded?

    Introduction

    Here’s a scenario most people recognize: you’ve been going to the gym consistently, maybe even seeing progress on the machines, but everyday physical tasks still feel harder than they should. Climbing stairs, lifting boxes, picking up kids, reaching overhead — these movements somehow expose a gap that your workout routine isn’t filling.

    That gap has a name: functional fitness. And according to the American College of Sports Medicine (ACSM), functional fitness training is one of the most consistently popular and evidence-supported approaches for adults who want to move better, feel stronger, and reduce injury risk in everyday life — not just look good in a mirror.

    In this guide, you’ll learn exactly what functional fitness is, why the science behind it is so compelling, how to start even if you’ve never heard the term before, and how to build a routine that genuinely improves the quality of your daily life. This isn’t about chasing aesthetics. It’s about building a body that works for you — in the real world.

    Why Functional Fitness Matters More Than You Think

    The average American adult spends the majority of their waking hours in isolated, static positions — sitting at desks, driving, scrolling phones. When they do exercise, many use machines that move them along a fixed track, training individual muscles in isolation. That’s not inherently bad, but it leaves a critical void.

    Functional fitness training focuses on compound, multi-joint movements that mimic the patterns your body uses in real life — pushing, pulling, hinging, squatting, rotating, and carrying. These patterns engage multiple muscle groups simultaneously, train your neuromuscular system to coordinate movement, and build what researchers call “transfer” — meaning the strength and control you build in the gym actually shows up in your daily life.

    A study published in the Journal of Aging and Physical Activity found that older adults who participated in functional training programs showed significantly greater improvements in daily living tasks — like climbing stairs and rising from chairs — compared to those who followed traditional resistance machine training. And this isn’t just relevant for seniors. Adults in their 30s and 40s who don’t train functionally are quietly accumulating movement deficits that compound over time.

    The Mayo Clinic also notes that functional fitness can help reduce the risk of injury both in athletic contexts and in everyday activities, since it trains the stabilizing muscles and connective tissue that isolation exercises tend to overlook. If you’ve ever thrown out your back picking something up off the floor, you’ve experienced firsthand what a lack of functional strength feels like.

    The Science Behind How Functional Fitness Actually Works

    Functional training isn’t a trend — it’s rooted in movement science, motor learning theory, and biomechanics. Here’s what’s actually happening when you train this way.

    Traditional exercise often trains the “prime movers” — the large muscles that do the obvious work. But human movement is a full-system event. Your core stabilizers, smaller hip rotators, shoulder stabilizers, and deep spinal muscles all have to fire in the right sequence for a movement to be safe and efficient. Functional training specifically targets this neuromuscular coordination.

    The myth it busts: Many people believe that if a muscle is strong, it’s also functional. Not true. You can have strong quadriceps and still have weak, poorly coordinated hip stabilizers — which is exactly why knee injuries are so common even among people who train regularly. Research from the British Journal of Sports Medicine has shown that poor hip and core neuromuscular control is one of the leading predictors of lower extremity injury, regardless of general strength levels.

    Functional training also works along multiple planes of motion. Most traditional gym exercises move in a single plane — think the up-down of a bicep curl or the forward-back of a chest press. Real life, however, requires rotational strength, lateral stability, and diagonal movement patterns constantly. Training these planes builds what biomechanists call “movement literacy” — your body’s ability to adapt fluidly to unexpected physical demands.

    Harvard Health Publishing also highlights that functional training, particularly when it involves balance challenges and proprioceptive demands (like single-leg exercises), actively engages the brain-body connection, which may support cognitive health as well as physical resilience. Think of it as cross-training for your nervous system.

    How to Get Started: From Beginner to Advanced

    One of the best things about functional fitness is that you don’t need a gym membership or special equipment to begin. Many of the most effective functional exercises use only your bodyweight — and they can be done anywhere.

    Start with these foundational movement patterns:

    • Squat pattern: Bodyweight squats, goblet squats, box squats. These mimic sitting, rising, and loading patterns.
    • Hip hinge: Romanian deadlifts, single-leg deadlifts, kettlebell swings. Critical for back health and posterior chain strength.
    • Push: Push-ups, dumbbell presses, overhead pressing. Mirrors daily pushing and reaching movements.
    • Pull: Resistance band rows, dumbbell rows, pull-ups or inverted rows. Counterbalances all that sitting and forward posture.
    • Carry: Farmer’s carries, suitcase carries (one-sided), overhead carries. One of the most functional movements and most neglected.
    • Rotate and brace: Pallof press, woodchops, dead bugs. Trains core stability in the way your body actually uses it.

    Beginner entry point (2-3 days/week): Pick one exercise from each category, do 2-3 sets of 8-12 reps with controlled form. Focus on quality over load. Rest 60-90 seconds between sets. A full session can be done in 30-35 minutes.

    Intermediate (3-4 days/week): Add load progressively, introduce single-leg and single-arm variations, include balance challenges (performing exercises on one leg, using unstable surfaces like a folded yoga mat). Begin combining patterns — like a deadlift into an overhead press.

    Advanced (4-5 days/week): Periodize your training with strength phases (heavier loads, 4-6 reps) and endurance phases (lighter loads, higher reps). Add complex movements like Turkish get-ups, barbell clean and press, or loaded carries over longer distances. Consider working with an ACSM-certified personal trainer to optimize programming.

    If you’re building your home training setup, our Home Workout Plans guide offers complementary programming that fits well with a functional approach.

    Common Mistakes That Sabotage Functional Training Results

    Functional fitness is simple in concept but easy to undermine in practice. These are the most common pitfalls — and they’re all fixable.

    1. Skipping the basics to jump to “cool” exercises. Turkish get-ups and single-leg kettlebell deadlifts look impressive on social media, but if your basic squat pattern is broken — heels rising, knees caving, lower back rounding — you’ll just be doing a broken pattern under more load. Master the fundamentals first. Results vary based on your movement baseline, so a movement screen with a certified professional can save you months of frustration.

    2. Treating every session like a conditioning circuit. Functional training ≠ high-intensity circuit training. Many people turn every session into a breathless, sweat-drenched AMRAP because it feels productive. But true functional strength requires adequate rest between sets and intentional tension — not speed. The ACSM recommends rest intervals of 60-120 seconds for strength-focused sessions.

    3. Ignoring the posterior chain entirely. Most people naturally gravitate toward pushing movements and quad-dominant exercises. The result is a dramatic imbalance where the front of the body is overworked and the back of the body — glutes, hamstrings, mid-back, rear deltoids — is undertrained. This is one of the leading contributors to chronic lower back pain. Every push needs a corresponding pull; every squat needs a corresponding hinge.

    4. Neglecting recovery. Functional training, especially when it includes heavy carries and compound lifts, is taxing on the central nervous system and connective tissue. Attempting to train functionally 6-7 days a week without adequate rest leads to overuse injuries — the opposite of the goal. Build in at least 2 recovery days per week, and don’t underestimate the role of sleep. Reviewing our sleep hygiene guide can help you optimize the recovery side of the equation.

    5. Forgetting that nutrition supports the training. You can’t out-train chronic undereating. Functional movements are metabolically demanding, and your muscles need adequate protein to repair and adapt. According to the Academy of Nutrition and Dietetics, most active adults should aim for 1.2–1.7 grams of protein per kilogram of body weight per day. For more specifics, our protein intake guide breaks it all down clearly.

    What to Eat to Support Functional Fitness

    Functional training makes real physical demands on your body, and your nutrition strategy should support both performance and recovery.

    Prioritize protein at every meal: Lean proteins like chicken breast, eggs, Greek yogurt, cottage cheese, salmon, and legumes provide the amino acids needed for muscle repair. Aim for 20-40 grams of protein per meal, distributed evenly throughout the day — research published in the Journal of Nutrition consistently shows that spreading protein intake across meals is more effective for muscle protein synthesis than front- or back-loading.

    Don’t fear carbohydrates: Complex carbohydrates — oats, sweet potatoes, brown rice, quinoa, whole grain bread — fuel your working muscles before training and replenish glycogen afterward. The USDA Dietary Guidelines recommend that 45-65% of total calories come from carbohydrates for active individuals. The downside of very low-carb approaches for functional athletes is impaired high-intensity performance and slower recovery between sessions.

    Hydration is functional too: Even mild dehydration (as little as 2% loss of body water) measurably impairs physical performance and neuromuscular coordination, according to the ACSM. Aim for at least 8-10 cups of water daily, with an additional 16-24 ounces for each hour of training.

    Anti-inflammatory eating supports joint health: Fatty fish (salmon, sardines), olive oil, berries, leafy greens, turmeric, and ginger all have documented anti-inflammatory properties that support joint and connective tissue recovery — exactly the structures that functional training loads most.

    How Long Until You See Results — and What to Track

    One of the most honest things to say about functional fitness results is that the first changes you notice won’t be in the mirror. They’ll be in your life.

    Weeks 1-3: Neuromuscular adaptation. Your nervous system is learning to recruit muscle fibers more efficiently. You may not feel “stronger” yet, but your coordination and balance will begin improving. Beginners often report feeling more stable and less fatigued by everyday tasks within the first two weeks.

    Weeks 4-8: Strength and endurance improvements become measurable. You’ll likely notice you can do more reps with the same load, recover faster between sets, and handle daily physical tasks with noticeably less effort.

    Months 3-6: Visible body composition changes alongside significant performance improvements. Research from the NIH suggests that 8-12 weeks of consistent resistance training is the minimum threshold for meaningful muscular hypertrophy.

    What to track:

    • Movement quality (can you squat to parallel without your heels rising?)
    • Reps and loads over time (progressive overload is the core driver of adaptation)
    • Daily energy and fatigue levels
    • How specific daily tasks feel (stairs, carrying, bending, reaching)
    • Joint comfort — functional training should reduce, not increase, chronic discomfort

    When to seek professional guidance: If you experience persistent joint pain (not muscle soreness) during or after sessions, if progress stalls completely after 6-8 weeks of consistent effort, or if you have pre-existing injuries that limit your movement, consulting with an ACSM-certified personal trainer or a physical therapist is genuinely worthwhile.

    Frequently Asked Questions

    Is functional fitness good for weight loss?
    Functional training can support weight management by building lean muscle mass, which increases resting caloric expenditure over time, and by burning significant calories during sessions — particularly circuit-style functional workouts. However, nutrition remains the primary driver of fat loss. This approach works best when combined with a sustainable eating strategy.

    Can I do functional fitness if I have lower back pain?
    Many people with chronic lower back pain actually benefit from functional training, particularly when it addresses core stability and hip strength deficits that are often at the root of the problem. That said, you should work with a physical therapist or certified trainer first to identify safe starting points. Some movements may need to be modified or progressed gradually.

    How is functional fitness different from CrossFit?
    CrossFit incorporates many functional movement patterns but is typically performed at high intensity in a competitive group setting. Functional fitness as a training philosophy is broader — it emphasizes movement quality and real-world application and doesn’t require high intensity or competitive elements. Many functional training approaches are slower, more deliberate, and well-suited to people who aren’t interested in high-intensity formats.

    Do I need equipment to train functionally?
    Not at all. Bodyweight movements like squats, push-ups, lunges, single-leg hip hinges, and plank variations cover most functional patterns effectively. A resistance band and a set of dumbbells or kettlebells will expand your options significantly, but they’re not required, especially for beginners.

    How does functional fitness change as I get older?
    For adults in their 40s, 50s, and 60s, functional fitness becomes even more important. The NIH reports that adults lose 3-8% of muscle mass per decade after age 30 — a process called sarcopenia — and that decline accelerates after 60. Functional training is one of the most effective evidence-based strategies for preserving muscle, balance, and mobility as you age, directly reducing fall risk and supporting independence.

    The Bottom Line

    Functional fitness isn’t a complicated philosophy or an elite training secret. It’s simply training your body to do what it was designed to do — move well across a full range of human activities, not just perform well on a narrow set of gym exercises.

    You don’t need a perfect program, expensive equipment, or hours in the gym each week. You need consistency, progressive challenge, and movements that actually transfer to your life. Start with the foundational patterns, focus on quality over quantity, and give your body the time it needs to adapt.

    Pick one movement pattern from today’s guide and practice it this week. That’s your next step. Small, repeated actions build real-world strength that lasts — and that’s the kind of fitness that actually makes life better.


    Wellness Disclaimer: This article is for informational and educational purposes only. The content is not intended to replace professional medical, nutritional, or fitness advice. Always consult a qualified healthcare provider, registered dietitian, or certified fitness professional before starting a new health program or making significant changes to your lifestyle.

    Content reviewed by our wellness editorial team, with references to peer-reviewed research and guidelines from leading health organizations.