Suspension Training: Build Strength with Your Own Body
One piece of equipment, anchored anywhere — and suddenly, every muscle in your body has to show up and work.
You’ve probably seen those yellow and black straps hanging from a pull-up bar at the gym or dangling from a park bench — and maybe you walked right past them. Most people do. But suspension training is quietly one of the most effective, scalable, and underused training methods available to everyday adults.
Here’s a number worth knowing: a study published in the Journal of Human Kinetics found that suspension training exercises produced significantly higher core muscle activation compared to traditional floor-based exercises — even when the movement patterns looked similar on the surface.
Whether you’re returning to fitness after a long break, hitting a plateau with conventional gym equipment, or looking for a smarter way to train at home or while traveling, suspension training deserves a serious look. In this guide, you’ll learn how it works, what the science says, how to start safely, and how to keep progressing — no matter your current fitness level.
Why Suspension Training Matters More Than You Think
Most fitness conversations orbit around two poles: lifting heavy things or doing cardio. Suspension training lives in a different space — one that prioritizes control, stability, and multi-joint coordination over isolated muscle pumping.
When you perform a suspension row or a single-leg squat using straps anchored overhead, your body can’t cheat. There’s no bench to support your back, no machine to keep you in a fixed path. Every rep requires your stabilizer muscles — those smaller, deeper muscles surrounding your joints — to fire alongside the primary movers.
According to the American College of Sports Medicine (ACSM), functional training — which trains movement patterns rather than isolated muscles — is consistently ranked among the top fitness trends for good reason. It translates directly to real-life strength: lifting groceries, climbing stairs, getting up from the floor without strain.
Beyond functional strength, suspension training offers something that weights often can’t: immediate scalability. You don’t need to load a barbell or switch dumbbells. You adjust the angle of your body, and the exercise gets harder or easier in seconds. That makes it genuinely accessible across a wide range of fitness levels.
For adults aged 25-60, this matters especially. Joint health becomes a growing concern with age, and suspension training allows for significant training stimulus with far less compressive load on the spine and knees compared to heavy barbell work.
The Science Behind Suspension Training and How It Actually Works
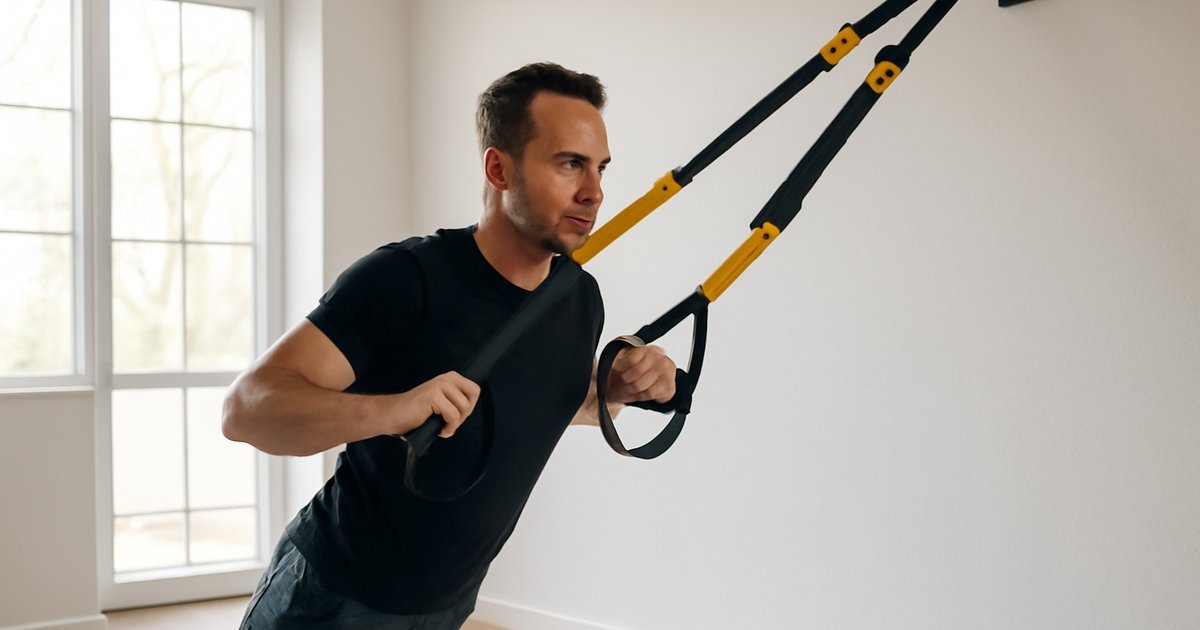
The core mechanic of suspension training is simple but biomechanically powerful: your body creates resistance by working against gravity at an angle, using adjustable straps anchored to a fixed point above you. The further you lean away from the anchor point, the more of your bodyweight becomes the load. The closer you stand, the easier the movement.
What makes this uniquely effective is what researchers call “instability-induced muscle activation.” Because the straps can move freely, your body is never in a perfectly stable environment. Your nervous system responds by recruiting more muscle fibers — particularly in the core, hips, and shoulder girdle — to maintain control throughout the movement.
A study published in the Journal of Strength and Conditioning Research compared EMG (electromyographic) muscle activation during suspension push-ups versus traditional push-ups on the floor. The suspension version showed meaningfully greater activation of the rectus abdominis and obliques — not because it was a core exercise, but because the instability demanded more from those muscles automatically.
One myth worth addressing: suspension training is often dismissed as “too easy” or “only for rehab.” This misunderstands the physics. At steeper angles — for example, a suspended atomic push-up or an inverted row with feet elevated — the difficulty matches or exceeds many barbell movements. Elite athletes, military personnel, and professional sports teams have incorporated suspension training precisely because of its high ceiling, not just its low floor.
It’s also worth noting that suspension training is particularly valuable for shoulder health. Because the movement path is not fixed, the shoulder joint tracks its natural arc rather than being forced into a machine’s predetermined path. For people with a history of minor shoulder discomfort (not acute injury), this can feel noticeably better than pressing machines or even free weights.
How to Get Started with Suspension Training
The good news: you don’t need a lot. A quality suspension trainer (TRX is the most widely recognized brand, though comparable options exist at various price points), a sturdy anchor point — a door frame, pull-up bar, tree branch, or ceiling mount — and enough space to move freely are all you need.
Step 1: Set up safely. Your anchor point must support your full bodyweight plus dynamic force. A standard door anchor that comes with most suspension kits works for most adults. Test it by pulling hard before your first session.
Step 2: Learn the body position basics. Your alignment is everything in suspension training. Keep your ears over your shoulders, shoulders over your hips, and hips over your ankles whenever possible. A “plank on your feet” posture is the foundation of most movements.
Beginner Starting Exercises:
- Suspension Row: Stand facing the anchor, lean back at roughly 45 degrees, and pull your chest to your hands. This builds upper back and bicep strength with minimal joint stress.
- Suspension Squat: Hold handles facing the anchor, lower into a squat while keeping your torso upright. The straps assist balance and allow you to sit deeper safely.
- Suspension Chest Press: Face away from anchor, lean forward, and press as you would a push-up. Easier than a floor push-up — a great entry point for beginners.
- Suspension Plank: Feet in the foot cradles, hands on the floor. Hold a plank position. Even 20 seconds is genuinely challenging.
Intermediate Progressions:
- Suspension Pike (from plank, drive hips toward ceiling)
- Single-Leg Squat (one foot elevated in cradle)
- Suspended Push-Up (both hands in handles)
- Atomic Push-Up (push-up followed immediately by a knee tuck)
Advanced Options:
- Suspended Body Saw
- Single-Arm Row
- Inverted Row with Feet Elevated
- Suspended Fallout (similar to an ab wheel rollout)
A good beginner session looks like 3 rounds of 4-5 exercises, 8-12 reps each, with 60-90 seconds rest between rounds. Three sessions per week allows sufficient recovery. If you’re also exploring bodyweight-based training more broadly, you might find our guide on Calisthenics for Adults: Build Real Strength Anywhere a useful companion resource.
Common Mistakes That Sabotage Your Suspension Training Results
Suspension training is intuitive — but a few consistent errors can keep you stuck or increase your injury risk. These mistakes are easy to make, especially without a coach watching your form.
Mistake 1: Ignoring strap length adjustment. Most people set their straps once and never change them. But strap length dramatically affects the difficulty of every movement. Too long and a row becomes too easy; too short and a chest press becomes dangerous. Get in the habit of adjusting before each exercise — it takes ten seconds and changes everything.
Mistake 2: Moving too fast. The instability of suspension training punishes momentum-driven reps. When you swing through a row or rush a squat, your stabilizers disengage and the primary movers do all the work — defeating the purpose. Slow the tempo down. A 3-second lowering phase will transform even basic exercises into serious challenges. For more on training tempo, see our guide on Tempo Training: The Secret to Smarter Muscle Growth.
Mistake 3: Letting the hips sag or pike out of alignment. Poor body alignment is the most common form error in suspension training. In any plank-based movement — push-ups, pikes, body saws — a sagging lower back or elevated hips shifts load away from the target muscles and places it on the lumbar spine. Before each rep, consciously brace your core as if you’re about to absorb a punch.
Mistake 4: Skipping the warm-up. Because suspension training activates stabilizer muscles that don’t get much work in daily life, jumping in cold can lead to shoulder, wrist, or hip irritation. A 5-minute dynamic warm-up — arm circles, hip hinges, leg swings, and a few bodyweight squats — makes a significant difference in how your joints feel mid-session.
Mistake 5: Underestimating recovery needs. Suspension training creates real muscle damage — particularly in the core and stabilizers — that needs time to repair. Many beginners feel surprisingly sore after their first session and make the mistake of training again the next day. Allow 48 hours between sessions targeting the same muscle groups, especially early on.
Supporting Your Training with the Right Nutrition
Suspension training creates a meaningful stimulus for muscle protein synthesis — your body’s process of repairing and building muscle tissue. Without adequate nutritional support, your results will plateau regardless of how well-designed your workouts are.
According to the Academy of Nutrition and Dietetics, active adults should target approximately 1.2 to 2.0 grams of protein per kilogram of body weight per day to support muscle maintenance and growth — the higher end of that range applies when training intensity is elevated.
Practical protein sources to prioritize include:
- Chicken breast: roughly 26g of protein per 3-ounce cooked serving
- Greek yogurt (plain): approximately 17-20g per cup
- Eggs: about 6g per egg — 3 whole eggs post-workout is a solid start
- Canned salmon or tuna: 20-25g per 3-ounce serving, with the added benefit of omega-3 fatty acids that support joint and muscle recovery
- Lentils or black beans: 15-18g per cooked cup — excellent plant-based options
Carbohydrates matter too. Suspension training depletes muscle glycogen — your muscles’ preferred fuel source. Consuming moderate amounts of complex carbohydrates (oats, sweet potatoes, brown rice, quinoa) around your training windows helps sustain energy and supports recovery. USDA Dietary Guidelines recommend that carbohydrates make up 45-65% of total caloric intake for active adults.
Hydration is often overlooked but critical. Even mild dehydration — as little as 2% of body weight — can impair strength output and mental focus, according to research cited by the American College of Sports Medicine. Aim for at least 8-10 cups of water daily, more on training days.
How Long Until You See Results — and What to Track
Results from suspension training are real, but they follow a predictable timeline that beginners often misunderstand. Here’s what to expect and what to measure.
Weeks 1-2: Neural adaptation. Your nervous system is learning to recruit muscles more efficiently. You’ll likely feel shaky, uncoordinated, and surprisingly fatigued — but that’s your brain and muscles building new communication pathways. Don’t expect visible changes yet, but do expect to feel noticeably more controlled by week two.
Weeks 3-6: Functional strength gains. Most people notice that daily movements feel easier — carrying bags, climbing stairs, getting up off the floor. Your posture may improve as your posterior chain and core become more engaged. If you’re tracking, you should see reps increasing or body angle steepening without additional effort.
Weeks 6-12: Visible and measurable changes. With consistent training and adequate nutrition, body composition shifts become more apparent. Lean muscle increases, and fat mass may decrease — though this depends significantly on your dietary habits. Research published in the Journal of Physiology supports that visible hypertrophy typically requires at least 6-8 weeks of progressive overload training.
What to track:
- Reps completed per exercise each session
- Body angle for key exercises (steeper = harder = progress)
- Perceived exertion on a 1-10 scale
- Energy and recovery quality (soreness duration, sleep quality)
- Optional: monthly photos from the same angle and lighting
If you’ve been training consistently for 8+ weeks and see no measurable progress, consider reassessing your nutrition, sleep quality, and whether you’re progressively challenging yourself. A session with a certified personal trainer can identify form issues or programming gaps that are easy to miss on your own. For those interested in understanding progressive loading more deeply, our guide on Mobility Training: Move Better, Feel Stronger Every Day pairs well with suspension work by addressing the joint range of motion that makes advanced progressions possible.
Frequently Asked Questions
Can suspension training replace weightlifting entirely?
It depends on your goals. For general fitness, functional strength, core stability, and body composition, suspension training can serve as a primary training method. However, for maximum hypertrophy (muscle size) or sport-specific strength development, it works best as a complement to barbell or dumbbell training rather than a full replacement. Results vary based on baseline fitness and specific objectives.
Is suspension training safe for people with lower back pain?
For many people with chronic low-grade lower back discomfort (not acute injury or diagnosed conditions), suspension training can actually be beneficial — because it strengthens the deep stabilizer muscles that support the spine. That said, always consult a physical therapist or physician before beginning any new training program if you have a history of back issues. Some exercises, like the suspended fallout, may be contraindicated until baseline core strength is established.
How much does a suspension trainer cost?
Entry-level options from reputable brands start around $30-40. The TRX brand — widely used in clinical and commercial settings — ranges from $100-200 depending on the model. Most fitness professionals agree that any well-constructed suspension trainer with secure attachment hardware will deliver excellent results. Avoid very cheap, no-brand options that may not support dynamic loading safely.
Can I use suspension training for cardio as well as strength?
Absolutely. When structured as a circuit — minimal rest between exercises, dynamic movements like mountain climbers, jump squats in foot cradles, and explosive rows — suspension training elevates heart rate significantly and can serve as an effective cardiovascular stimulus. The American College of Sports Medicine recognizes circuit-style resistance training as a valid mode of cardiovascular conditioning.
How is suspension training different from using resistance bands?
Resistance bands create external resistance — they pull against your movement. Suspension training uses your body weight and gravity as resistance, and the instability element is a key differentiator. Both are valuable, and many people use them together for comprehensive training variety. If you’re curious about band training specifically, our guide on Resistance Band Training: Build Strength Anywhere covers that method in detail.
Start Moving Smarter — One Rep at a Time
Suspension training won’t hand you a transformation overnight — nothing honest ever does. But what it offers is something genuinely rare in fitness: a method that scales with you, challenges your whole body simultaneously, demands real control rather than raw force, and can be done almost anywhere with minimal equipment.
Start with the basics. A suspension row. A squat holding the handles. A modified chest press. Do those consistently for three weeks, and then progress the angle, the tempo, the complexity. That’s the whole game.
Your body doesn’t need more equipment. It needs a smarter challenge — and a set of straps might be exactly that.
This article is for informational and educational purposes only. The content is not intended to replace professional medical, nutritional, or fitness advice. Always consult a qualified healthcare provider, registered dietitian, or certified fitness professional before starting a new health program or making significant changes to your lifestyle.
Content reviewed by our wellness editorial team, with references to peer-reviewed research and guidelines from leading health organizations.